The Best Sewing Supplies For Beginners
Let’s talk about the best sewing supplies for beginners.
It has taken me quite a few years to figure out what works best when sewing clothing, a bag, or a quilt. A good set of sewing supplies for beginners will make sewing a little easier and far more enjoyable, especially if you are just starting out on your sewing journey.
So I thought since I talked all about this on my YouTube Channel, I should write a detailed post about it too.
Basic beginner sewing essentials are the foundation of a good relationship with sewing, quilting, and clothes making so let’s jump right in!

Some of these links are affiliate links. You can read my full disclosure HERE.
Video
Sewing as a Beginner
Obviously, as a beginner sewer or quilter, you aren’t going to need everything on this list that I’m reviewing/discussing today. But these are some things that should be on your list of future purchases if sewing becomes a more serious hobby.
Like everything, having the right tools to complete your sewing tasks will make things so much easier and more efficient.
The Best Sewing Supplies for Beginners
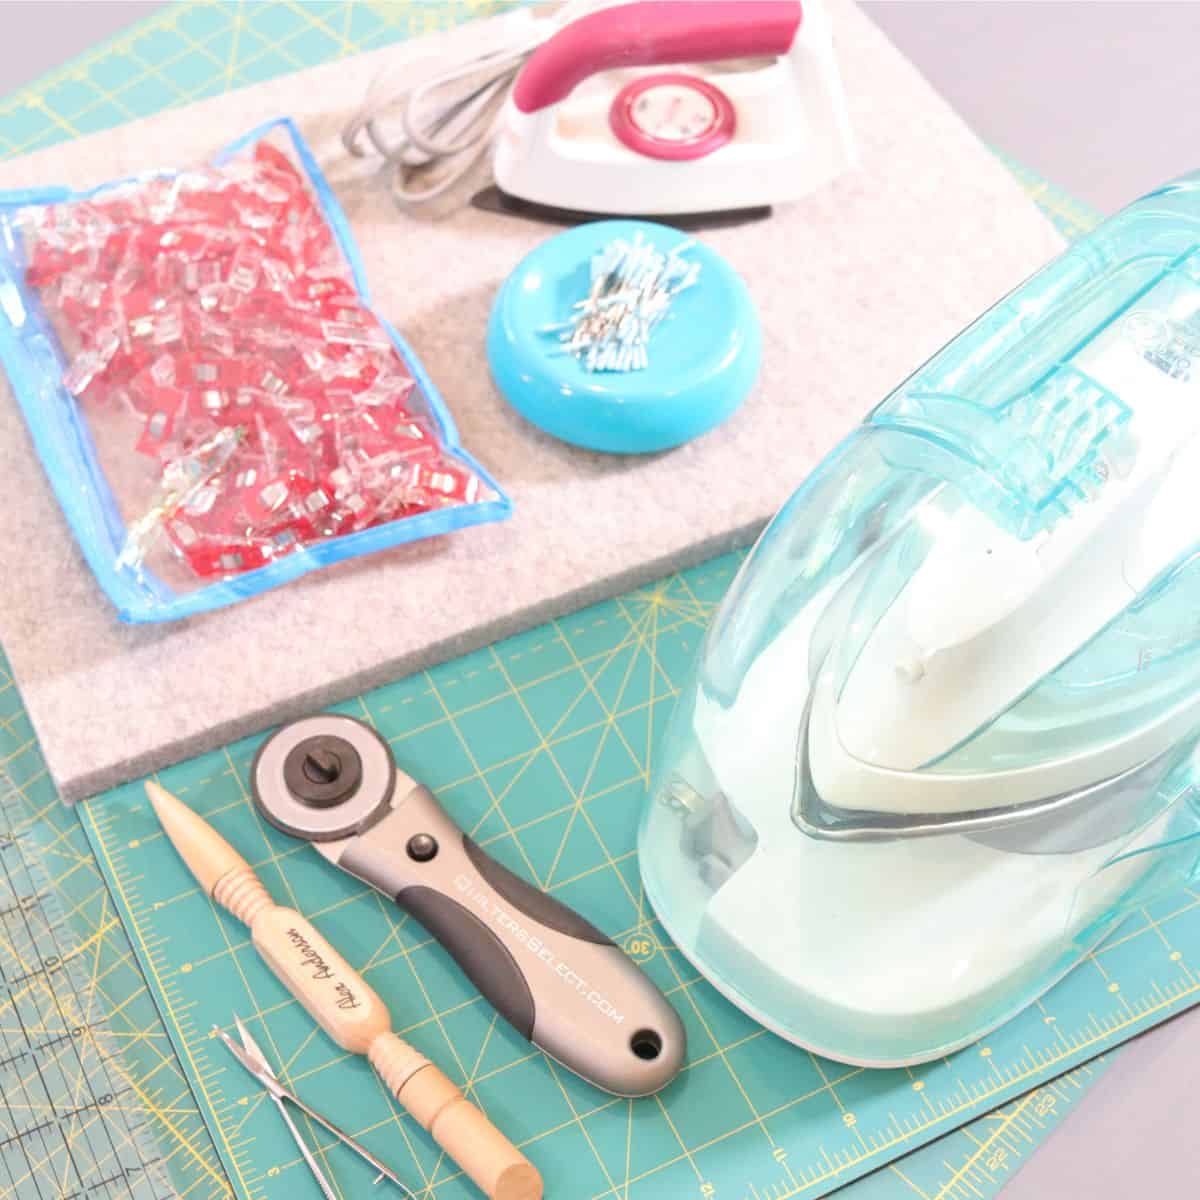
Sewing Accessories
Basic sewing accessories are the things that you need that will help you complete your sewing projects. Accessories can include things like scissors, pins, rulers, and so on.
Gadgets have the ability to make things so much easier. Am I right?
If you are a sewer, quilter, or crafter then obviously you know this is true. Notions are just one of those things that have the ability to simplify. When I find a new one I always think, “why didn’t I think of that?!”
Teach Yourself To Sew
Can you teach yourself to sew? Absolutely!
There are so many resources available on the internet these days that make getting started with sewing easier than ever!
If you don’t know anyone that sews, and still want to learn, don’t be intimidated. Start small. Get the basics you need to complete, small, simple projects and work your way to more complex sewing endeavors.
- Books are a great resource. There are great books for all kinds of sewing. Quilting, garment construction, handbag maki
- Classes are another really great option. Craftsy is my personal favorite, but you can look into classes at a local sewing shop as well.
The Best Sewing Tools For Beginners
I guess it’s pretty obvious to say that if you want to sew, you need a sewing machine.
That being said, there are so many machines on the market these days that it may seem overwhelming to find one that is going to suit all your sewing needs, and last you a while.
This is the machine I started with. It lasted me a couple of years before I finally decided I was ready to sell it and buy something a little more advanced.
Things to look for when buying a sewing machine as a beginner sewer.
- Zig-zag stitch
- Buttonhole options.
- Cas handle sewing through multiple layers of fabric easily.
If you aren’t ready to invest in a sewing machine brand new, don’t forget to check out your local Facebook Marketplace, Offerup, and Craigslist. You may be able to find something similar for a fraction of the price.
Be sure and take a friend or family member with you when meeting up with people from these platforms. Safety first!
The Best Sewing Machine For Beginners

This is a Singer Heavy Duty sewing machine. It has all the options I mentioned above. It was a great beginner sewing machine.
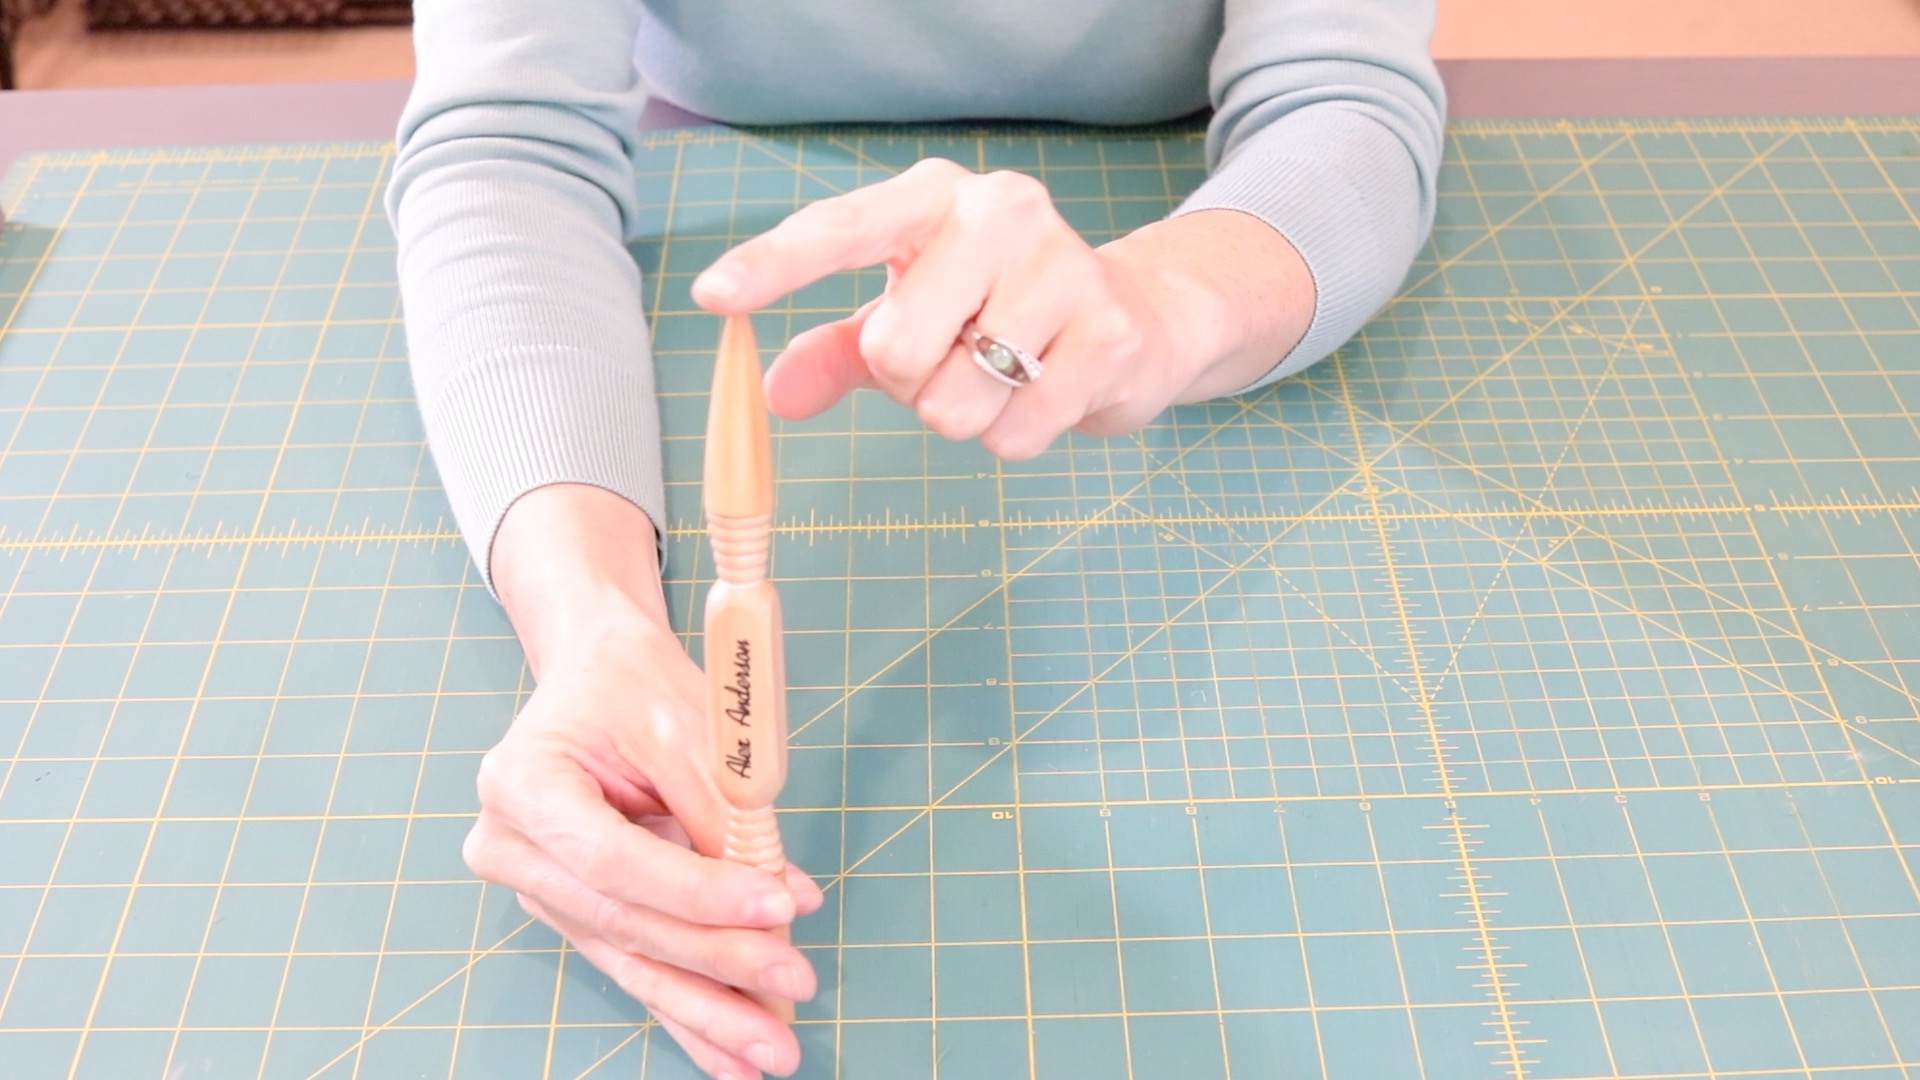
4-in-1 Sewing Tool
To get started with our sewing essentials list, I thought I’d show you this multipurpose sewing tool.
The elusive Alex Anderson 4 in 1 tool. This is probably the number one notion I get asked about in my YouTube sewing videos. It seemed like an obvious choice to put it first.
What is it you ask? Let me show you and explain what it can do.
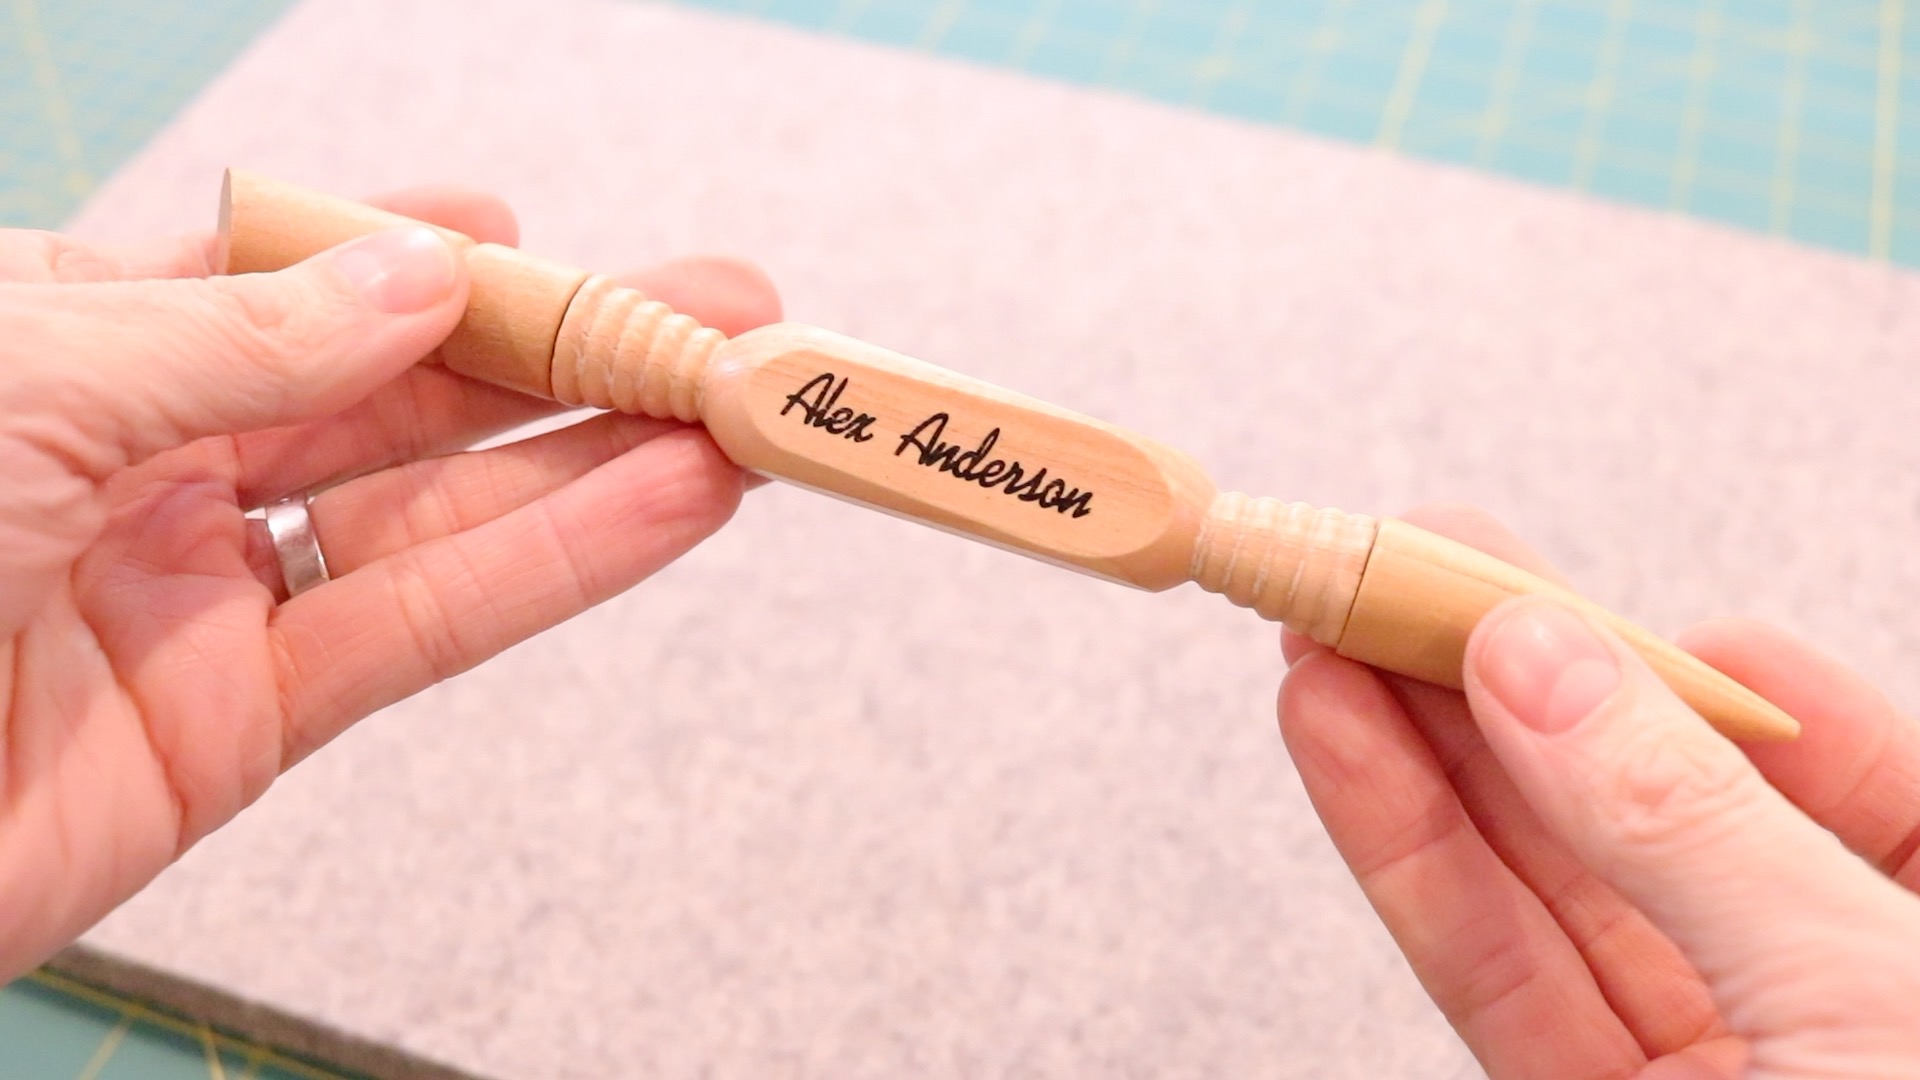
This tool is exactly as it says. 4 tools in 1! That’s a win for me. Alex Anderson did us all a great service by making something so compact that can do the job of 4-in-1 handy tool no less.
Let’s start by listing all the things this handy sewing gadget can do:
- Seam ripper.
- Stiletto.
- Presser.
- Turner.
This 4-in-1 tool is made of smooth wood it’s simple and beautiful.
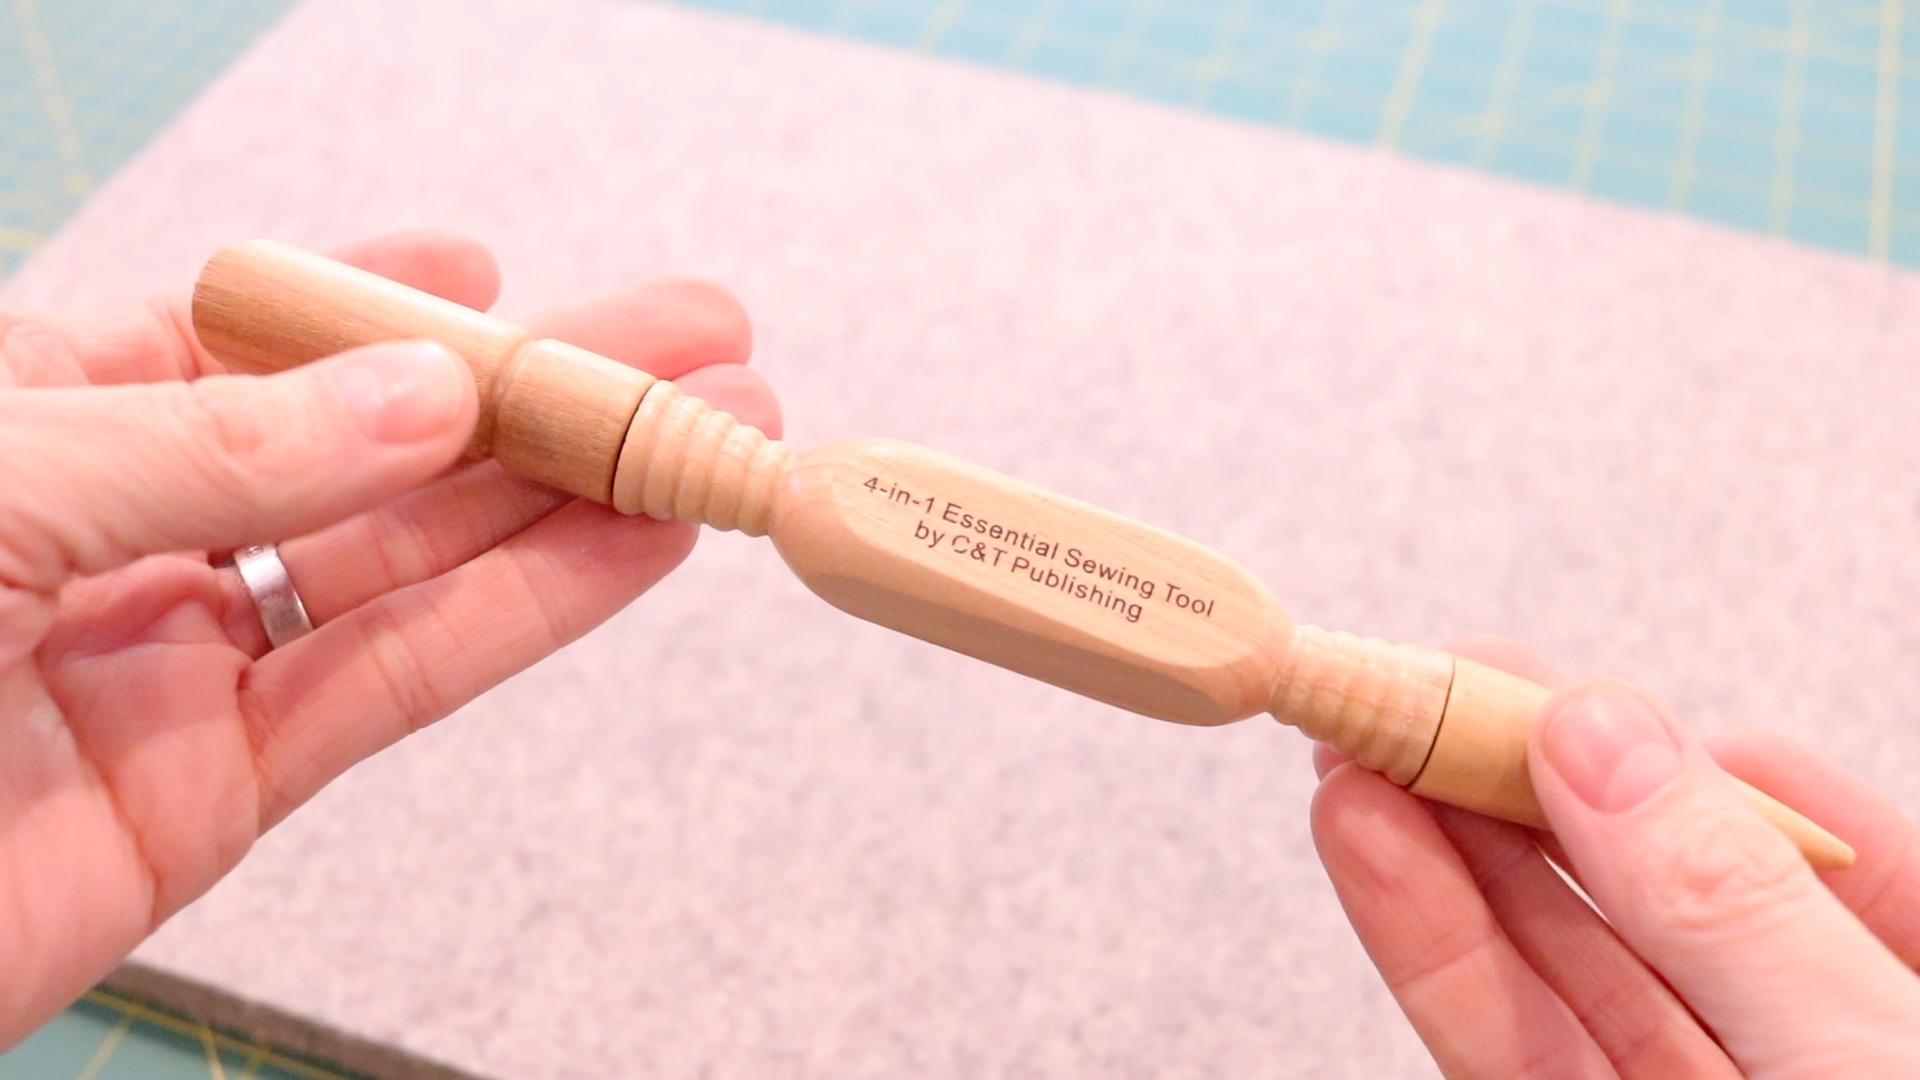
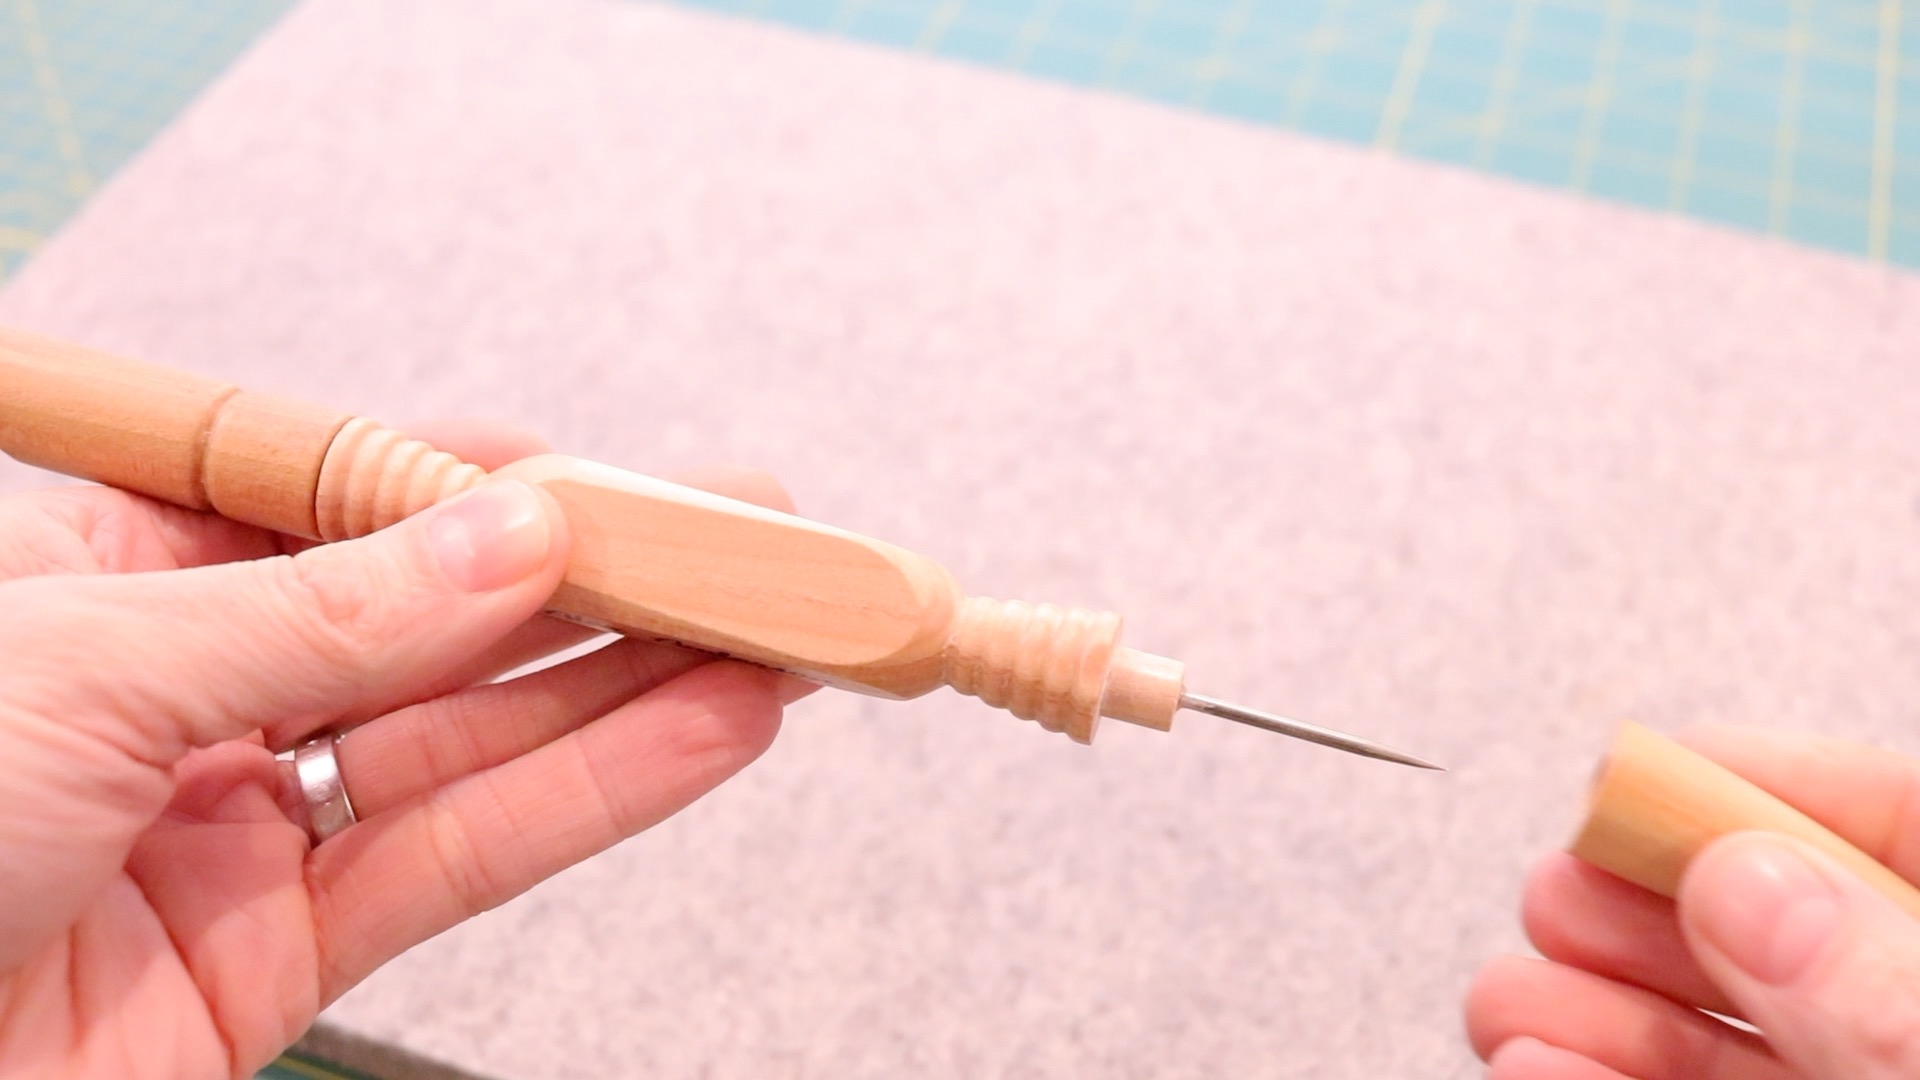
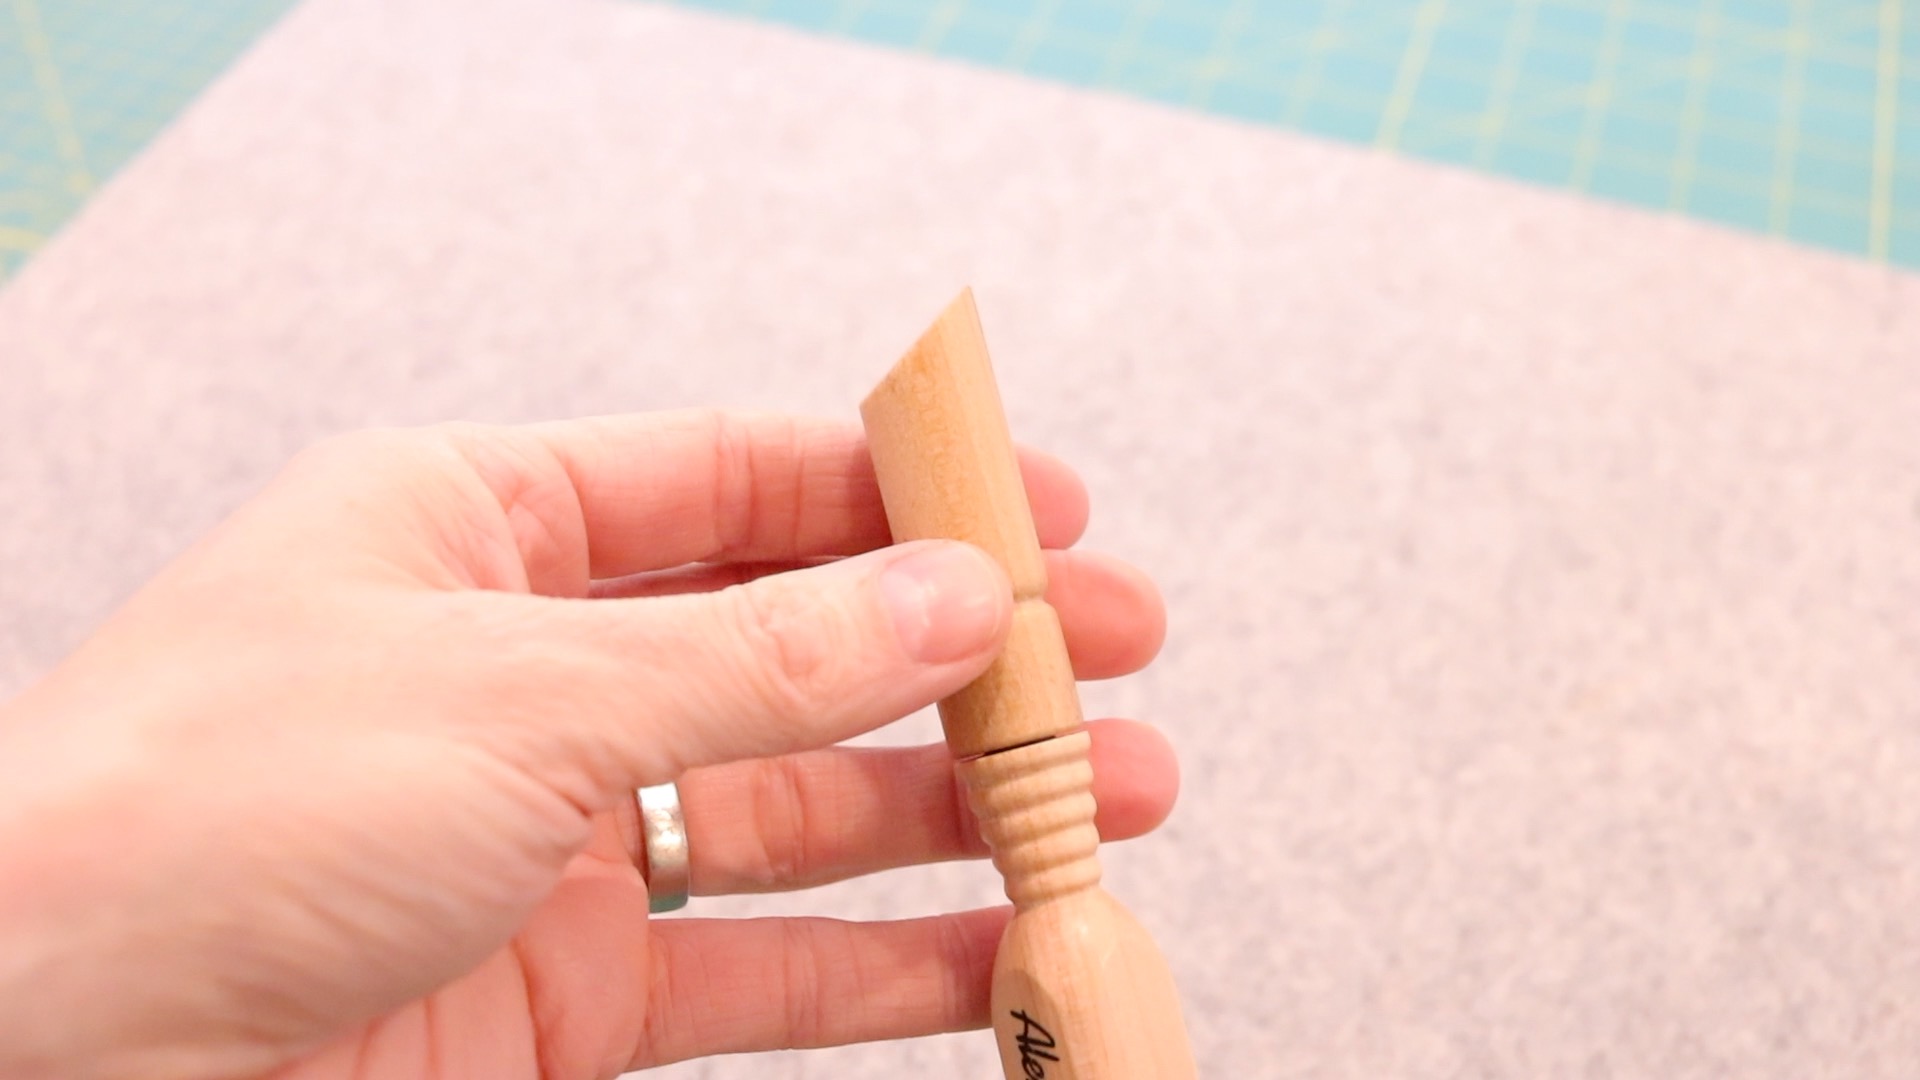

The Alex Anderson 4-in-1 tool
This tool has an ergonomic grip as well. The middle part of the handle is square cut, but the edges remain smooth so it doesn’t hurt your hands to have to hold it for a prolonged period of time. Say ripping out?
Final thoughts on this tool? Get one, and you can thank me later.
Cutting Tools
Cutting Mat
If you plan on using a rotary cutter to cut your fabric, then a cutting mat is essential.
- A cutting mat will protect the surface of your countertop or table so the blade of the rotary cutter doesn’t slice right through it.
Rotary cutters are extremely sharp and all caution should be taken when using them to protect fingers and furniture.
I have used many cutting mats over the last 12 years, and I always go back to the Olfa self-healing mats.
The price will vary greatly depending on the size of the mat you purchase. I have six of them in different sizes. I would say that if you buy just one, I recommend the 24-inch by 36-inch size. It is the one I use the most.
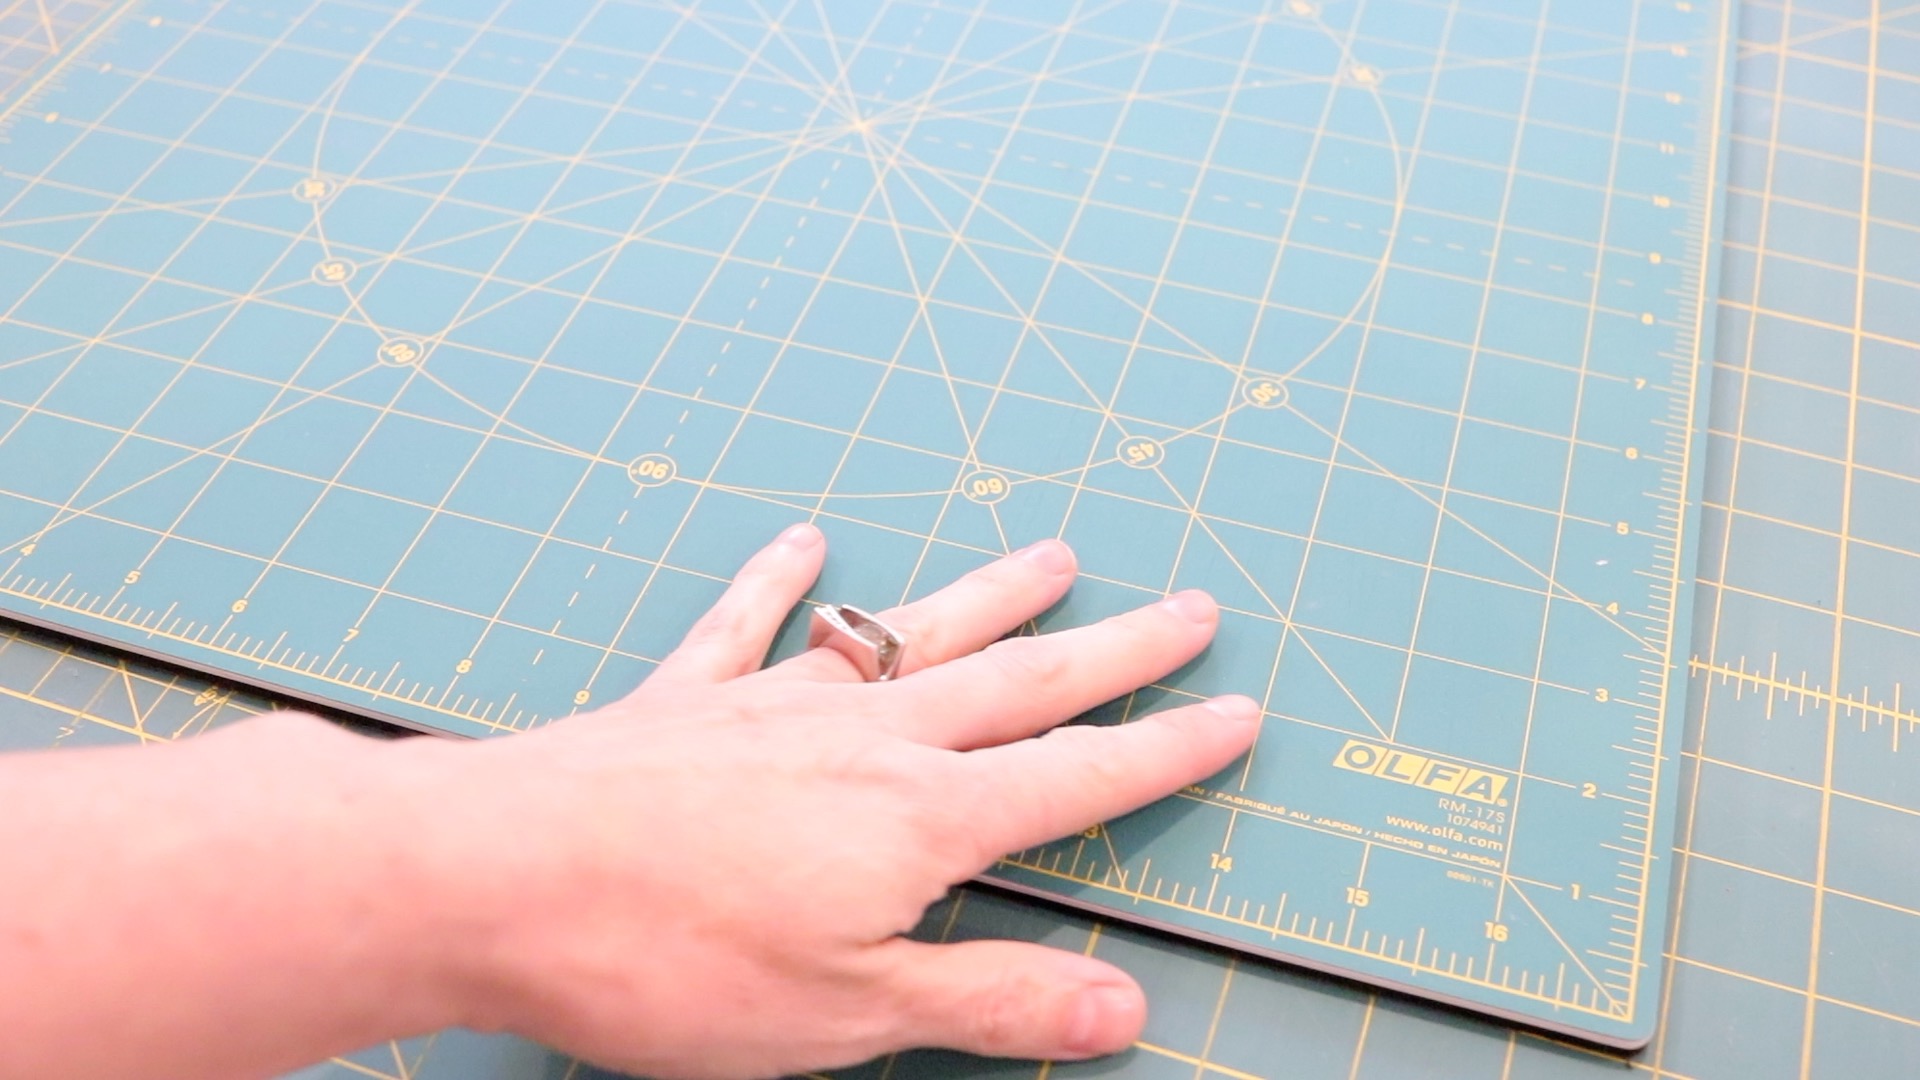
Olfa Cutting Mat
- Self-healing mat. This just means that when you use your rotary cutter to cut your fabric, the mat isn’t left with deep grooves that inevitably your rotary blade will find in the future with ease. These mats heal themselves so the groove lines aren’t noticeable.
- Longevity. These mats have lasted me much longer than any of my other cutting mats.
- Size availability. These mats come in quite a variety of sizes.
- Functionality. My 12-inch by 12-inch rotating cutting mat makes cutting small quilt squares far less painful. No more lifting the fabric to make another cut. Spin the cutting mat (like a lazy Susan), and make your next cut.
Basic Sewing Supplies
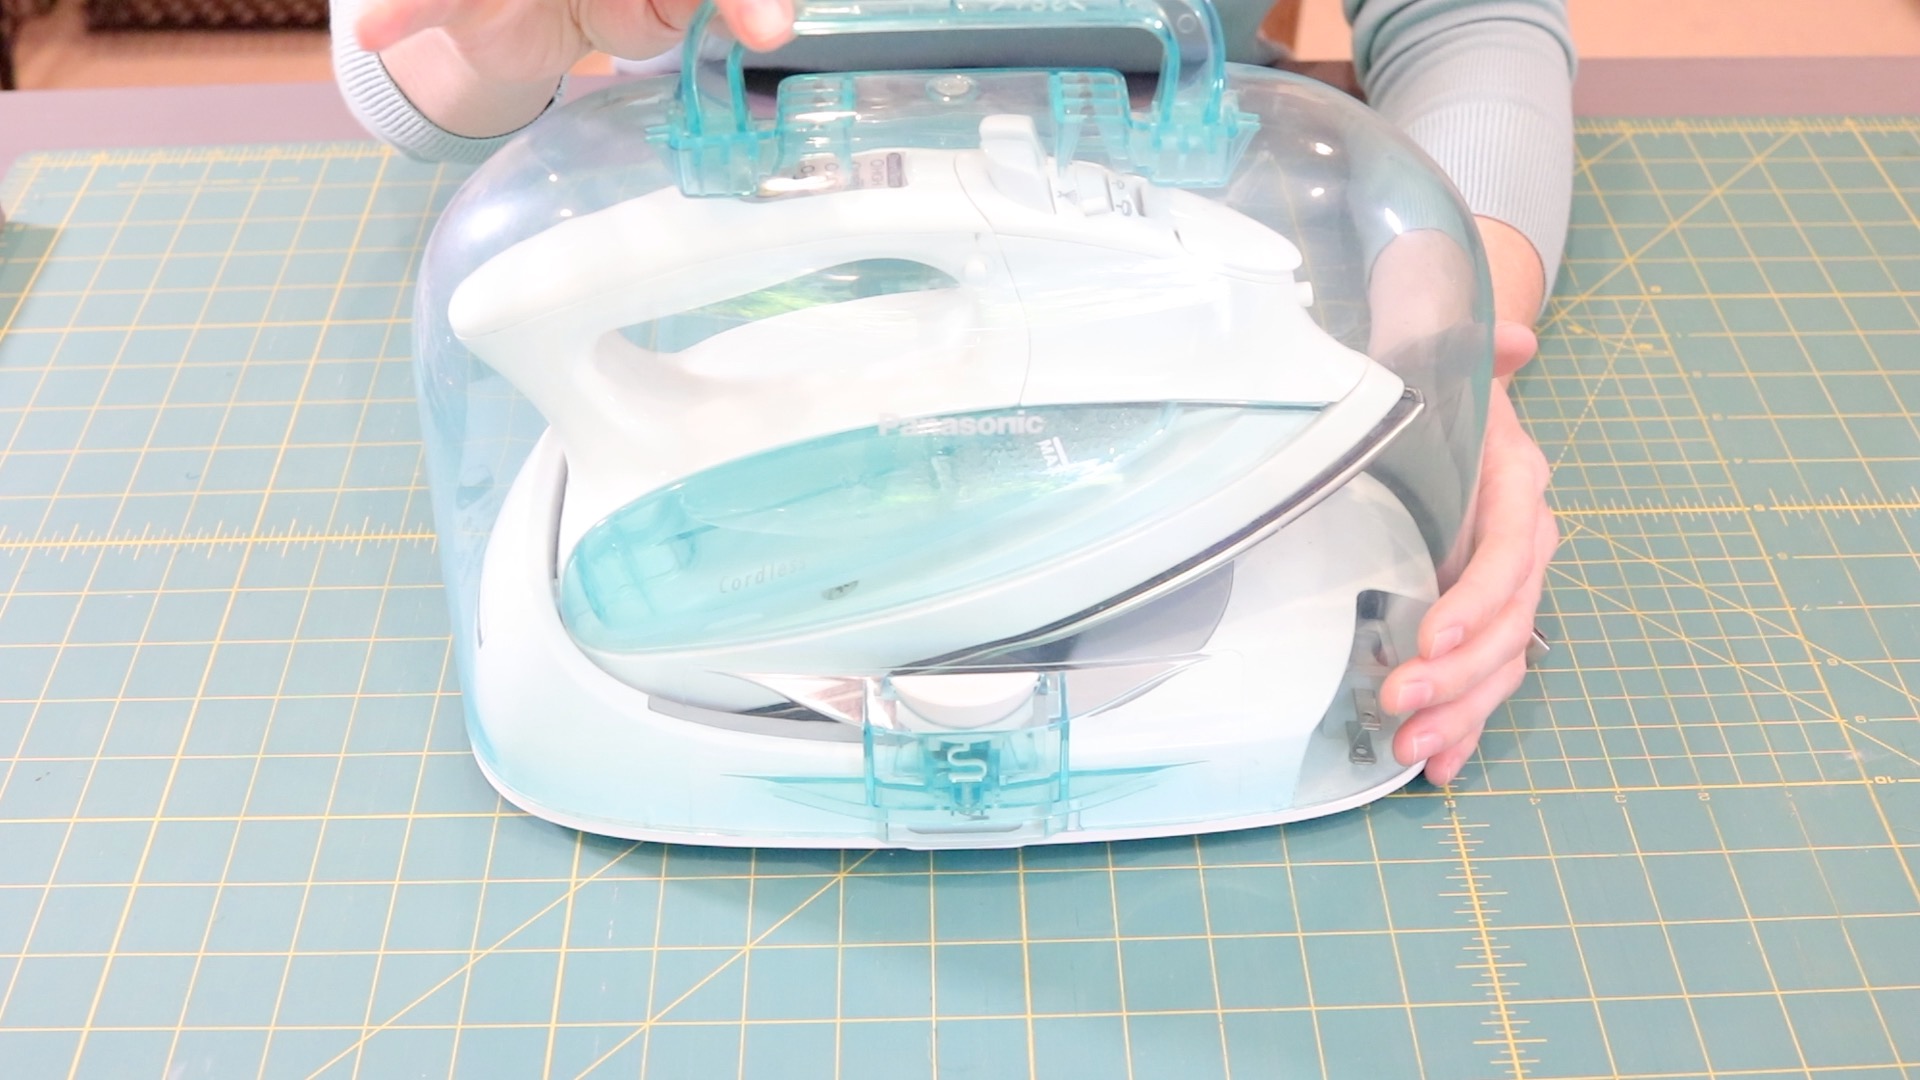
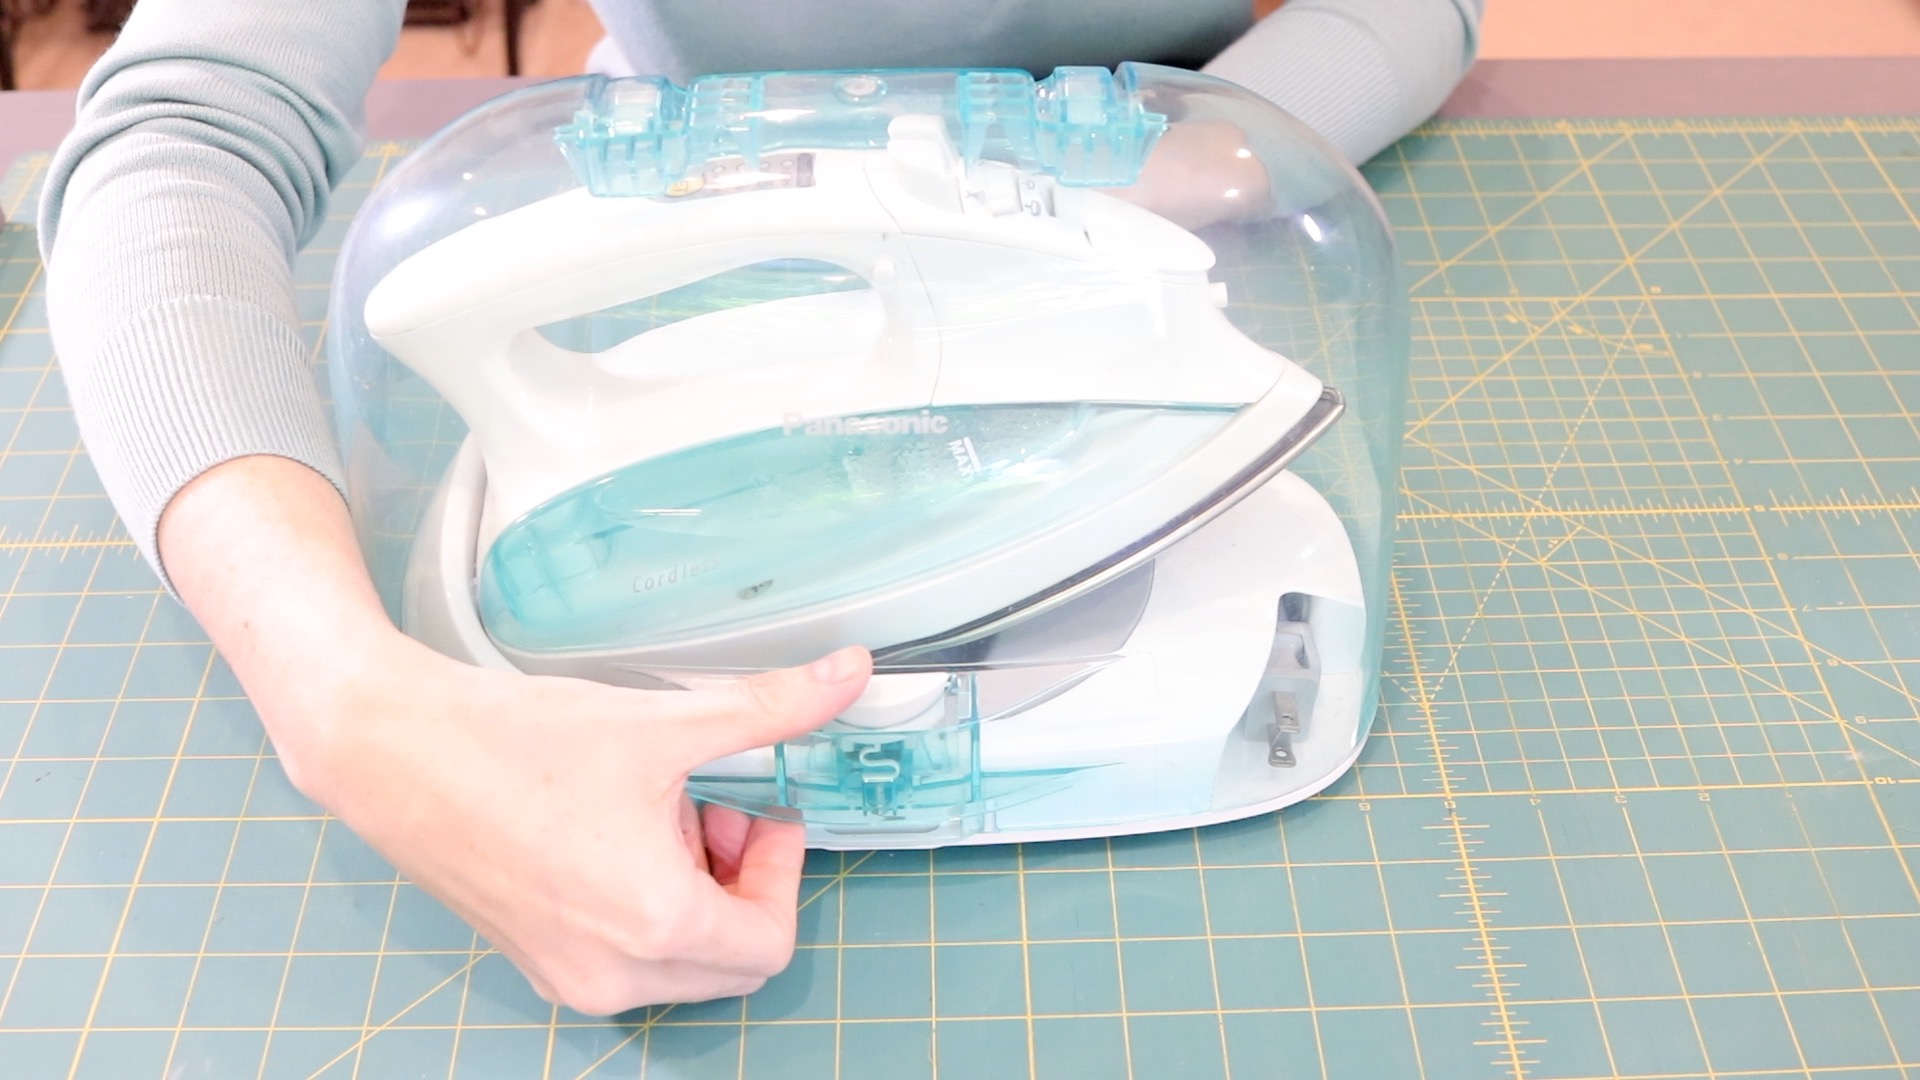
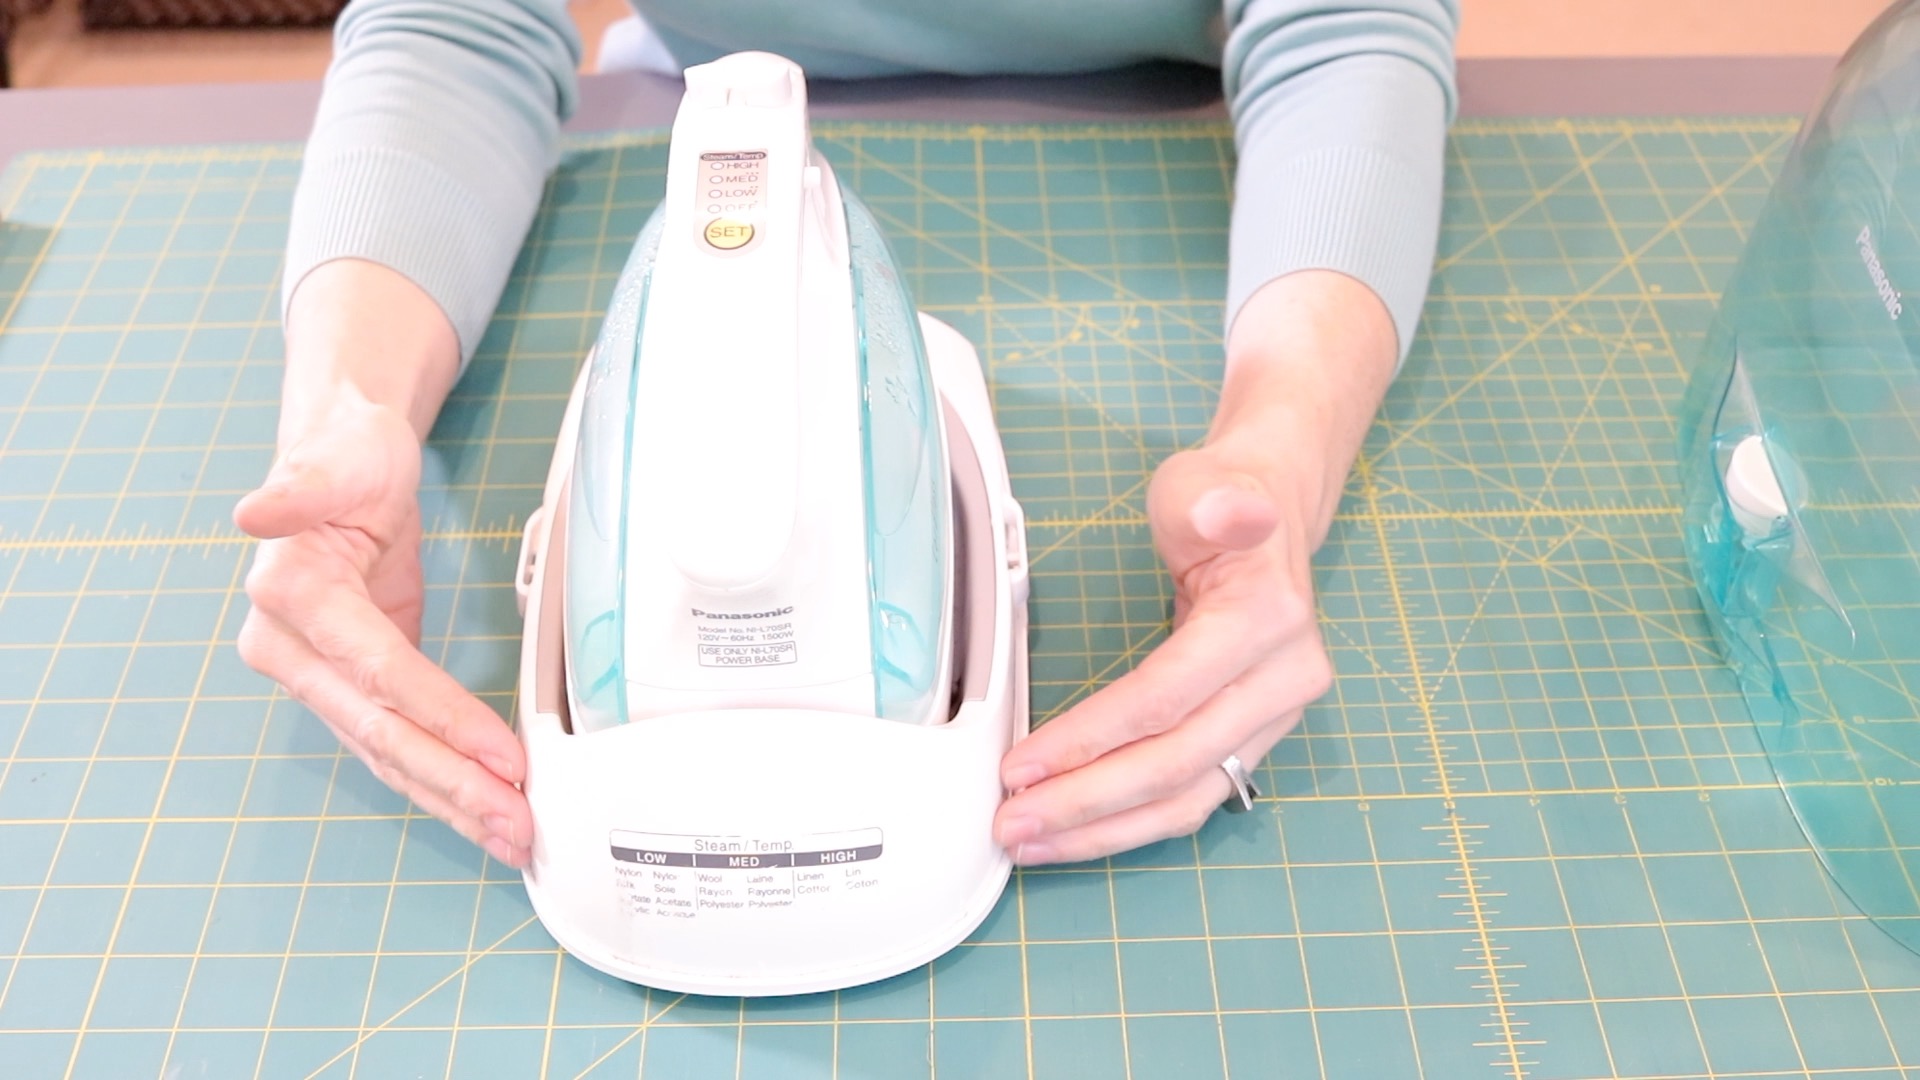
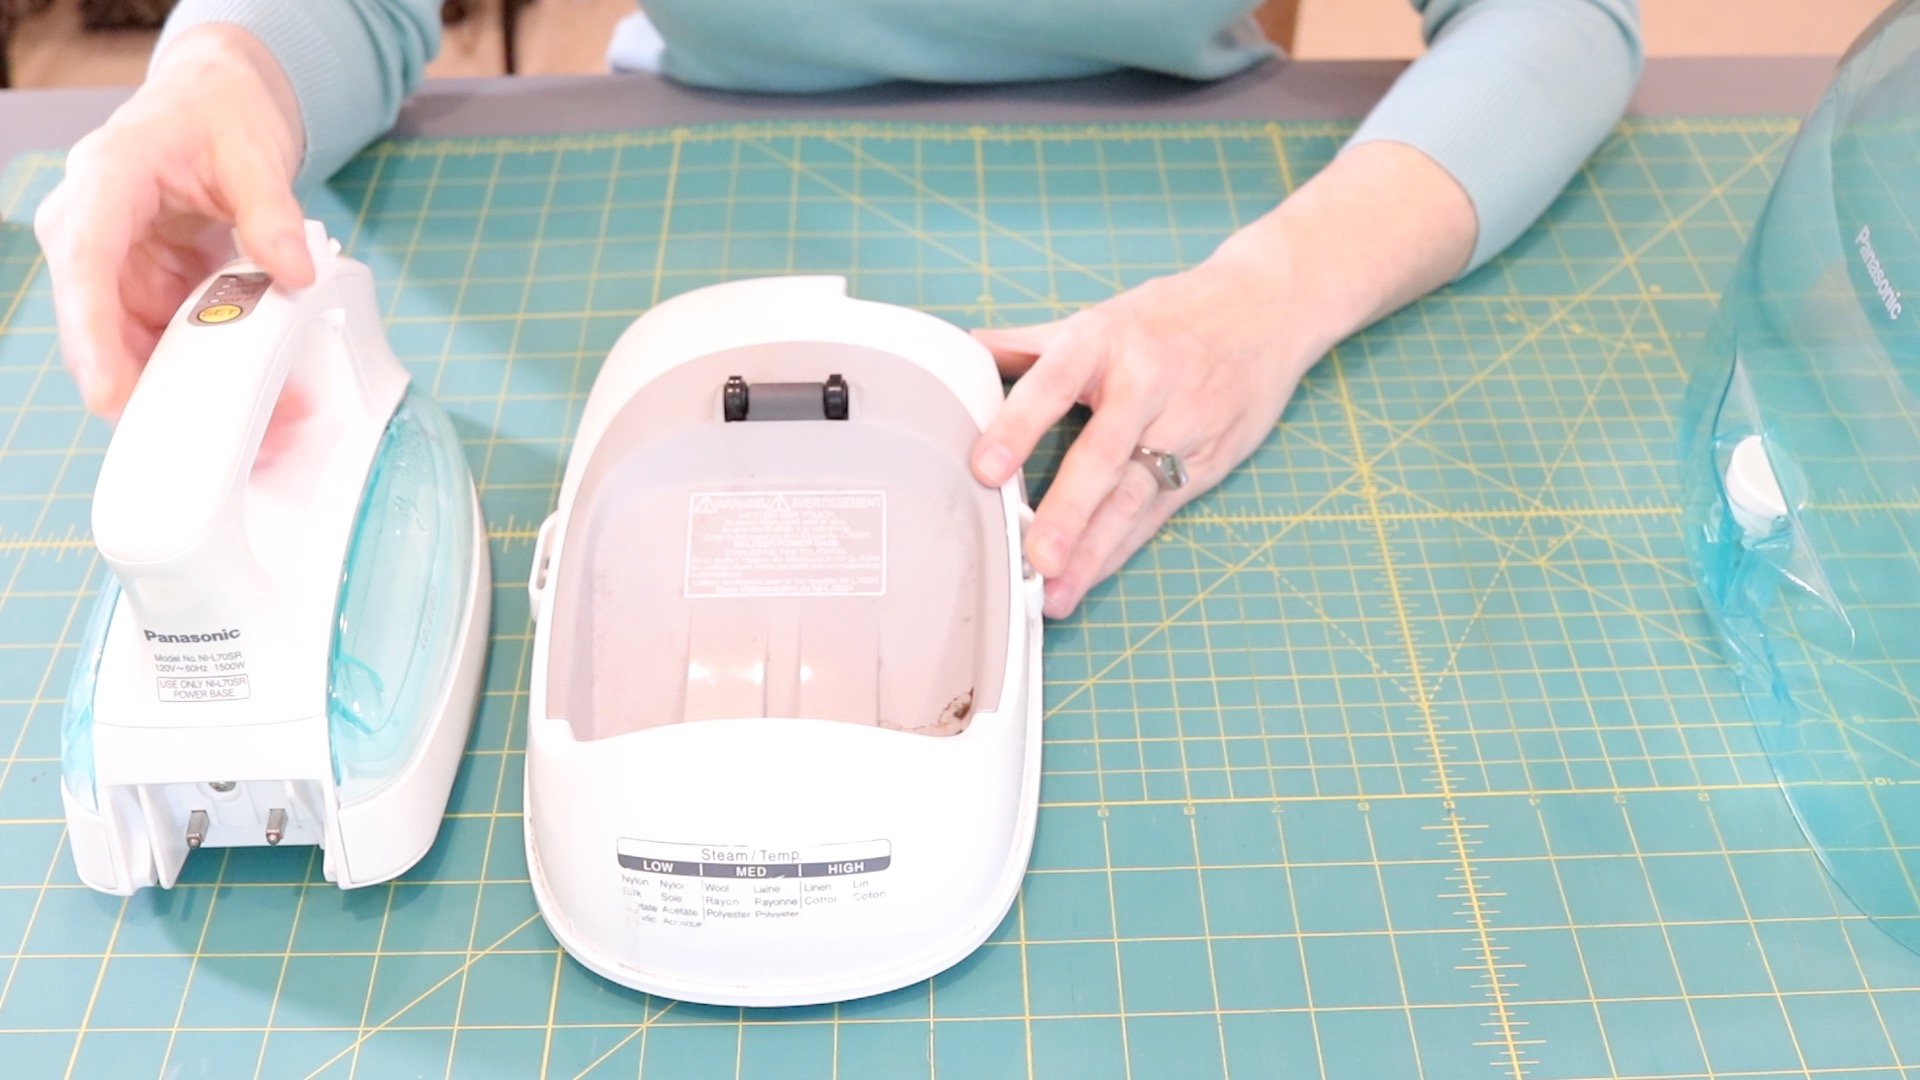
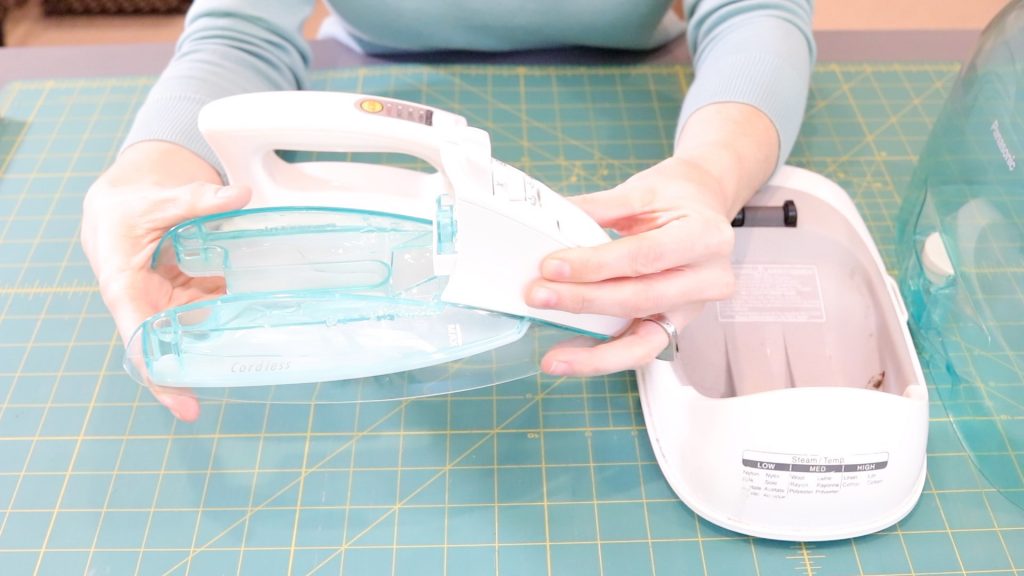
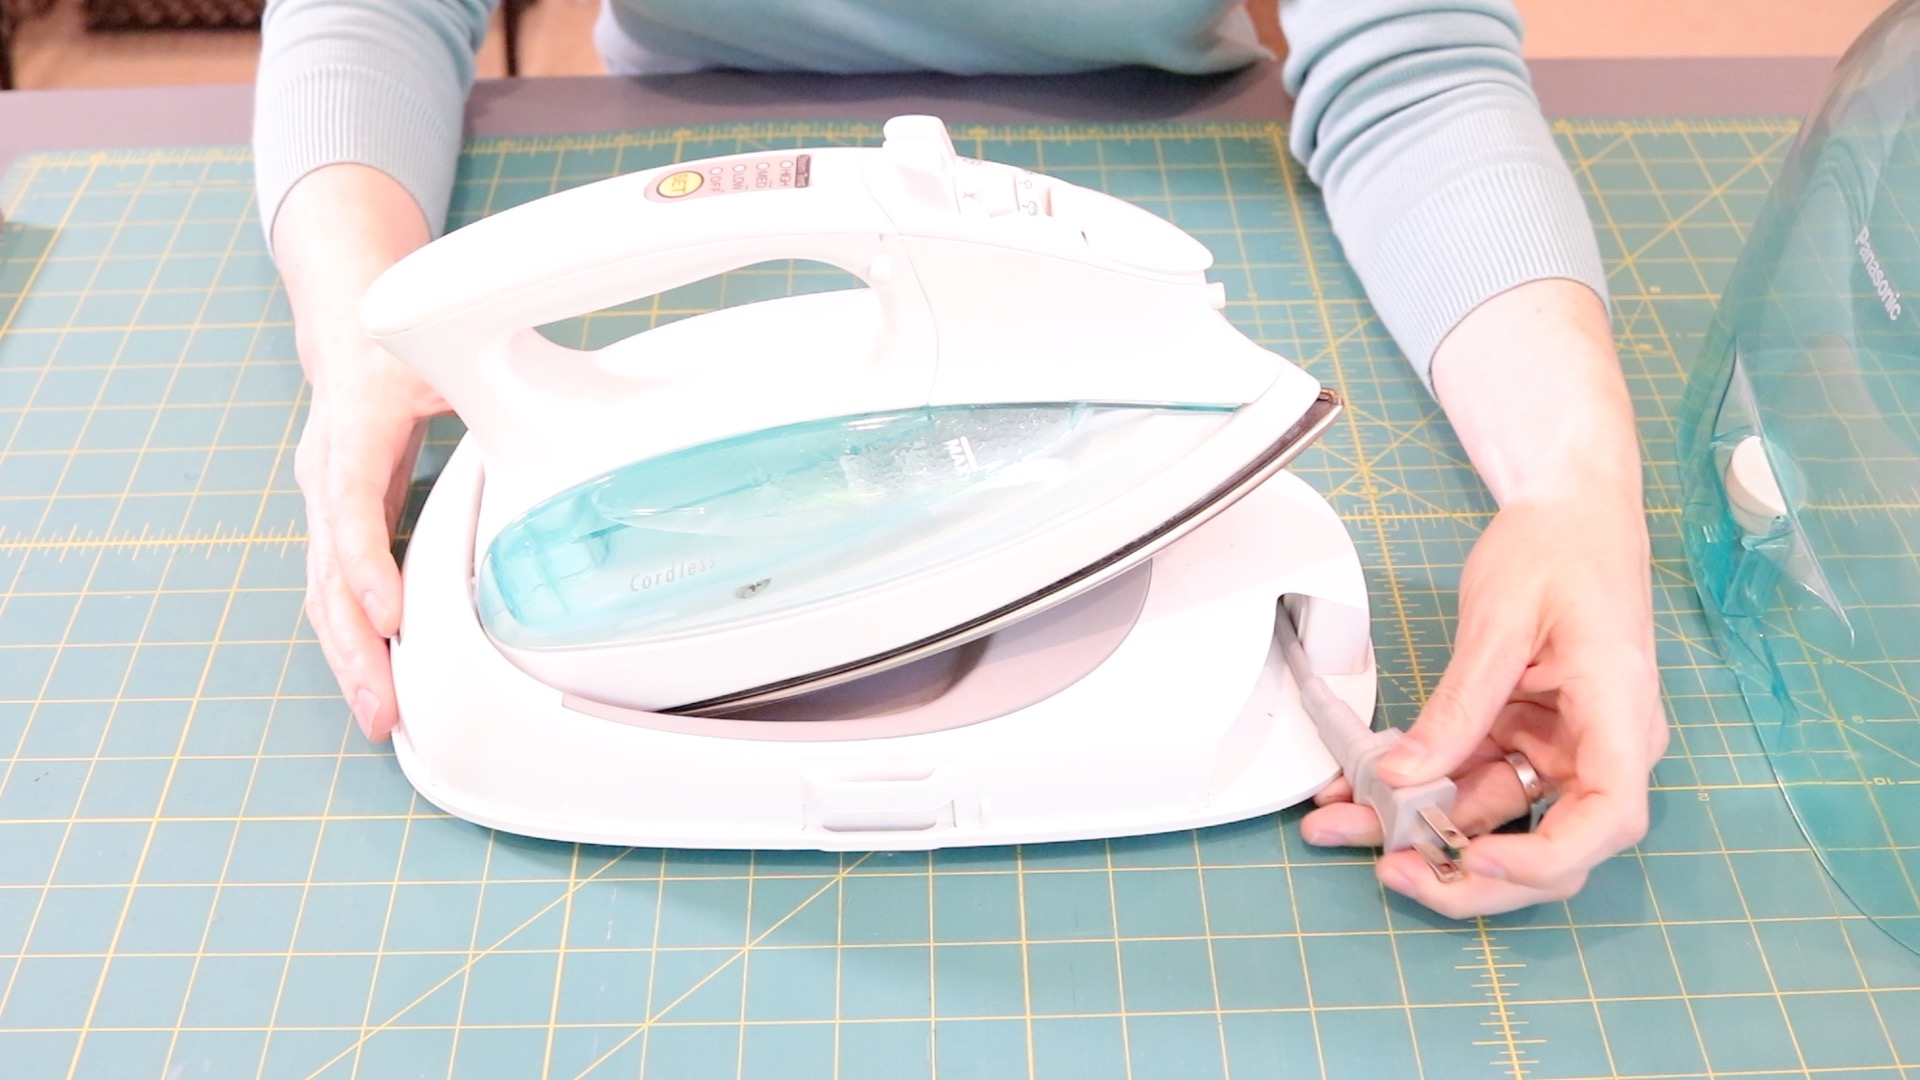
Iron
Like everything when it comes to sewing, quilting and clothes making, you’ll find certain things that you love and certain things that are a nuisance.
For me, I do not enjoy having a cord from my iron that gets tangled up when I’m trying to get things pressed. I personally love my cordless iron.
- The iron has a low, medium, and high heat setting.
- Retractable cord for easy storage.
- The lid has a carry handle.
- Removable water well (for easy filling).
Retails for $55-$89.00. Price will vary depending on where you find it.
I have had both of my cordless irons for 5 plus years and they are still going strong.
Pins and Clips
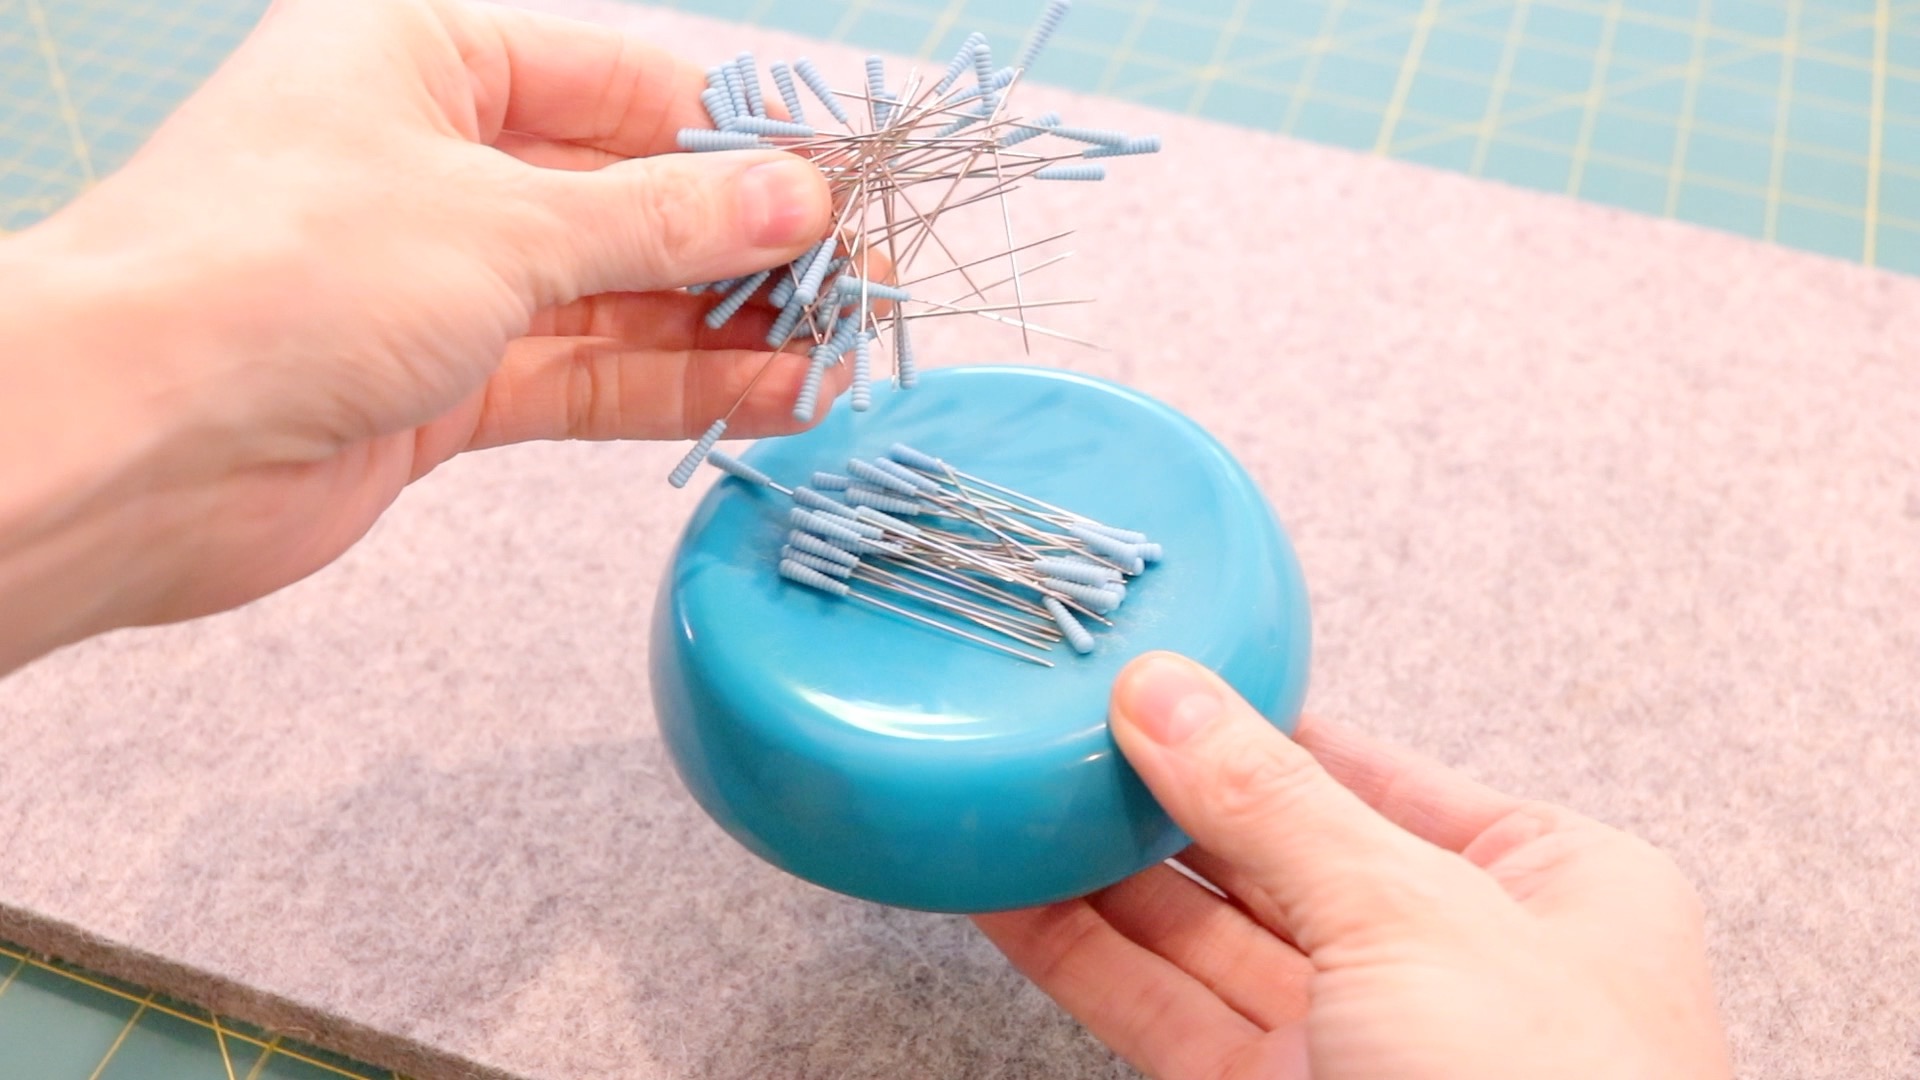
Magnetic Pin Cushion with Pins
Magnetic sewing pin cushions are so helpful in a room full of sharp pins. If you’ve ever dropped a regular pin cushion on the ground and later found a lost pin with your foot, this may be the thing for you.
The magnetic grabs hold of those sewing pins and keeps them nicely in place. If you drop pins on the ground while sewing it’s also much nicer to pick them up with this than with your hand.
Retail $12-$14.00.
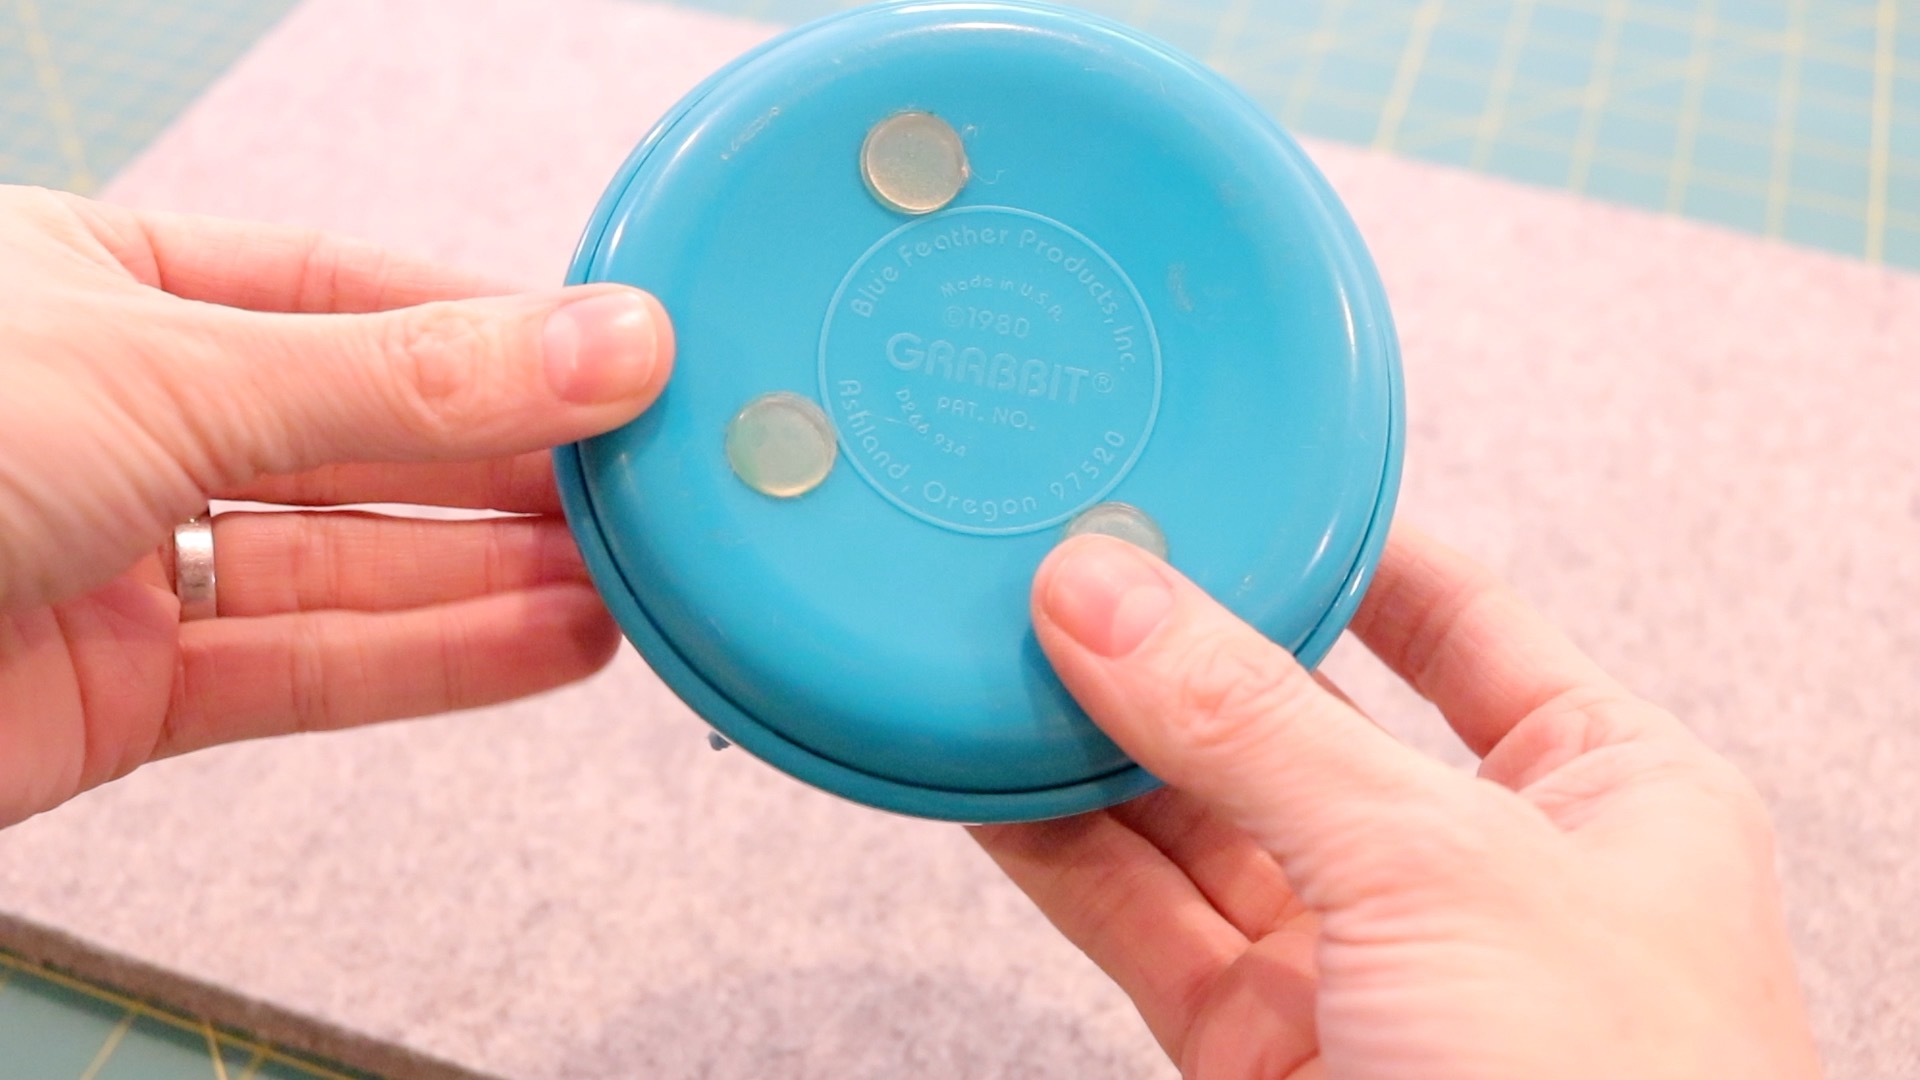
Grabbit Magnetic Pin Cushion
Most brand’s magnetic pin cushions come with sewing pins. The ones pictured on my pin cushion are sold separately.
Because these particular pins have a silicone top, they won’t melt if you touch them with the iron.
If you are interested in these “magic pins,” you can find them HERE. However, the pins that come with these pin cushions work just fine too. So don’t feel like you need to purchase separate ones.
- The pins won’t ever fall off.
- Place a couple of ruler grips on the bottom like I did to keep your pin cushion from sliding around on your sewing table.
- Come in a variety of colors.
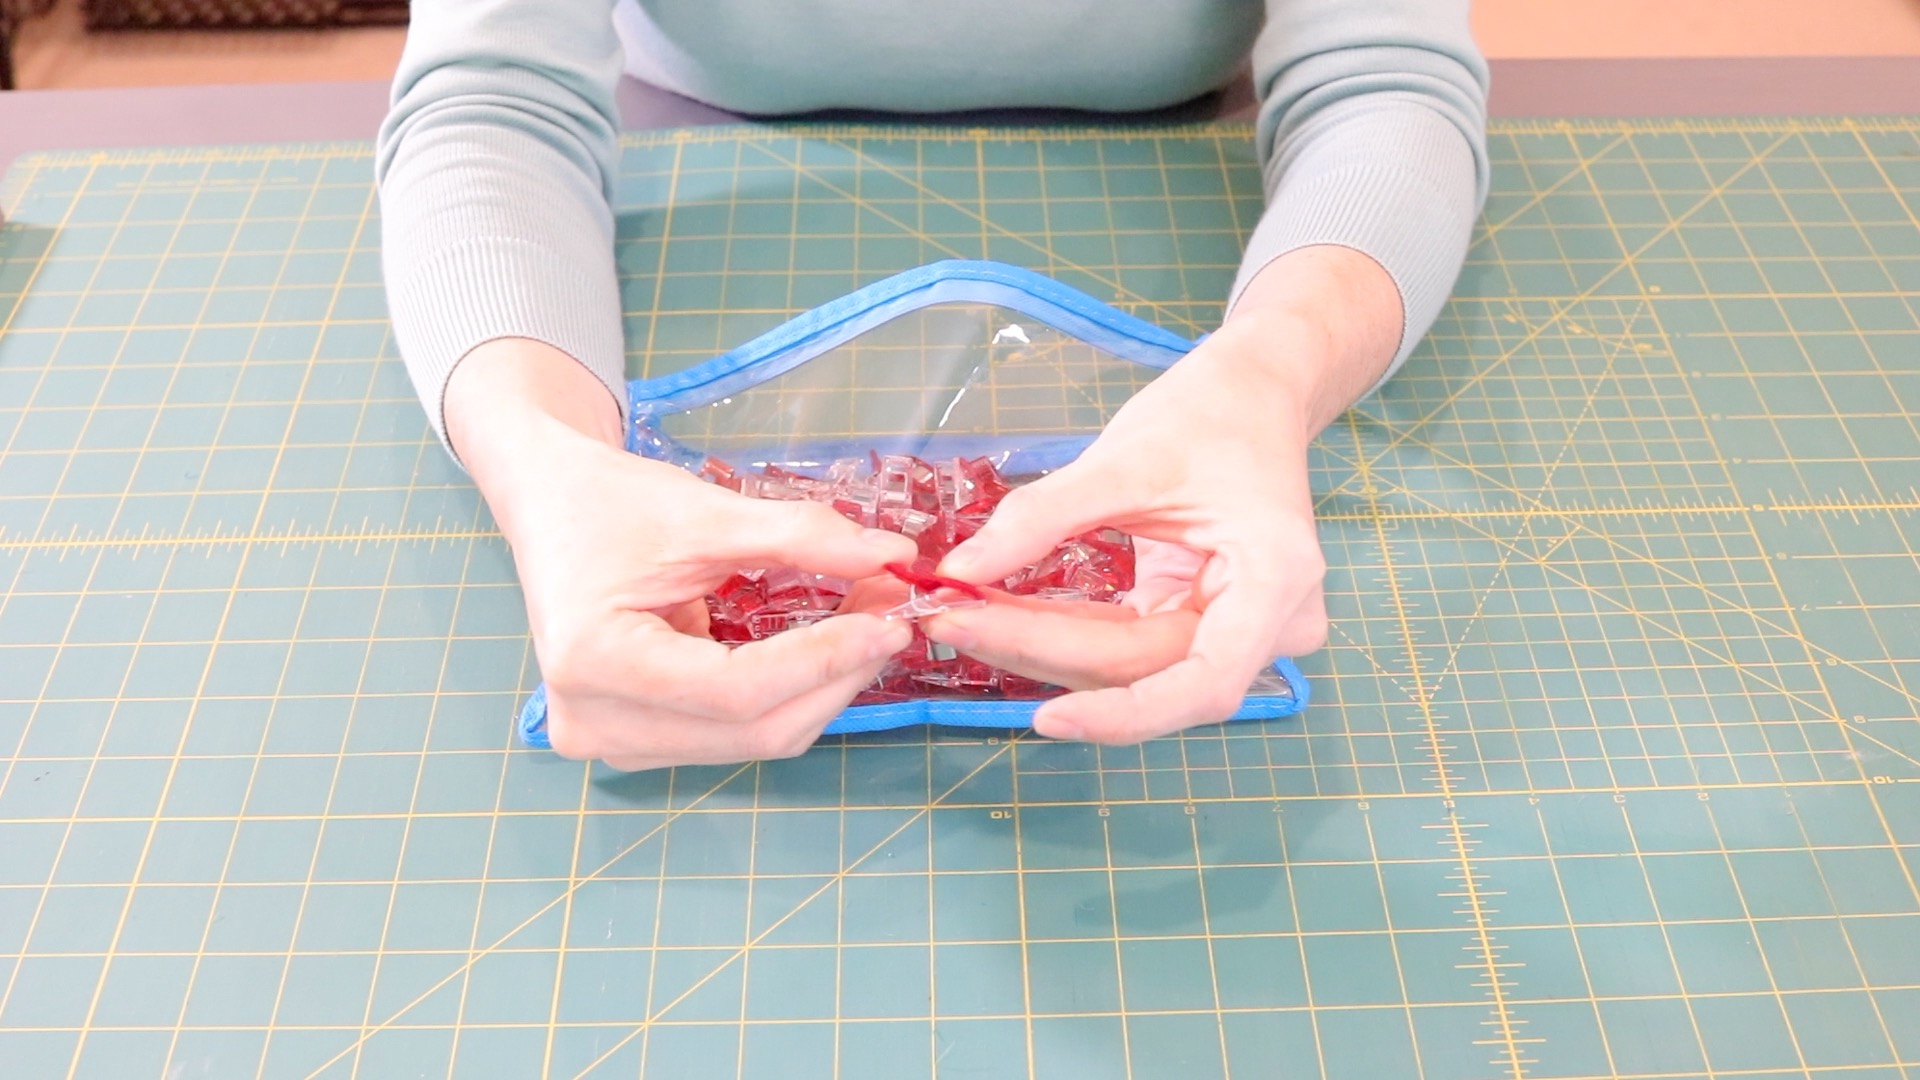
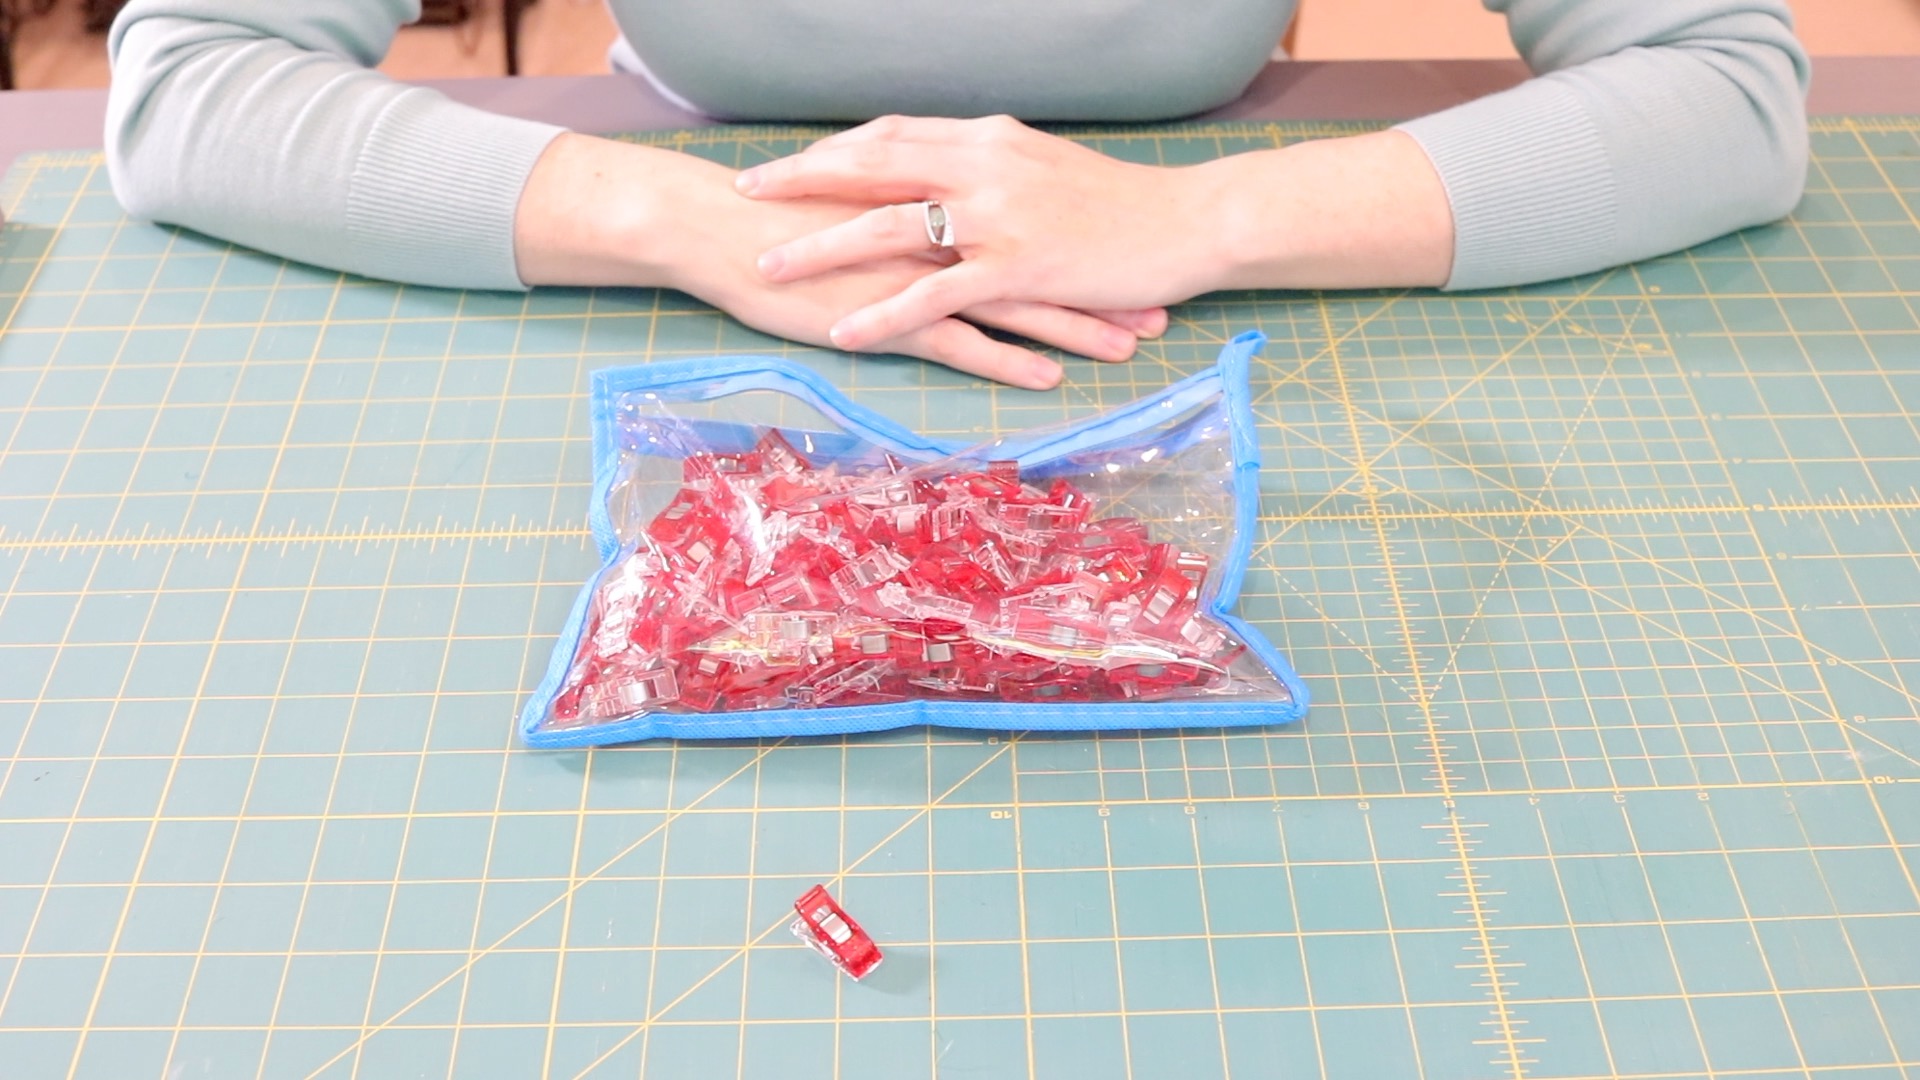
Sewing Clips
I didn’t discover sewing clips until much later on in my sewing/quilting journey. Once I saw someone using them to bind a quilt I knew that I would never use pins again for binding.
I bought some for myself and they are truly magical.
Sewing clips can also be used in place of pins for most projects.
Clover Sewing Clips
- Clips are more expensive than pins.
- I have had better luck with brand name clips than generic brands that didn’t clip as tightly and seemed to break easily.
- You will need quite a few to do a large quilt IF you want to clip it all at once instead of doing one side at a time.
- The clipping mechanism is really strong and holds fabric tightly.
Scissors and Rotary Cutters
Among the essential sewing supplies for beginners are scissors and rotary cutters. Scissors are a must while the rotary cutter is more of a luxury tool. If you plan to sew clothes and bag, the rotary cutter isn’t as necessary. If you plan to make quilts however, you’ll want to have one for cutting strips and other pieces with ease.
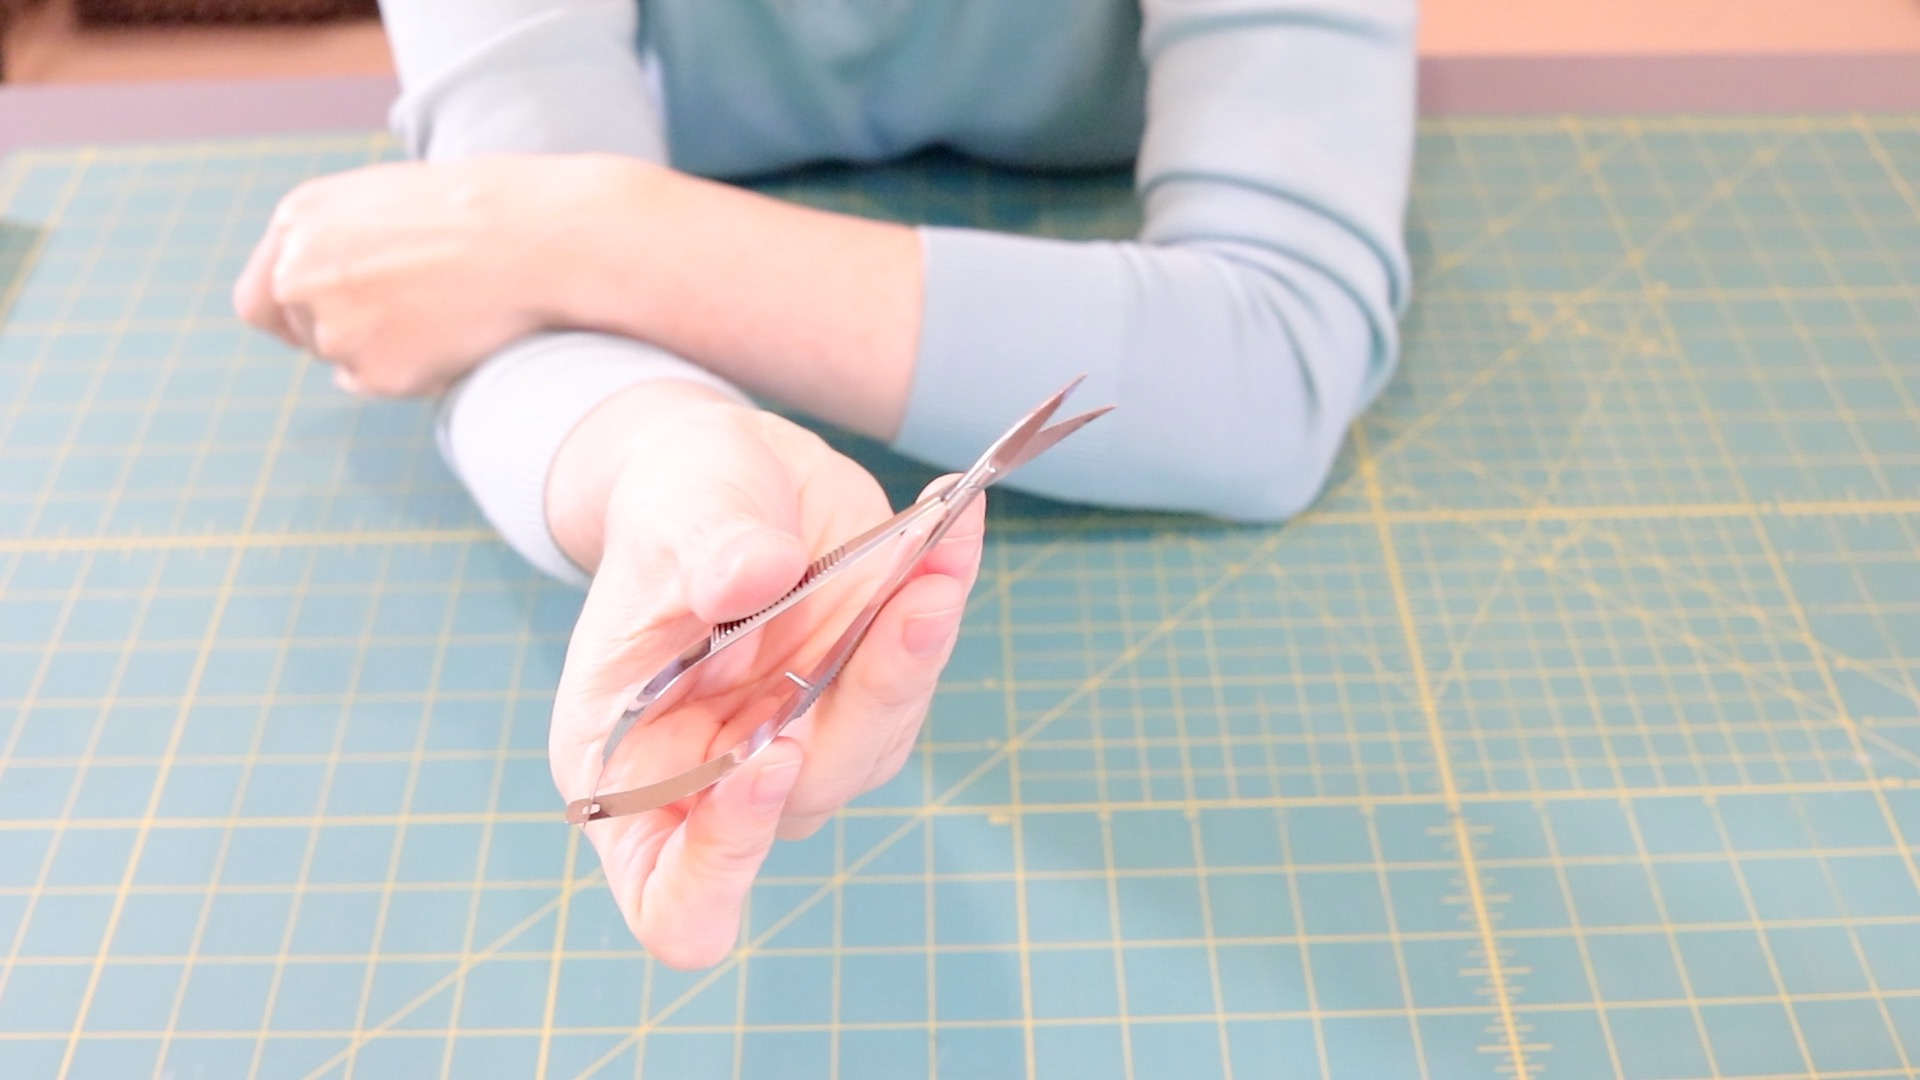
Thread Scissors
I have a pair of thread snips hanging from each one of my sewing machines. I adore these particular ones.
You can also use a regular pair of scissors to clip threads. I just found that these little thread snips work better for my needs.
Havel Mini Thread Scissors
- Made of stainless steel.
- Lightweight.
- Spring-like snipping action causes less hand fatigue with use.
- A curved blade makes it easy to trim threads super close to your fabric without poking your fabric with the end of your scissors.
- Affordable? I didn’t think so at first, but they are so worth the investment. I haven’t bought snips in such a long time that I really don’t have anything to compare the price to.
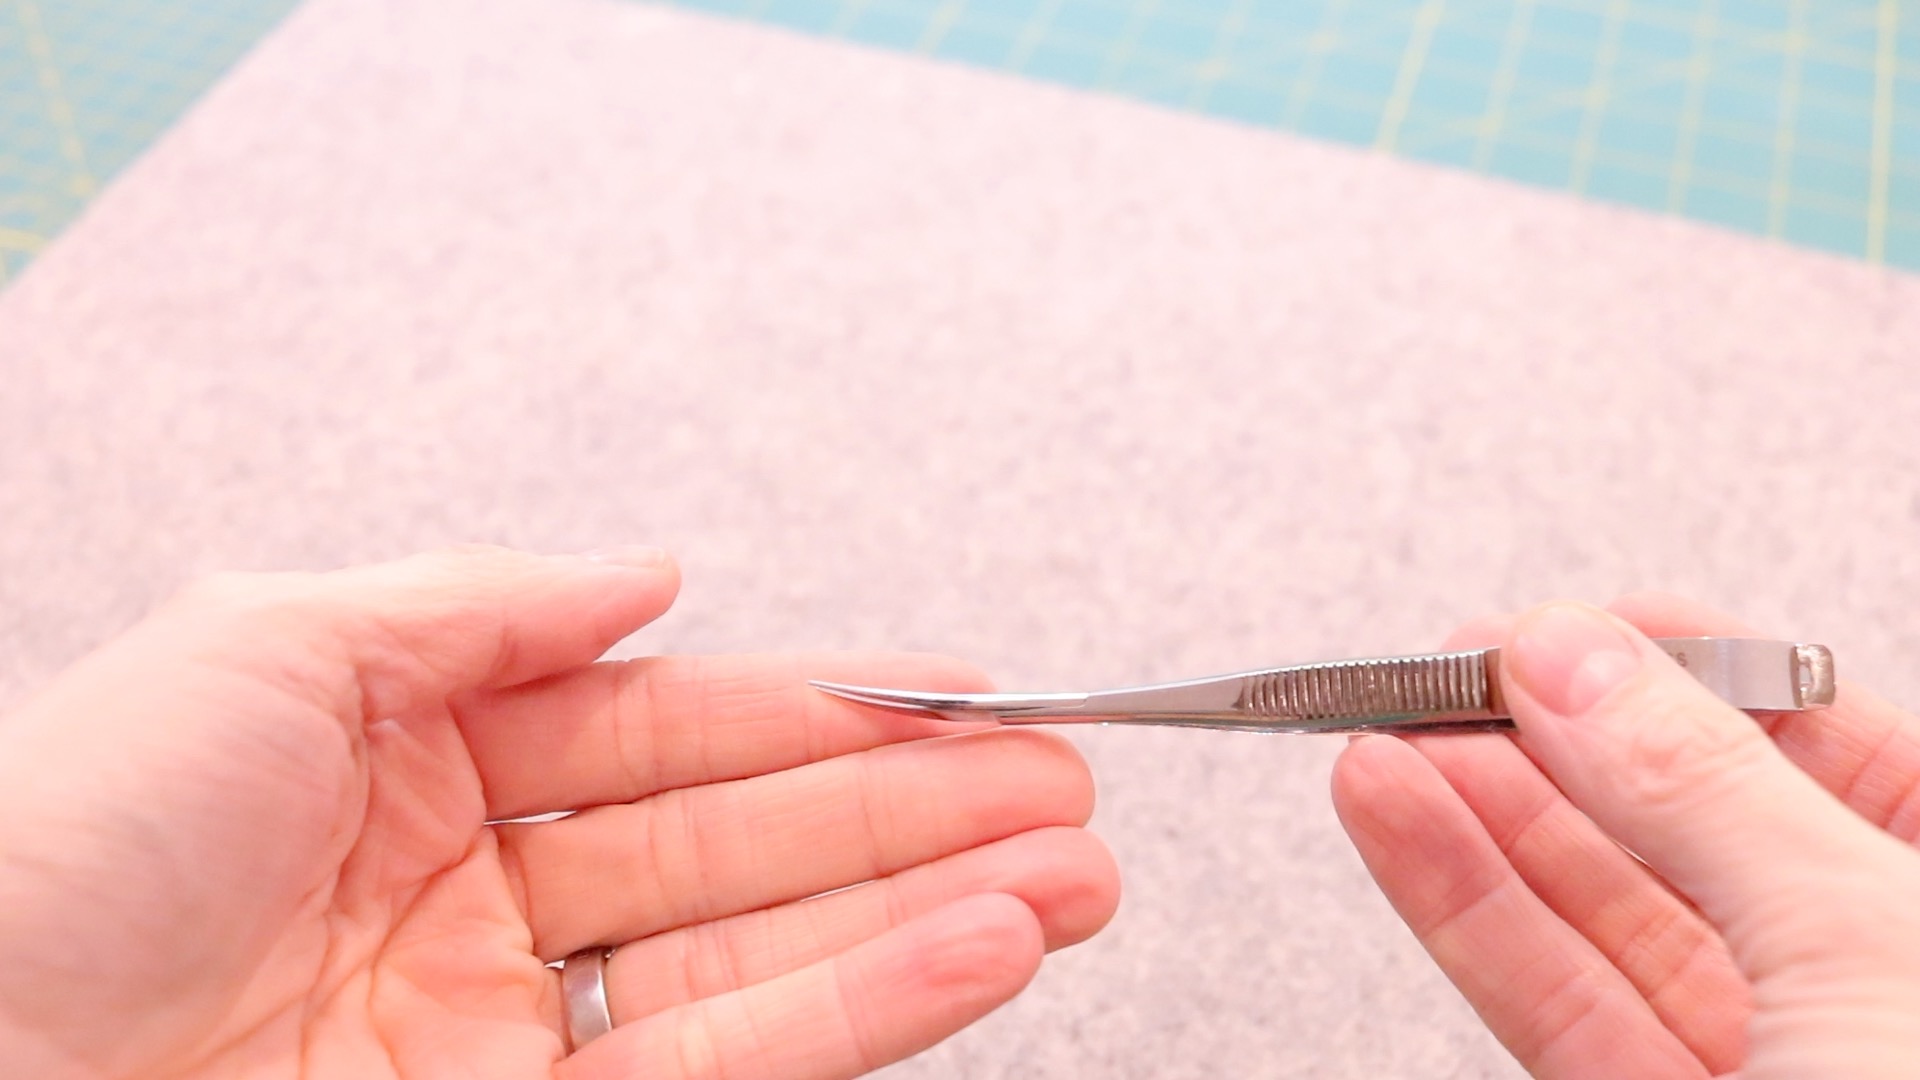
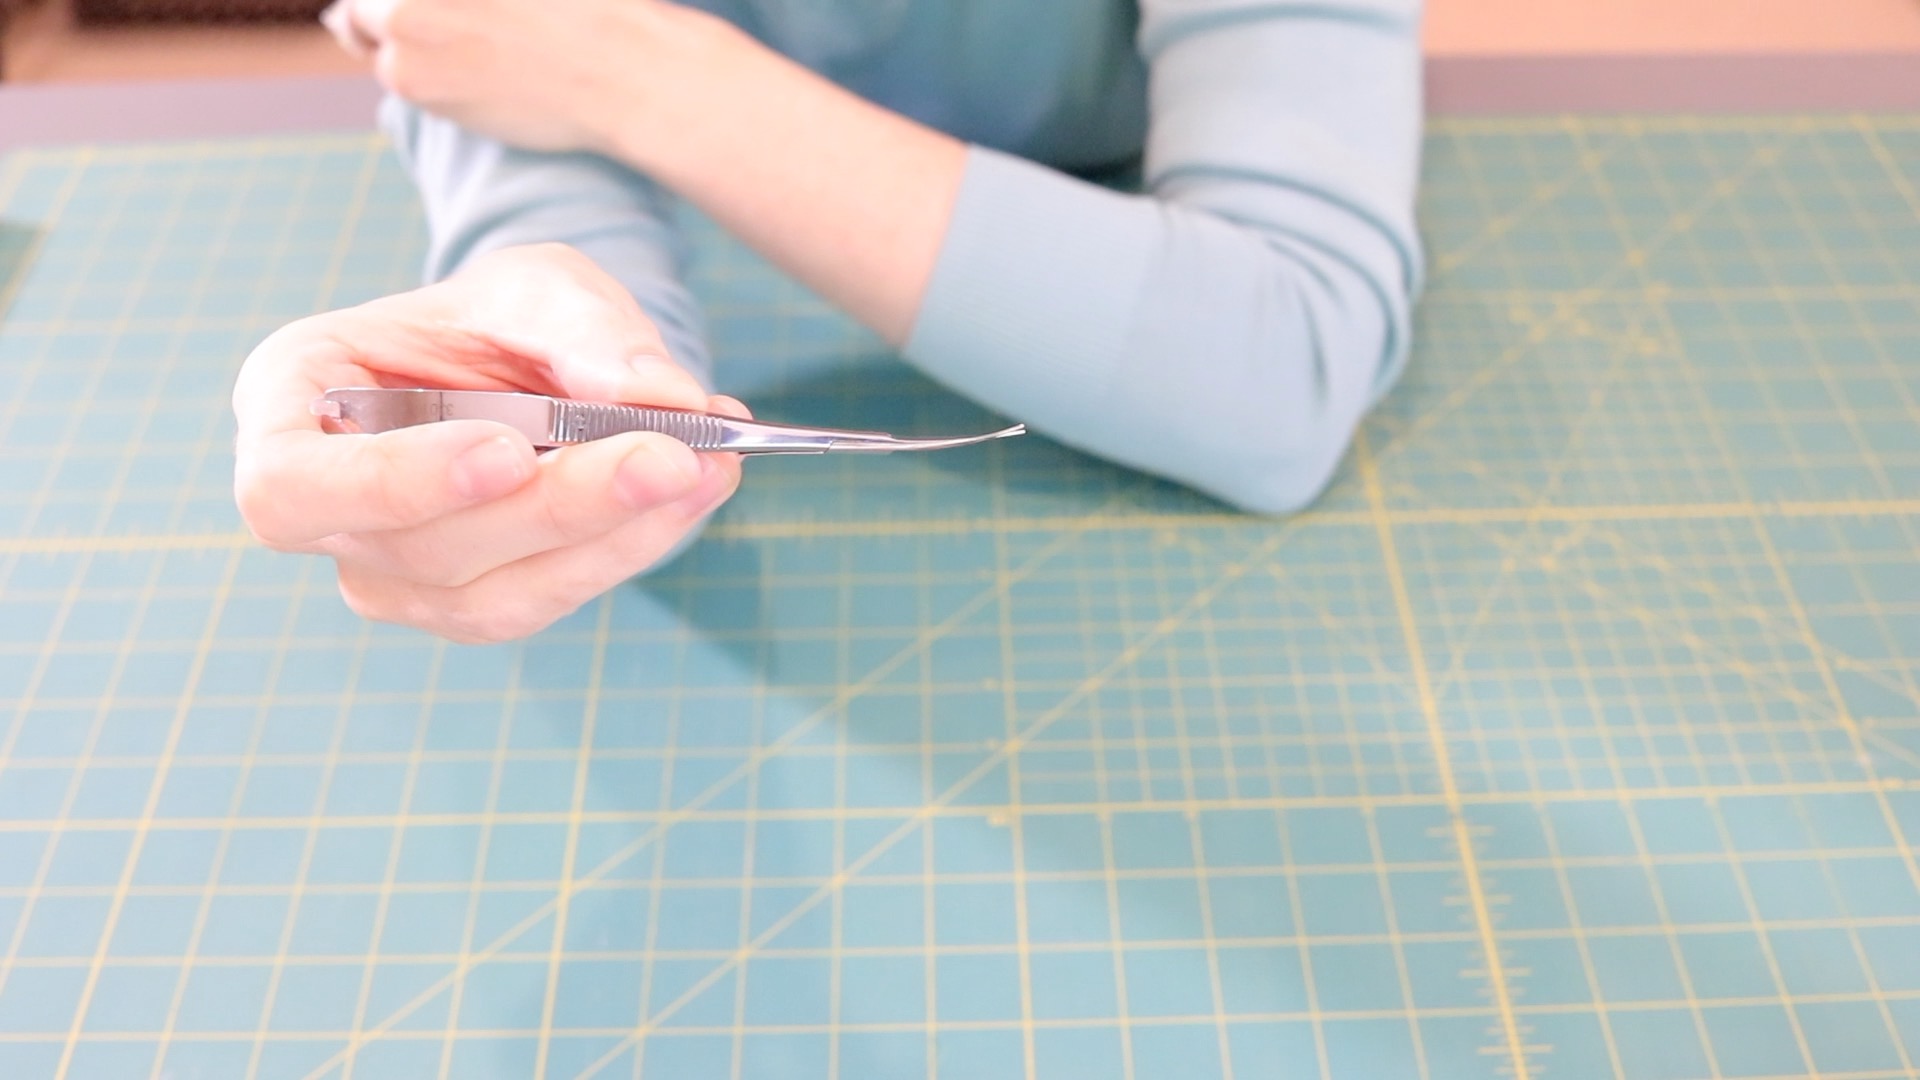
If you are needing to purchase some new thread snips, give these a try. I think you may be surprised at just how much you love them.
Rotary Cutter
I have quite a collection of rotary cutters. This is the newest one to my collection and the only one I really use anymore.
At first I was hesitant to spend the money, but I’m really glad I did. It is by far my favorite and the only one I find myself reaching for.
I will be sharing two different rotary cutters with you, and you can choose the one that best suits your budget.
Quilters Select Rotary Cutter by Alex Anderson
- This rotary cutter weighs more than the standard rotary cutter. It’s all metal parts.
- The handle is really nice to hold. Has silicone inserts for a comfortable grip that won’t slip.
- Easy to change the blades.
- Press the button on the handle and “tap” the blade on your cutting surface to engage the blade to cut.
Quilters Select Rotary Cutter
- When you’re finished cutting, just flip the rotary cutter over and give it a quick tap to disengage the blade back into safety mode.
- The weight of the rotary cutter helps prevent fatigue when cutting. You don’t have to press your weight down as hard to obtain an accurate cut. The weight of this helps with that. I think that’s the number one reason I like this so much.
- Pretty expensive for a rotary cutter? Yes. Yes indeed. But my dad has always taught me that if you buy quality upfront, you won’t have to replace it later. So I made the investment.
- These rotary cutters have a hole on the end of the handle so you can hang them on a notions wall in your sewing or craft room. Love this feature. I don’t personally hang my rotary cutters or scissors but most of my sewing friends do. So I’d consider this a bonus.
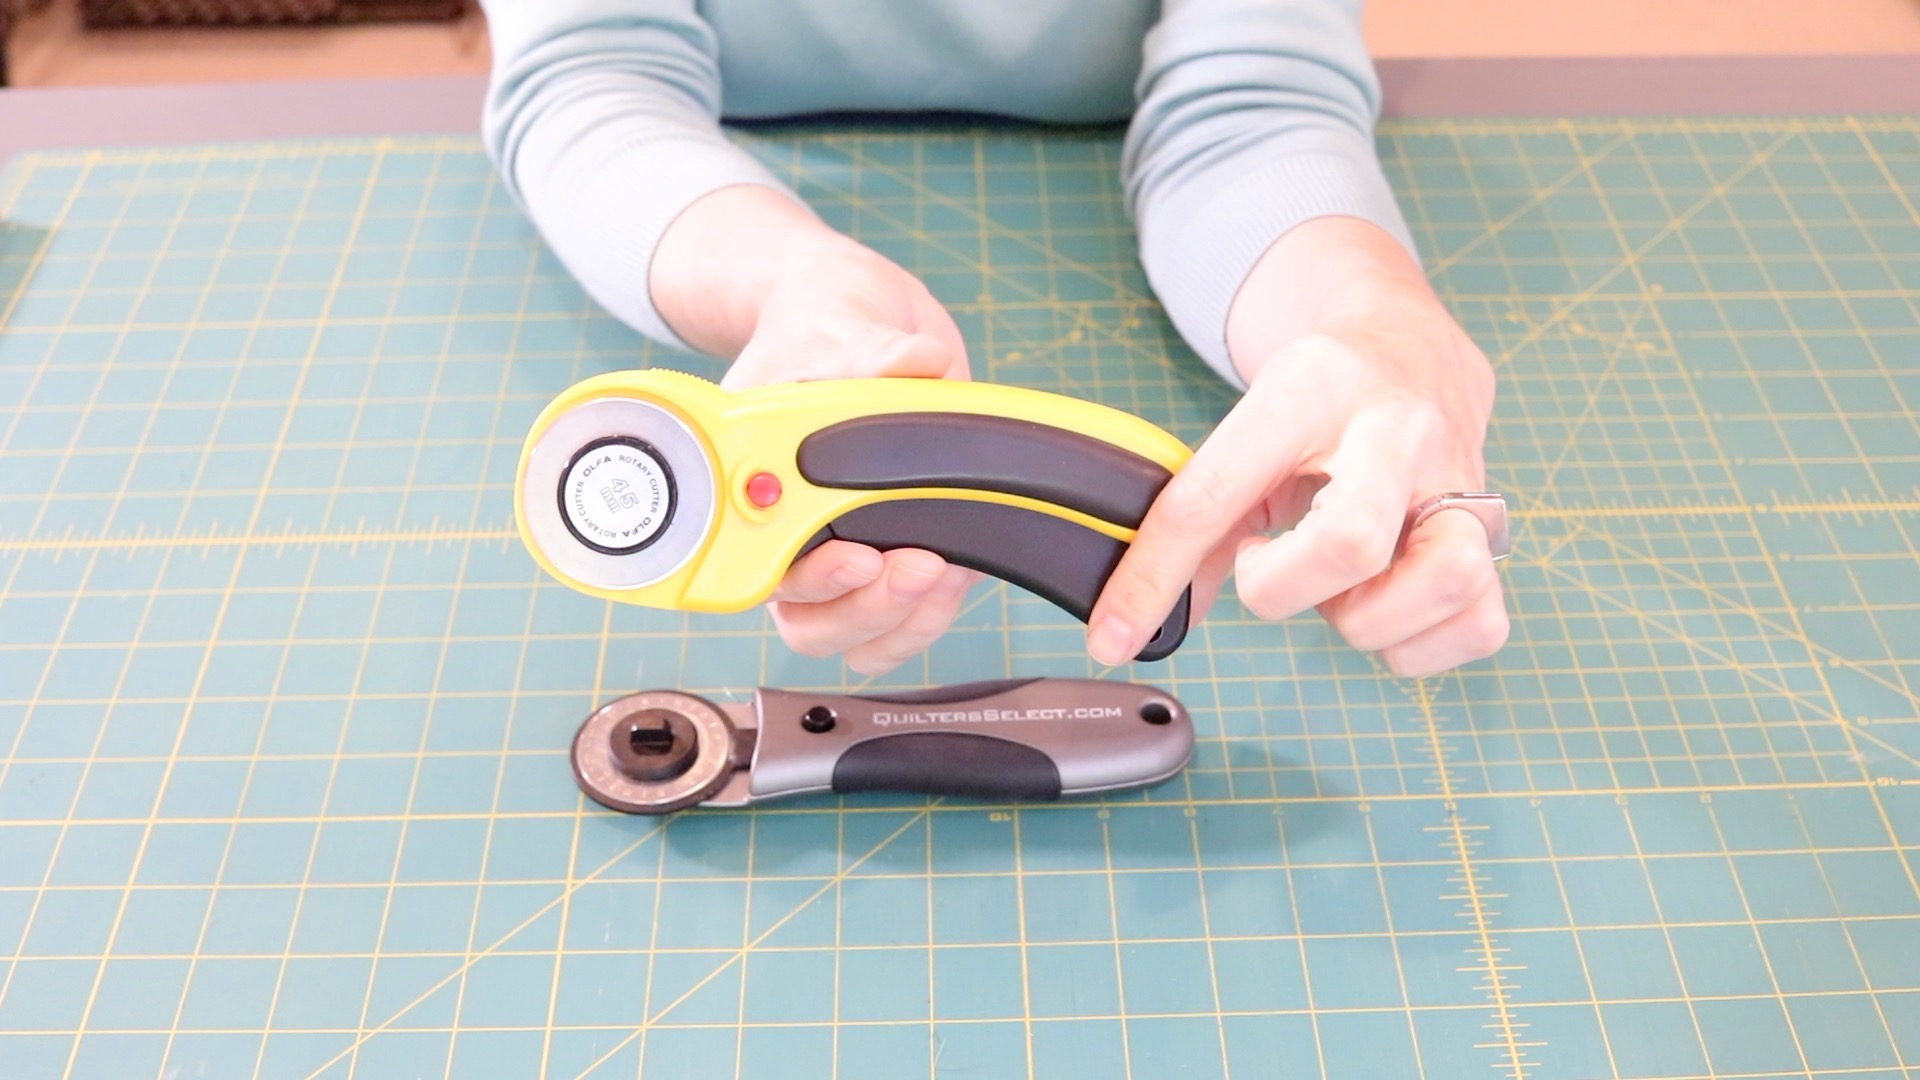
If you are looking for a more affordable, but ergonomic rotary cutter, try one of these Olfa rotary cutters. These are the only rotary cutters I used prior to purchasing the quilters select brand.
- Fraction of the price, ergonomic, and easy to use.
How To Use:
- Squeeze the handle to engage the blade to cut. Release the handle and the blade returns to safety mode.
I honesty believe that these are a close favorite to the Quilter’s Select brand. If I hadn’t have found the other one this year at the sewing expo, I’d still be using my Olfa cutter.
Rulers and Tape Measures
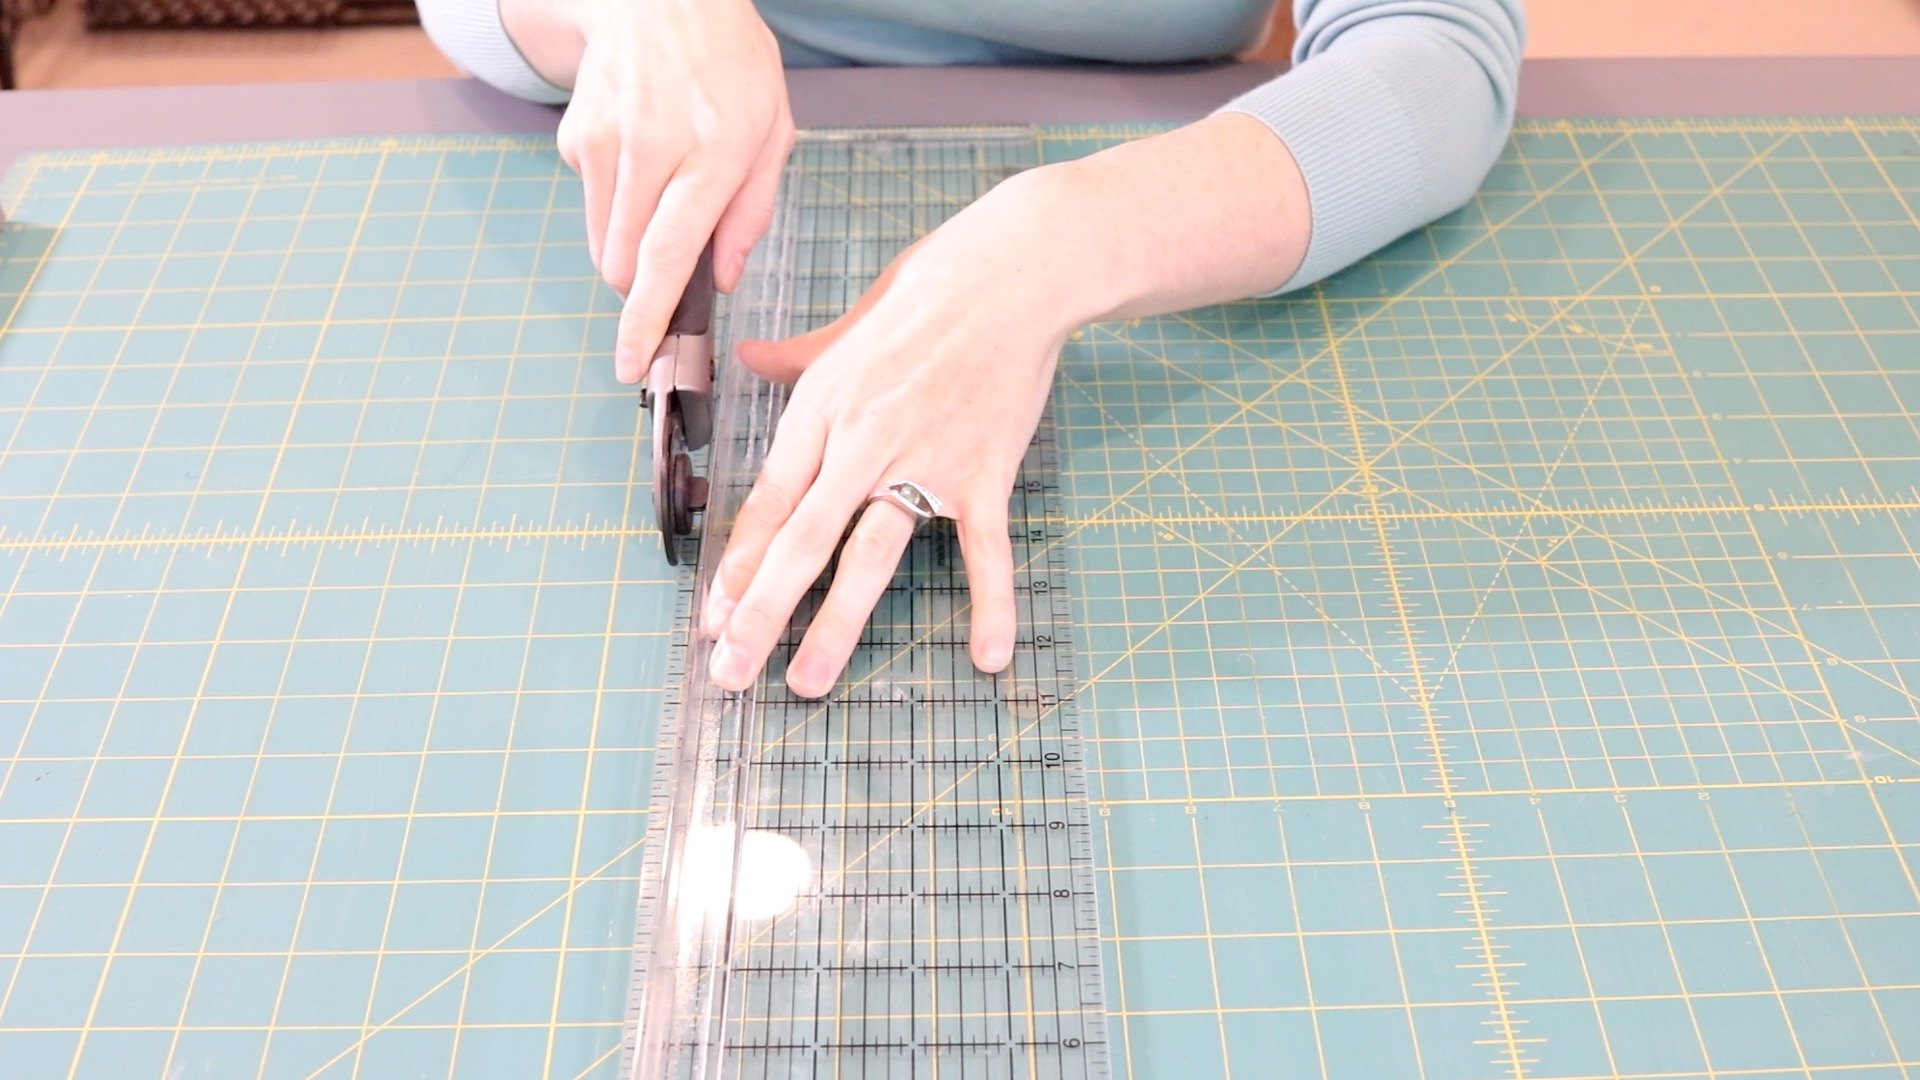
Acrylic Quilting Rulers
Clear acrylic quilting rulers make cutting pieces and strips for quilts so simple.
Like everything, there are many different versions of these rulers, but the lip edge rulers are my all-time favorite.
O’Lipfa Ruler with Lip Edge
These rulers are going to help with accuracy and change the way you look at all your other rulers.
These rulers are made of clear acrylic plastic. This makes them really easy to read and use. The lip edge on the end of the ruler hooks onto the edge of your cutting mat making it easy to keep your cutting lines super straight.
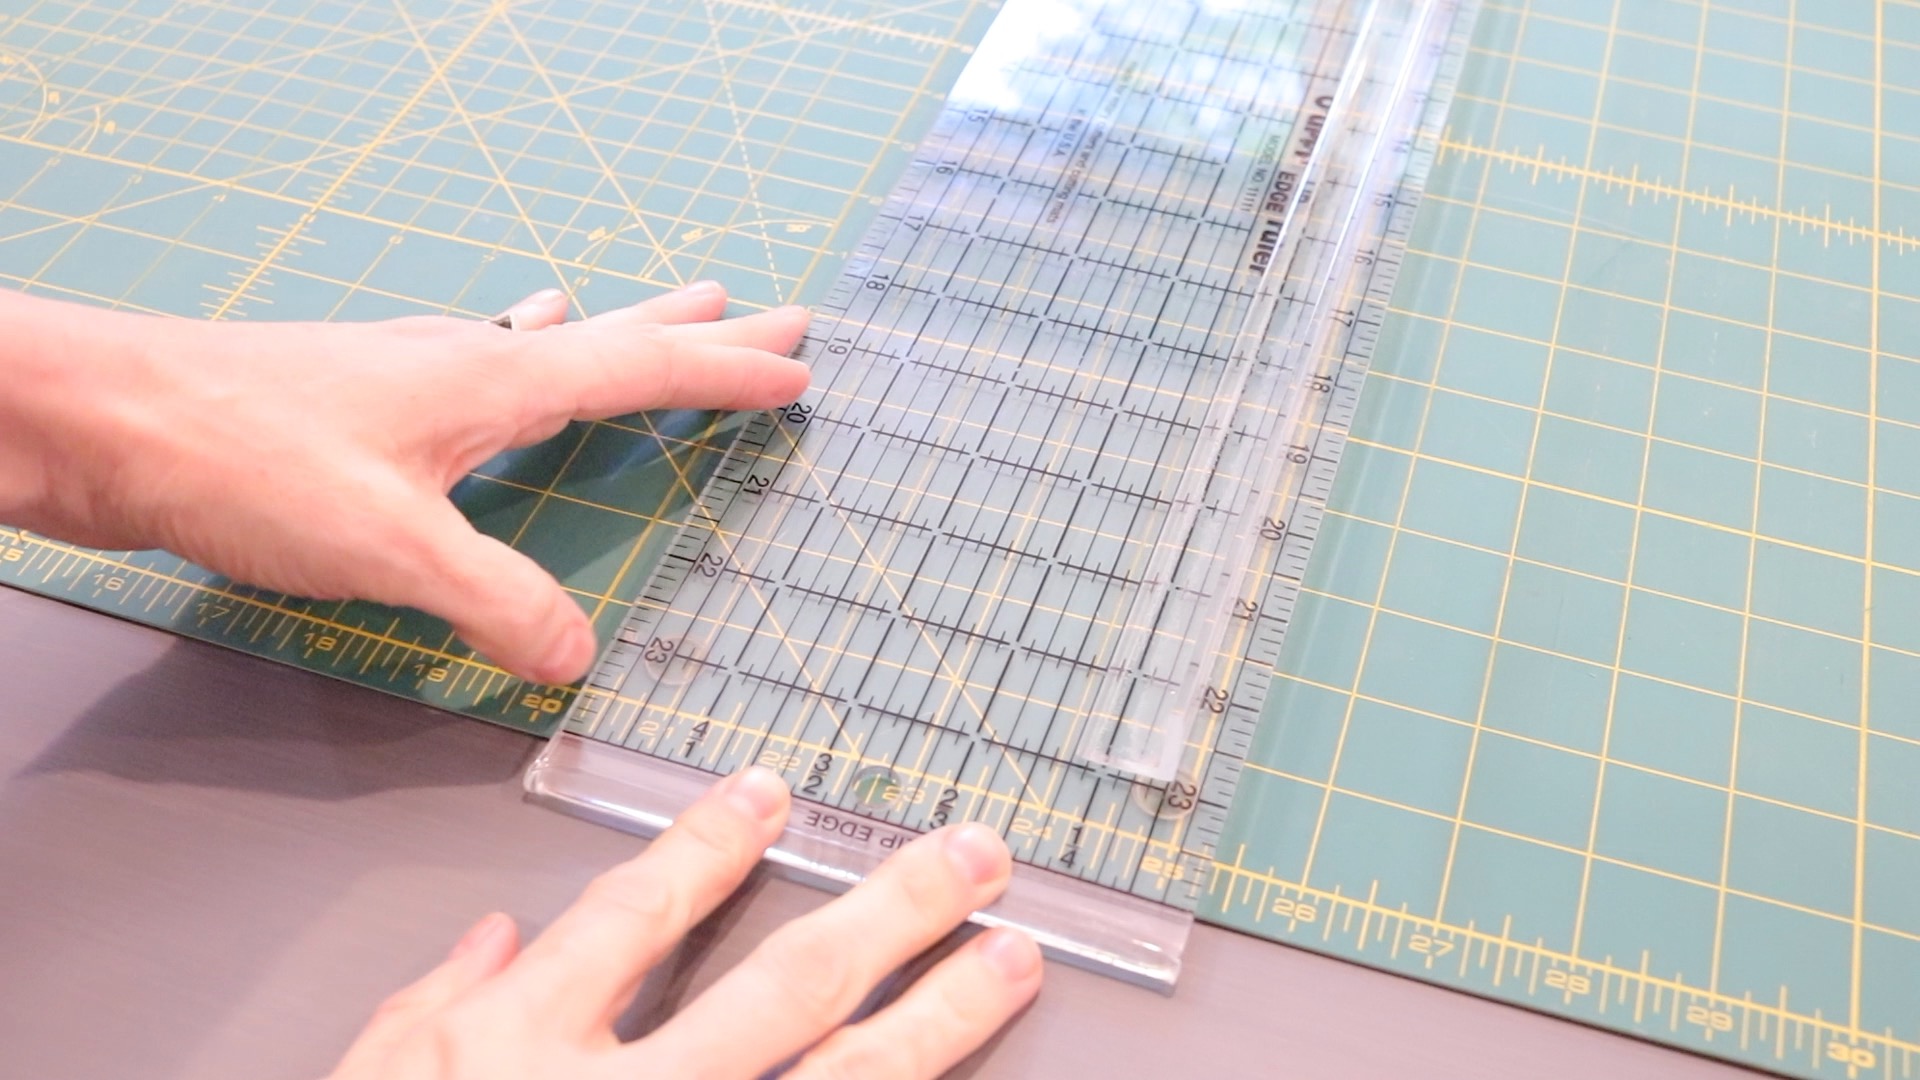
You can find the guide to attach your rotary cutter HERE. It’s also made by O’Lipfa (pictured below).
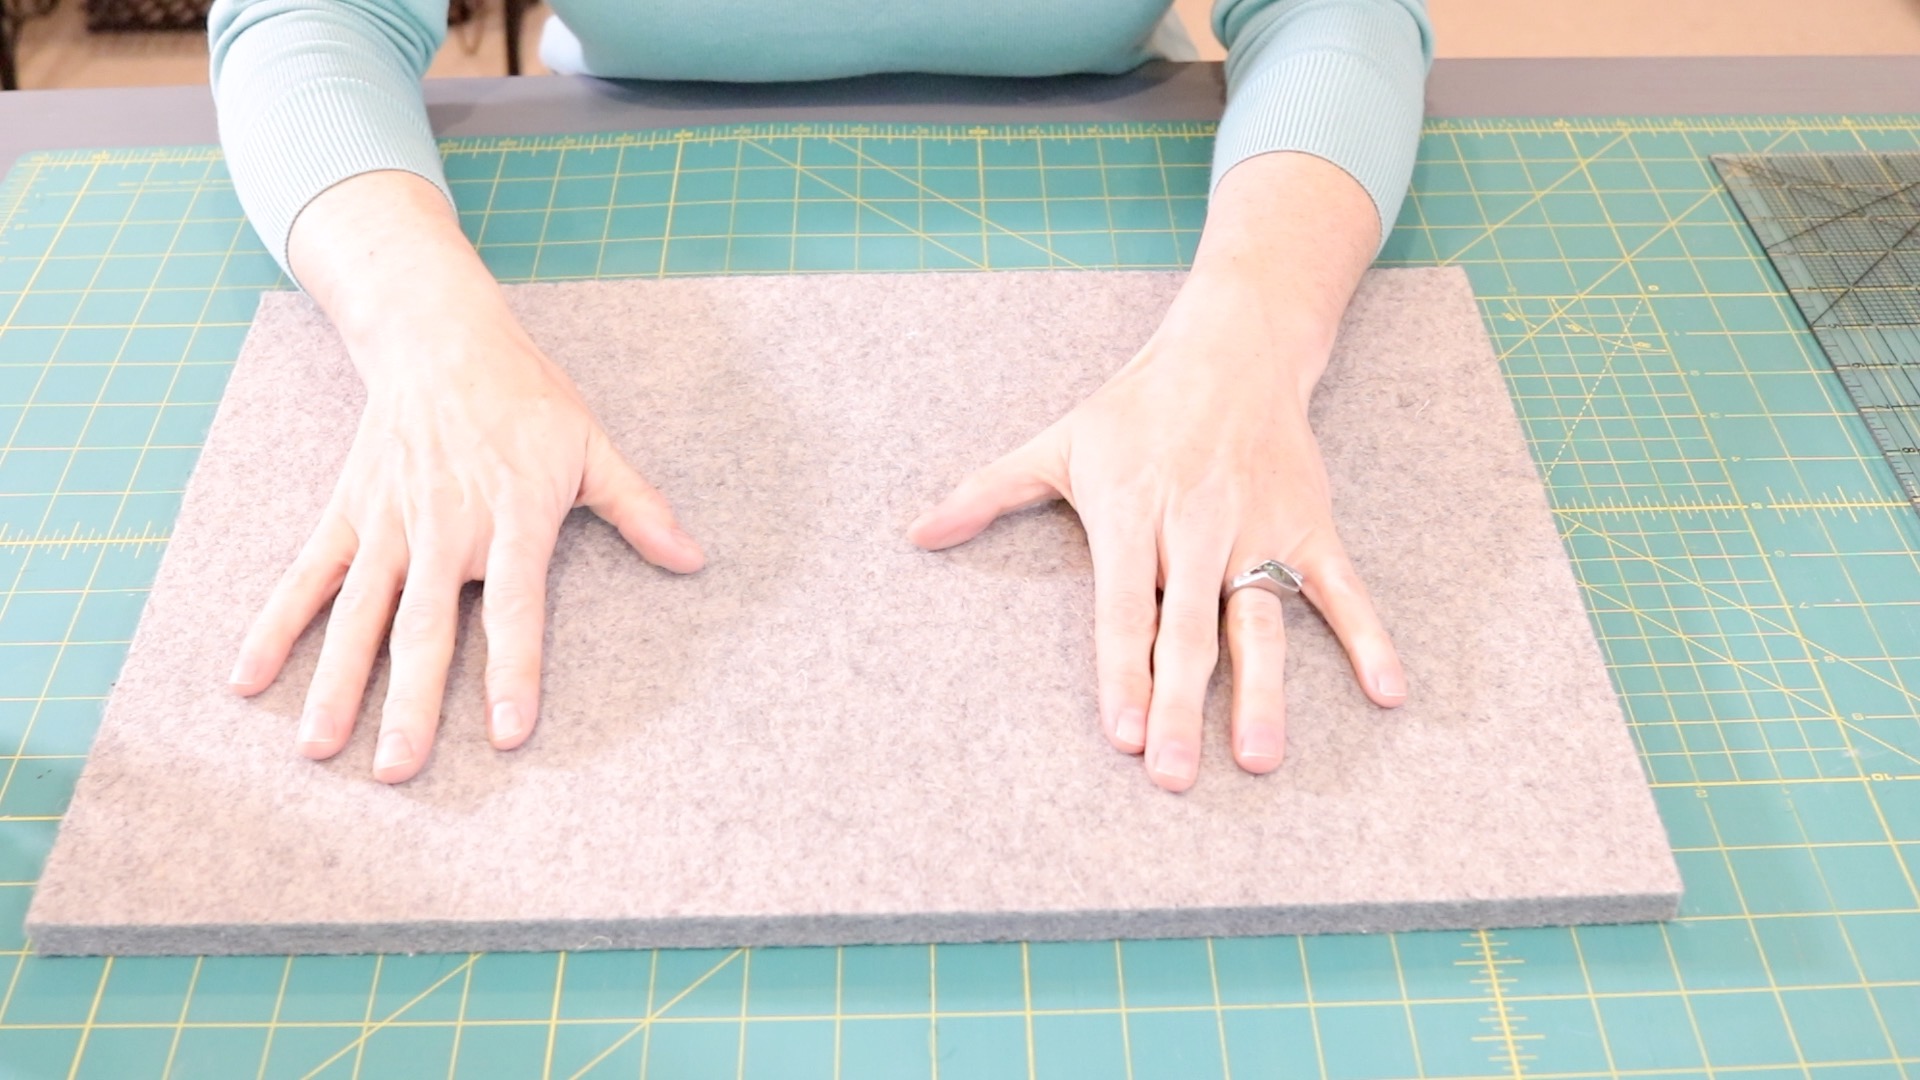
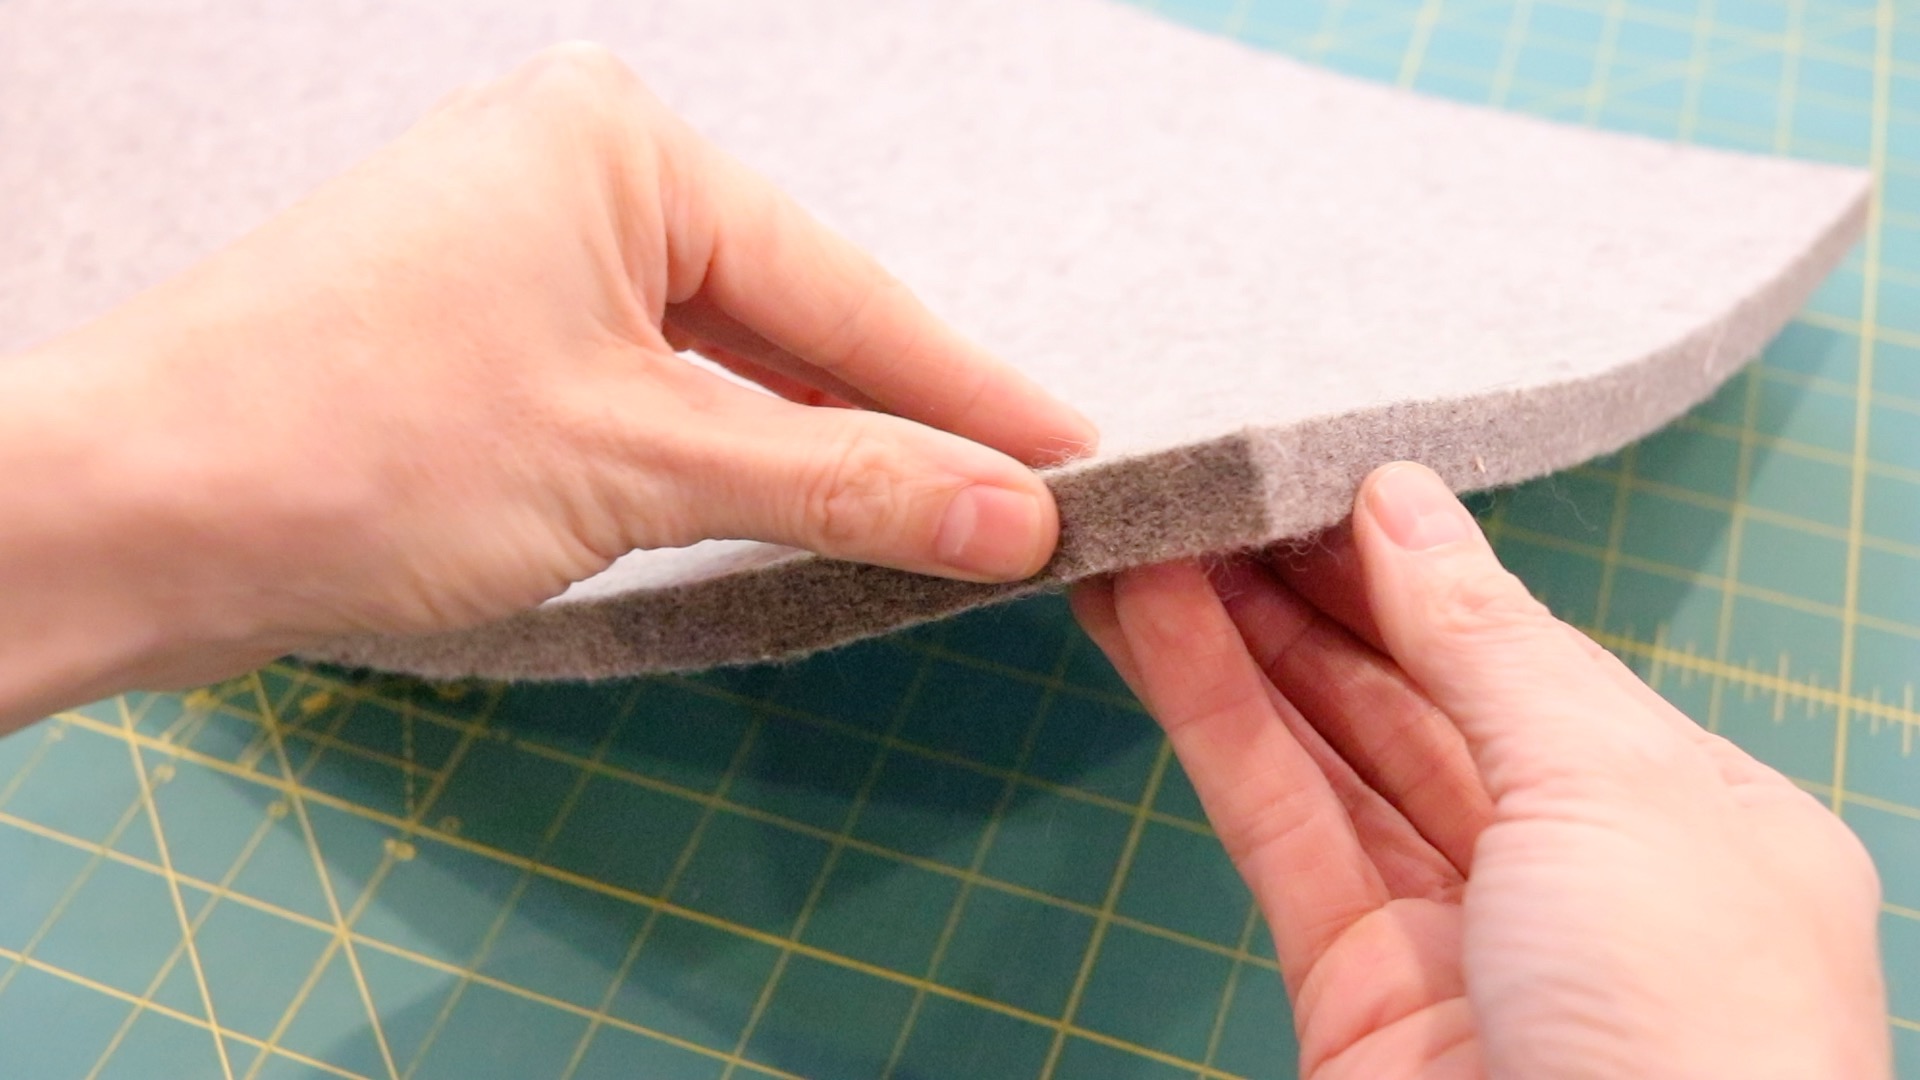
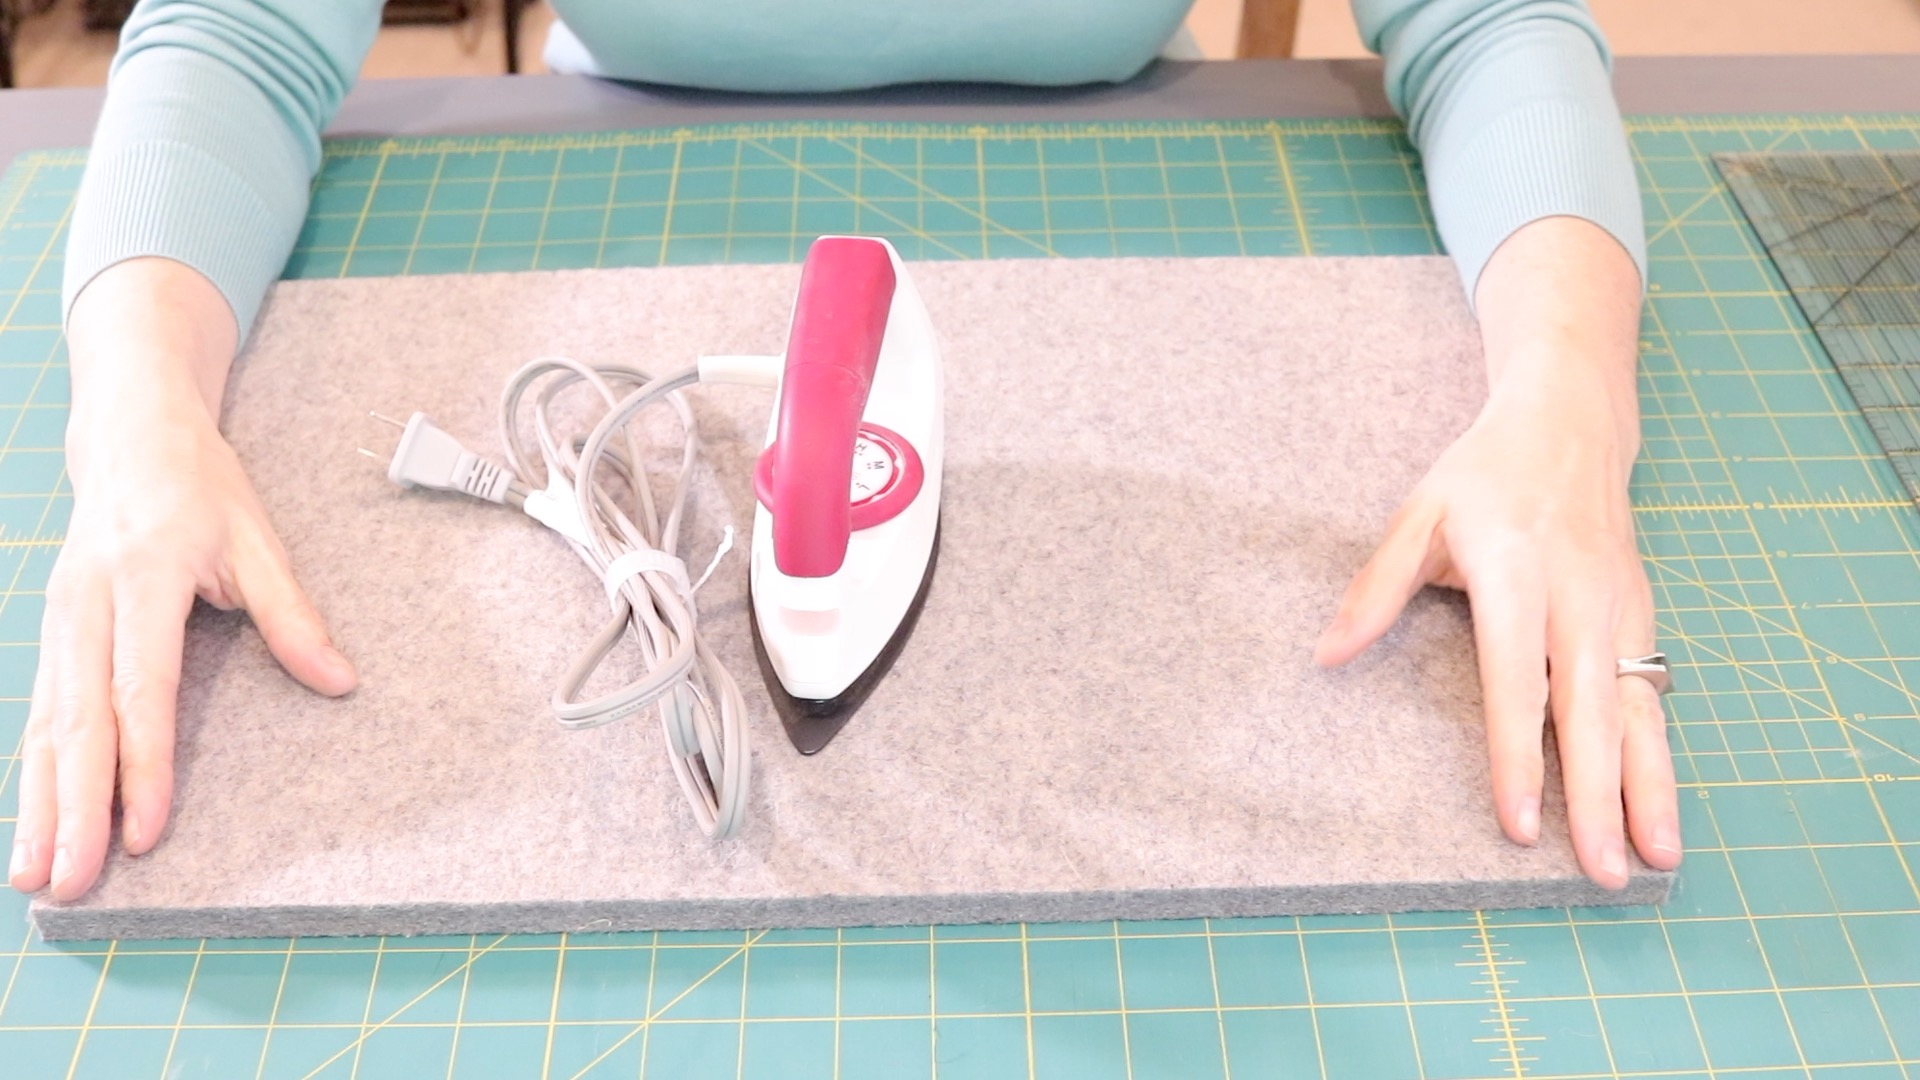
Must-Have Sewing Supplies- Wool Pressing Mat
Wool Pressing Mat
Wool pressing mats have only recently become really popular. I have had mine for only 6 years or so.
The Pam Damour Wool Pressing Mat and Clover Mini Steam-less Iron.
OK. First things first. The wool pressing mat. They are NOT all created equal. How do I know? I purchased three other mats that were definitely lacking in quality before I settled on the Pam Damour version.
Don’t make the same mistake I did and try to purchase a slightly less expensive one. The other versions I got were not very dense and honestly didn’t smell like wool. This led me to believe that they were not 100% felted wool.
I also wasn’t able to find anything on the packaging that said they were in fact wool. Oddly enough they were advertised as such, but when I received them I was really disappointed.
Benefits of a wool pressing mat
- This mat contains dense wool fibers that trap heat. This allows you to press both sides at the same time.
- Because these are felted wool, they provide a firm surface for pressing quilt squares without stretching your fabric.
Wool is a natural fiber. So if you are sensitive to smells or allergic to wool, obviously I don’t recommend these as safe to use for you.
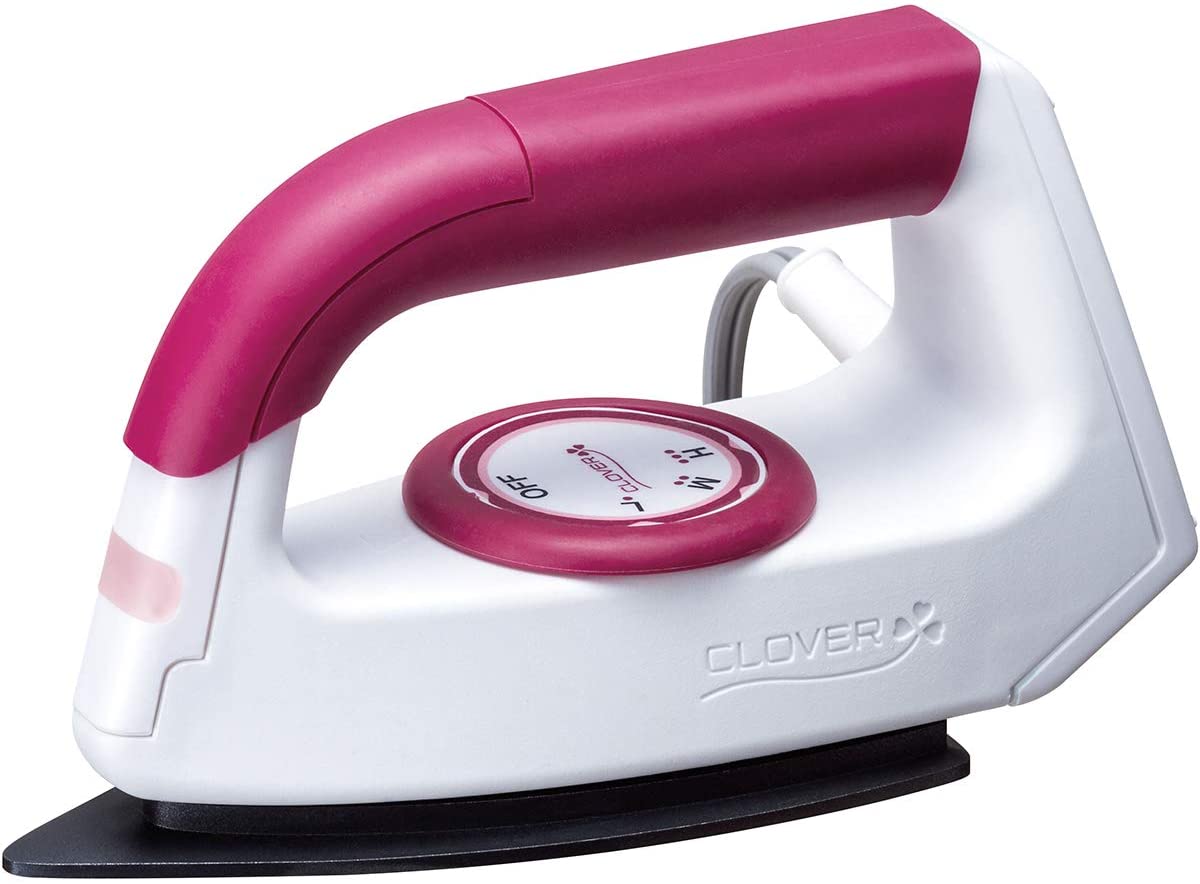
Mini Pressing Iron
Next up is the Clover wedge iron. I just call it my mini iron.
I currently own two different mini irons. This is the one I reach for most but both of them work great.

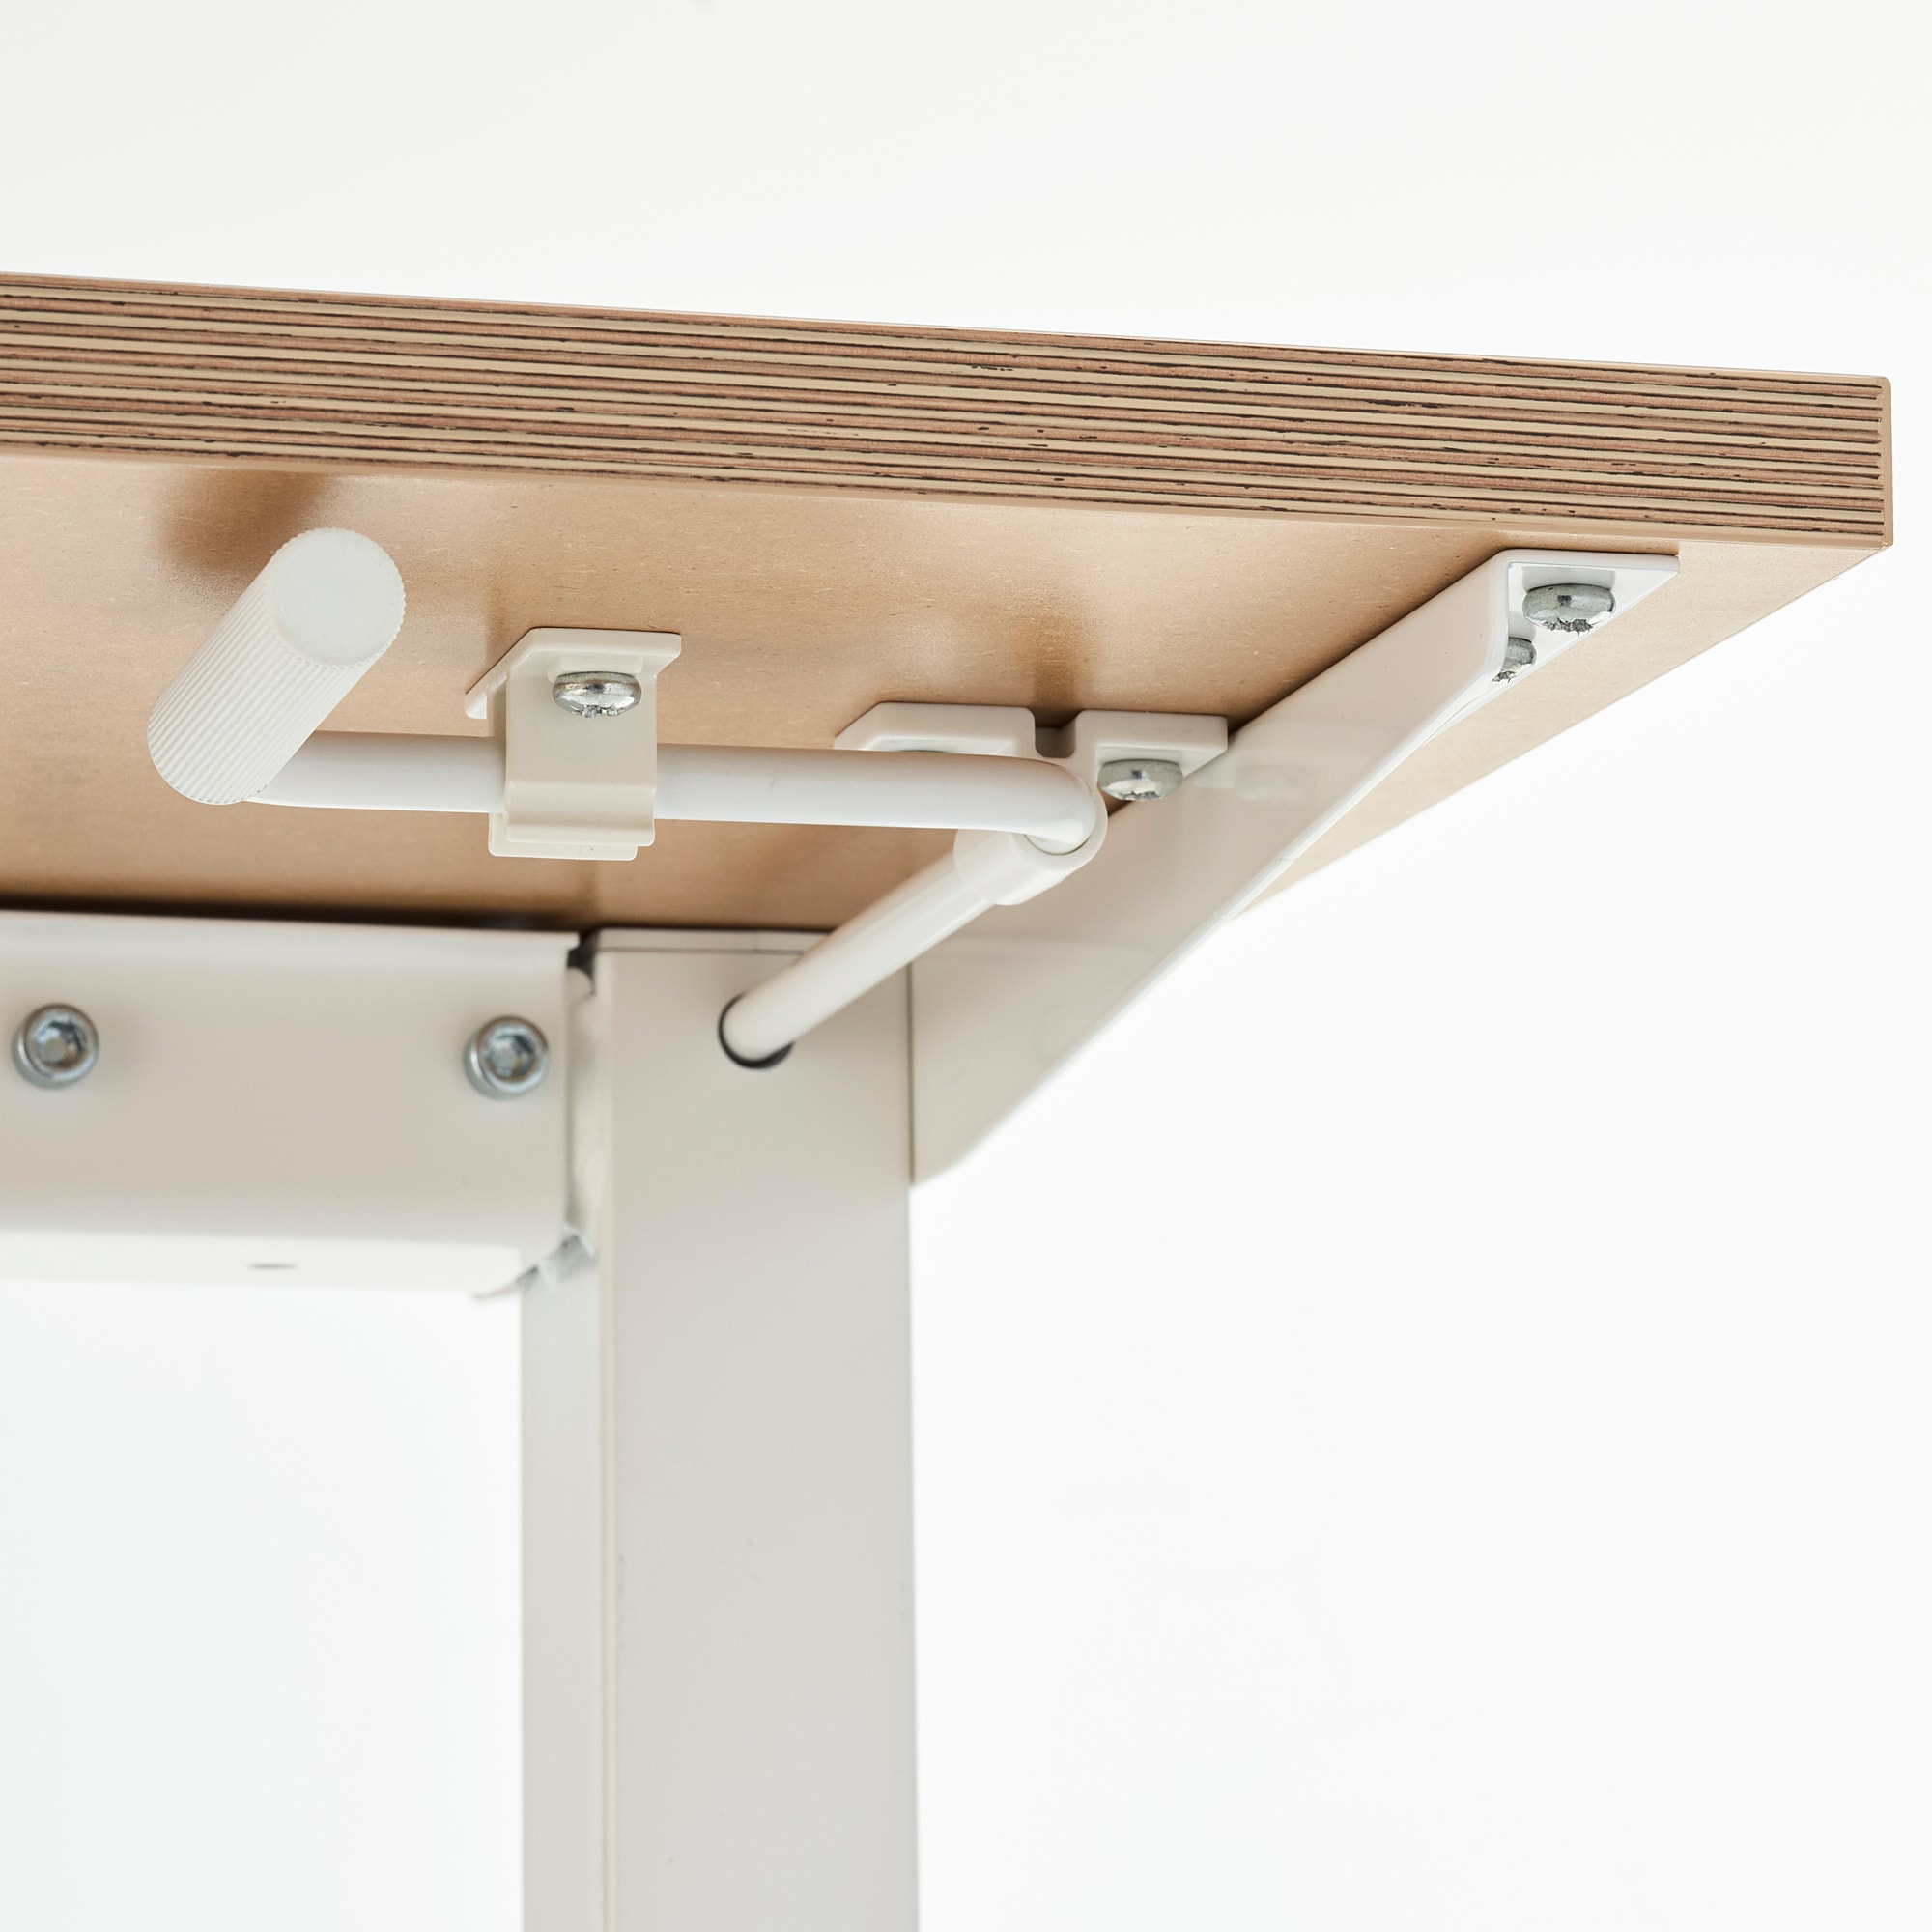
Height Adjustable Sewing Table
The Ikea Skarsta sit-to-stand desk makes the perfect sewing table.
- Height adjustable. This feature makes it easy to use as a cutting table or a sewing table in any height that is comfortable for me.
Often times when I’m spending hours sewing, it’s nice to be able to stand a sew for a bit.
I own two of these tables and have never regretted the purchase.
These tables are available with a white base or a dark (almost black) color. I opted for white with a solid wood top.
You can also purchase this desk with a melamine top (in white). Check your local Ikea store for availability.
If you are looking to buy one of these desks but it isn’t in the budget? Check your local Facebook marketplace or craigslist for a slightly used one.
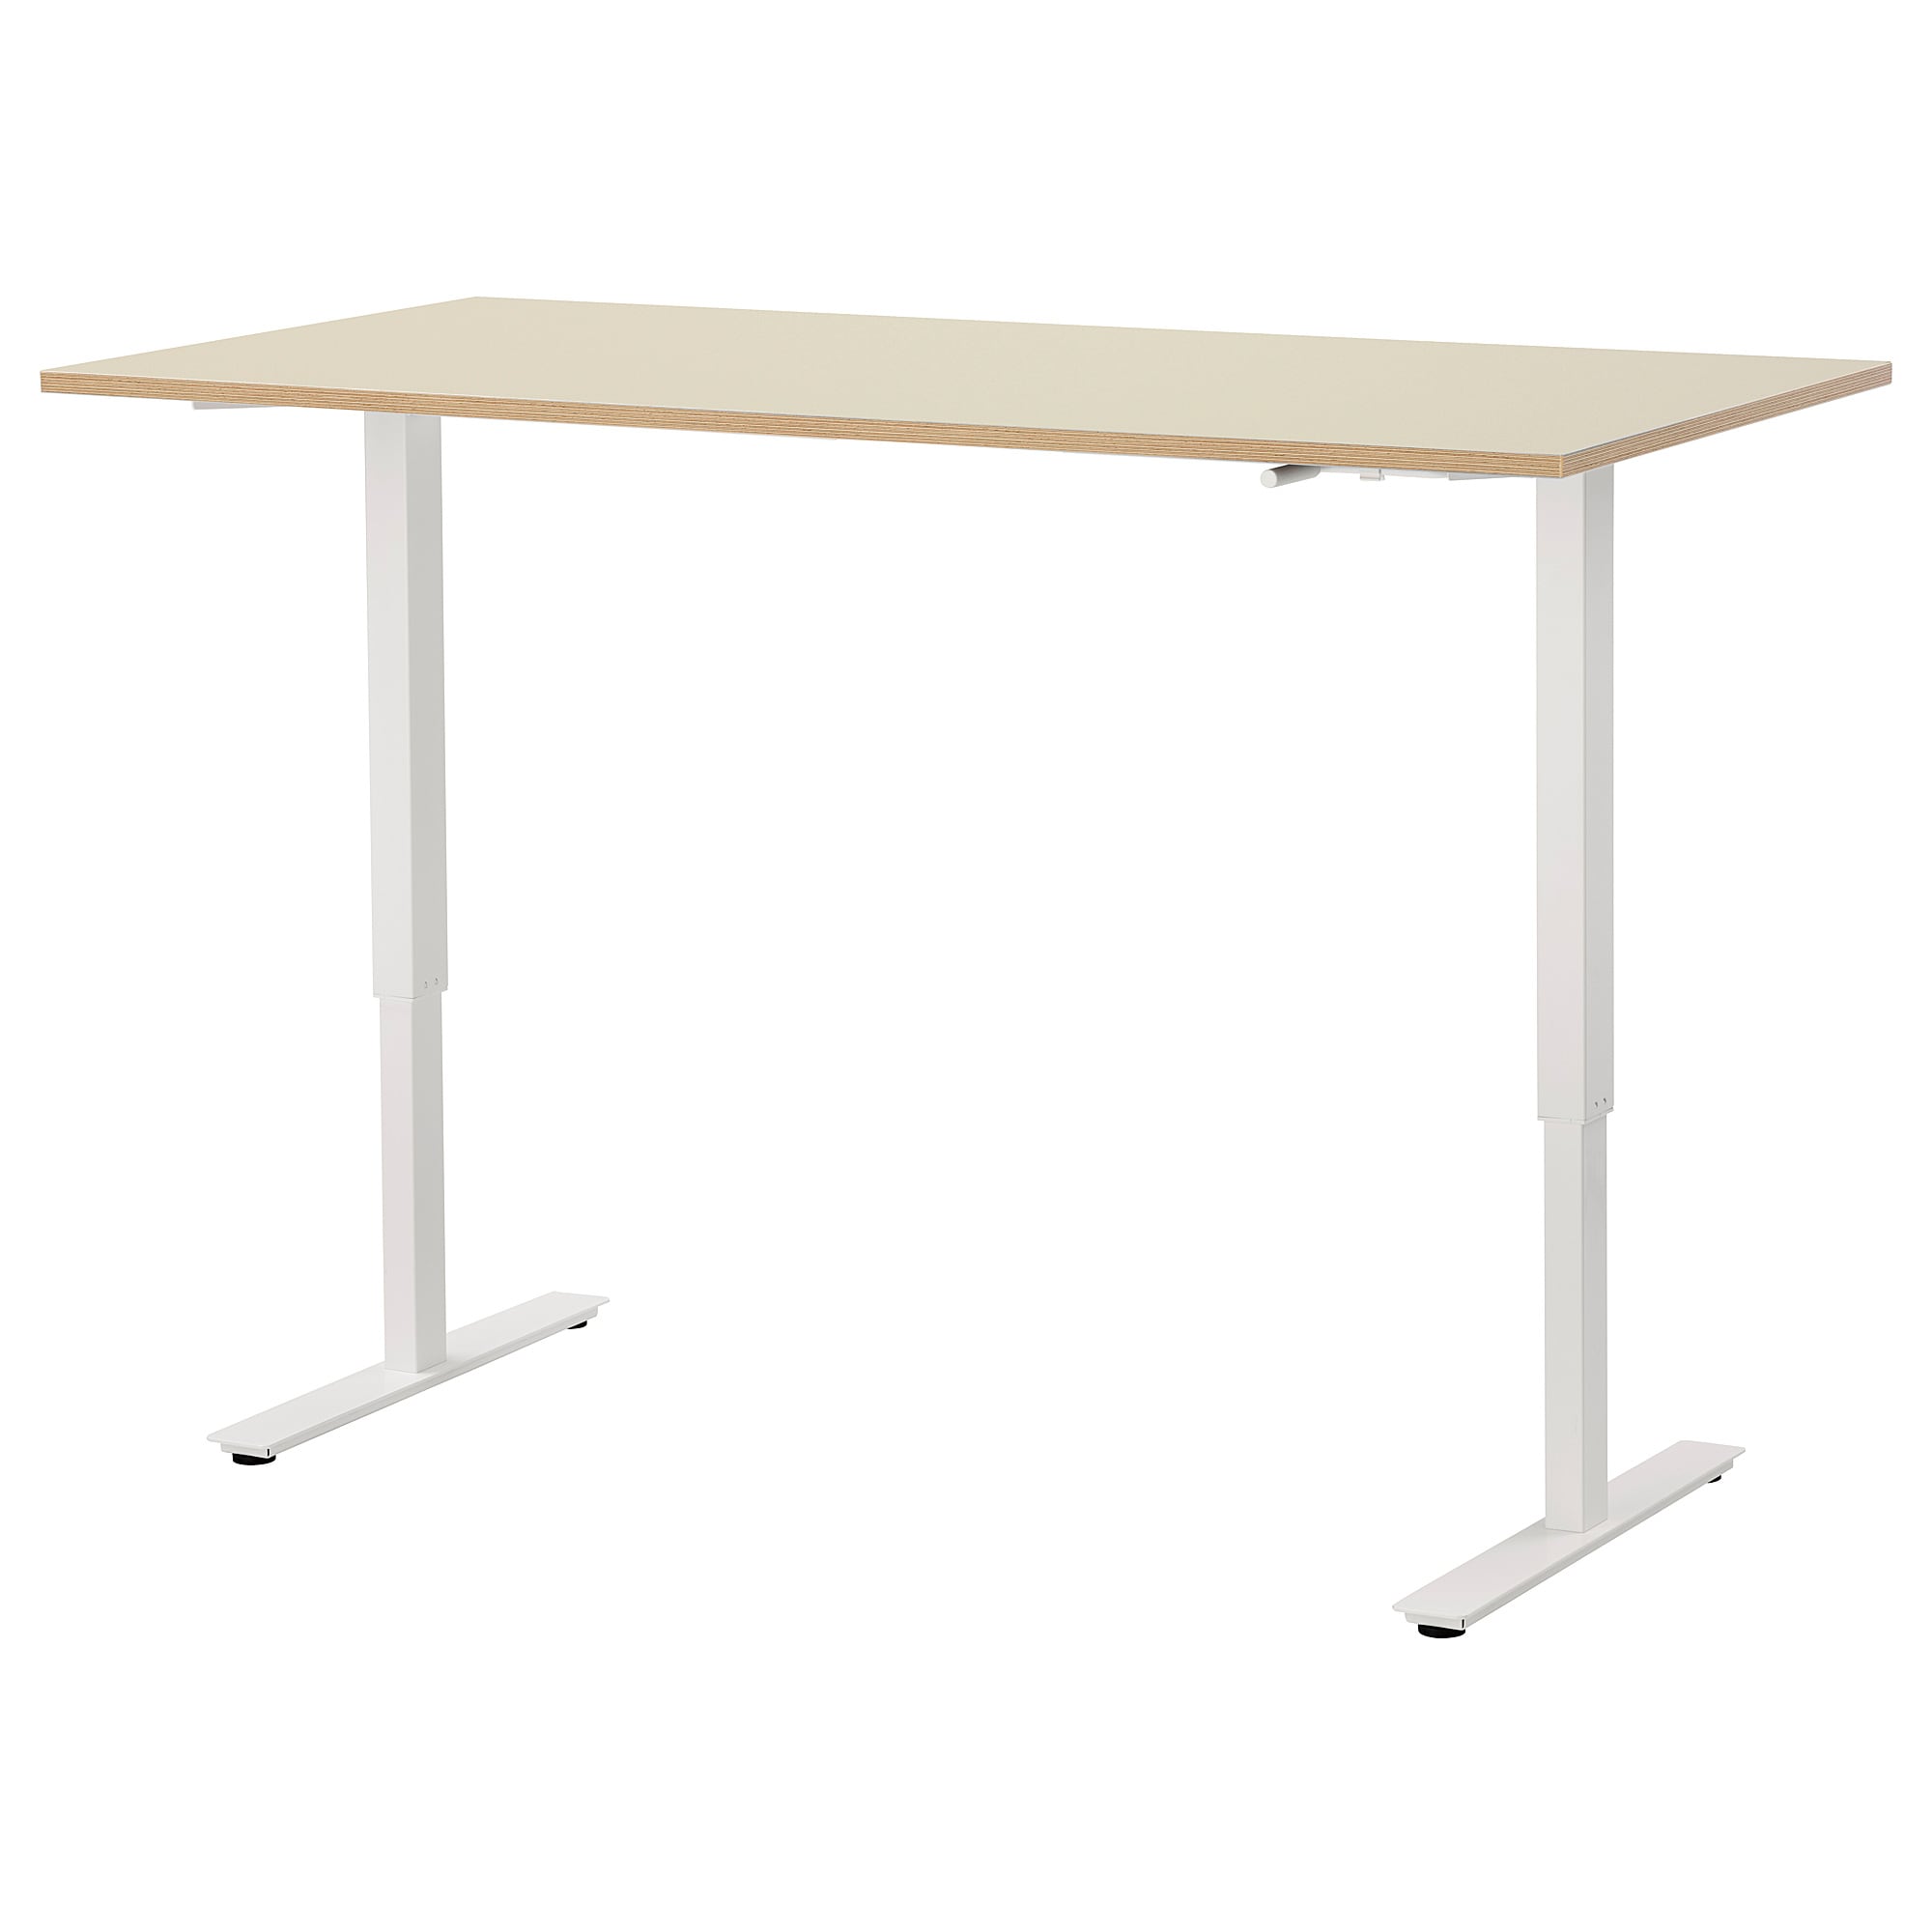
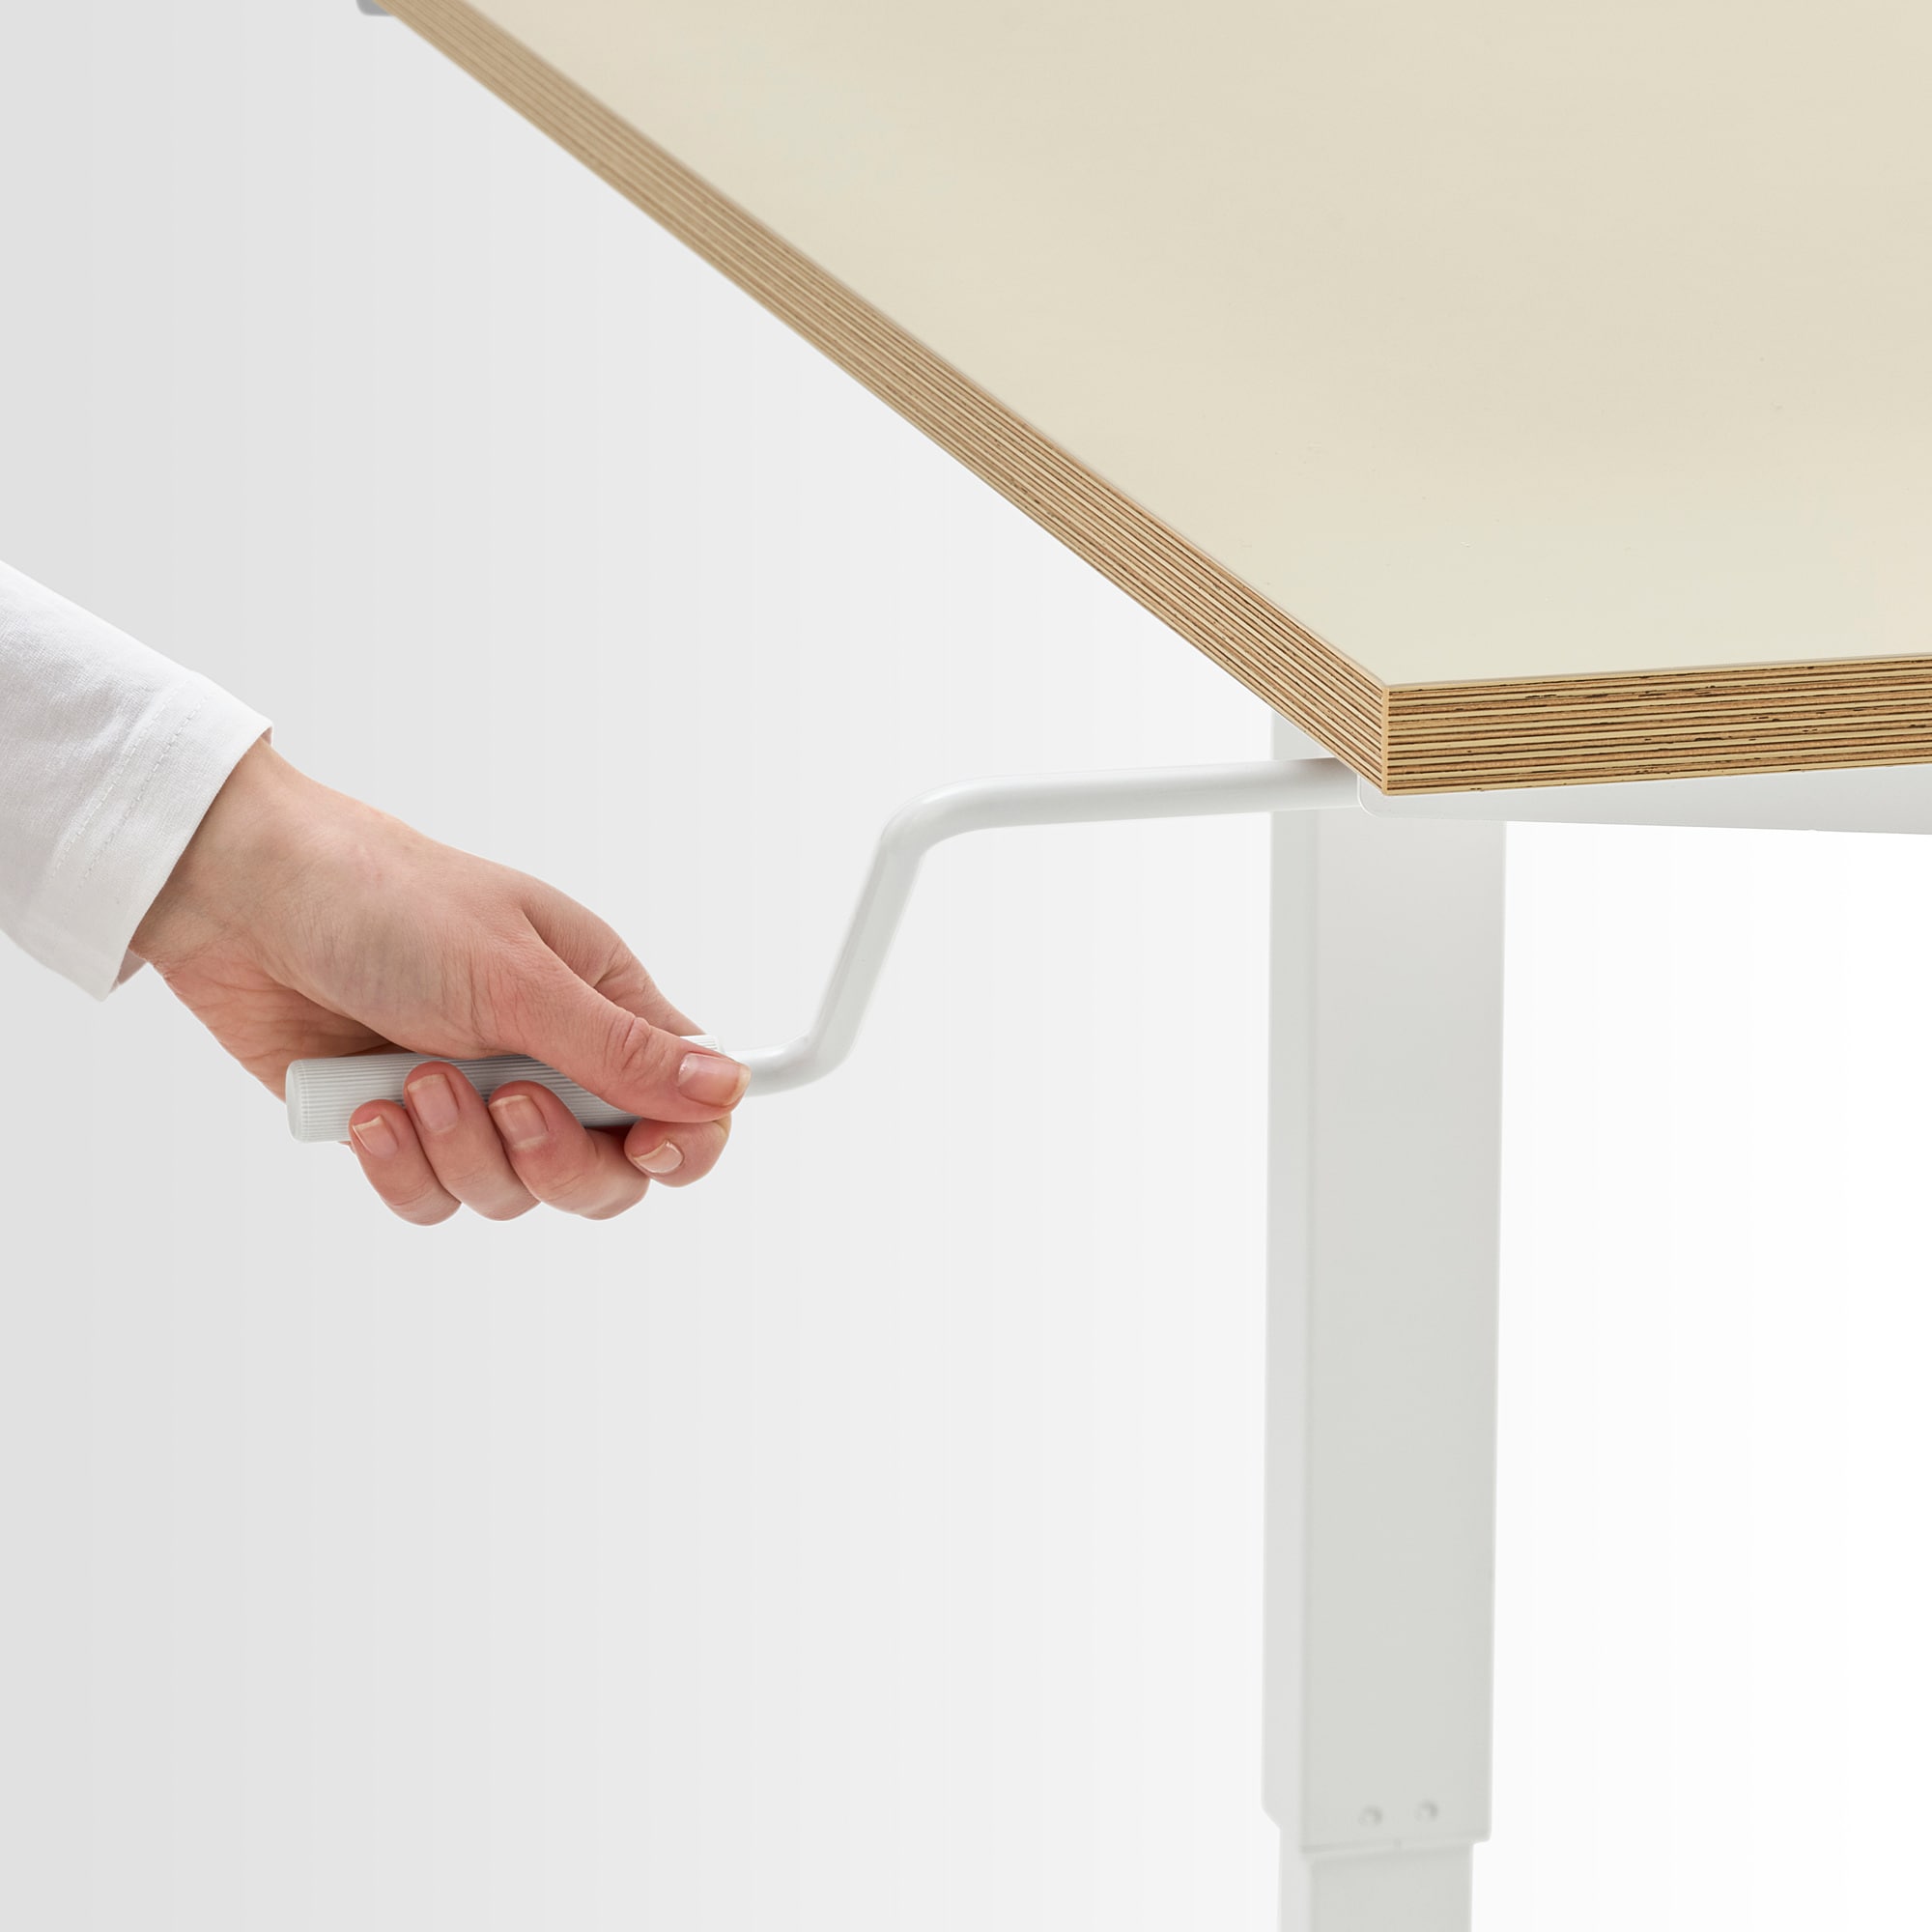
- The smaller IKEA table retails for $249.00 for the smaller table (47.25 inches long by 27.5 inches deep).
- Retails for $279.00 for the larger version (63 inches long by 31 inches deep).
- Height adjustable.
- Perfect height for a cutting station or to stand and sew.
- The Skarsta desk is also available in an electric model. However, it’s quite a bit more expensive. For this reason, I chose to purchase the crank model instead.
Considerations for the Ikea Skarsta Desk
- Purchase the top and base of the desk separately.
- Heavy-duty construction. Doesn’t tip over easily. Roughly 75 pounds for the larger version.
- Large work surface. Can hold multiple sewing machines.
- White color with a white top or white base with faux wood top.
- Available at IKEA so you can order online for home delivery (for a fee), or order online for in-store pick-up (free).


Hope you all enjoyed seeing this list of my top 10 sewing essentials. I truly love each one of these items and have used most of them for years.
Shop
- Sewing Machine
- Sewing Table
Any firm surface will work for a sewing area. But if you are looking for a height-adjustable option, be sure and check these two out!
I own both, so I can say that they are both equal in value, price, and functionality.
Here are a couple extra things that can help if you are a beginner sewer.
Easy Beginner Sewing Projects
I have done quite a few tutorials on my YouTube Channel as well as here on the blog that are great beginner sewing projects.
- Tote Basket (free pattern included in 2 sizes)
- Fabric Shawl
- Bandana
- Christmas Stocking
- Coasters
Check the “sewing” to find more projects that I’ve done.
Sewing Clothes
Most of the items I have mentioned above you will need to begin sewing your own clothing.
But let me share a quick list that may vary slightly if you are intending on sewing mostly clothes.
- Sewing Machine Needles (size and brand may be specific to your make and model of sewing machine-check your users manual)
- Thread (buy the color you need to coordinate with your sewing project)
- Scissors (for cutting paper patterns)
- Fabric Scissors (for cutting fabric only)
You can use the same pair of scissors to cut your patterns and fabric but I do NOT recommend this option long term.
Using scissors to cut both pattern paper as well as the fabric will result in dull scissors that will need to be sharpened frequently.
- Rotary Cutter (optional but can speed up the process)
- Cutting Mat (if you are intending on using a rotary cutter)
- Clips (pins are fine if you aren’t ready to invest in alternatives)
- Seam Gauge (really helpful for beginners)
- Seam Ripper
OPTIONAL ITEMS FOR CLOTHING SEWING
TIP: You don’t have to use sewing-specific pattern weights. I like to use marble drink coasters instead. They were the same cost as pattern weights, just as heavy and I find they actually work better. Here is one of the sets I have.
As always I will only recommend products that I know, use, and trust.
What were some of your favorite sewing essentials when you were a beginner? Let me know in the comments below.
More Sewing Posts

Beginner Hair Scrunchies
Learn how to sew these beginner hair scrunchies using fabric scraps from your stash.
Photo Credit: Homemade On Our Homestead
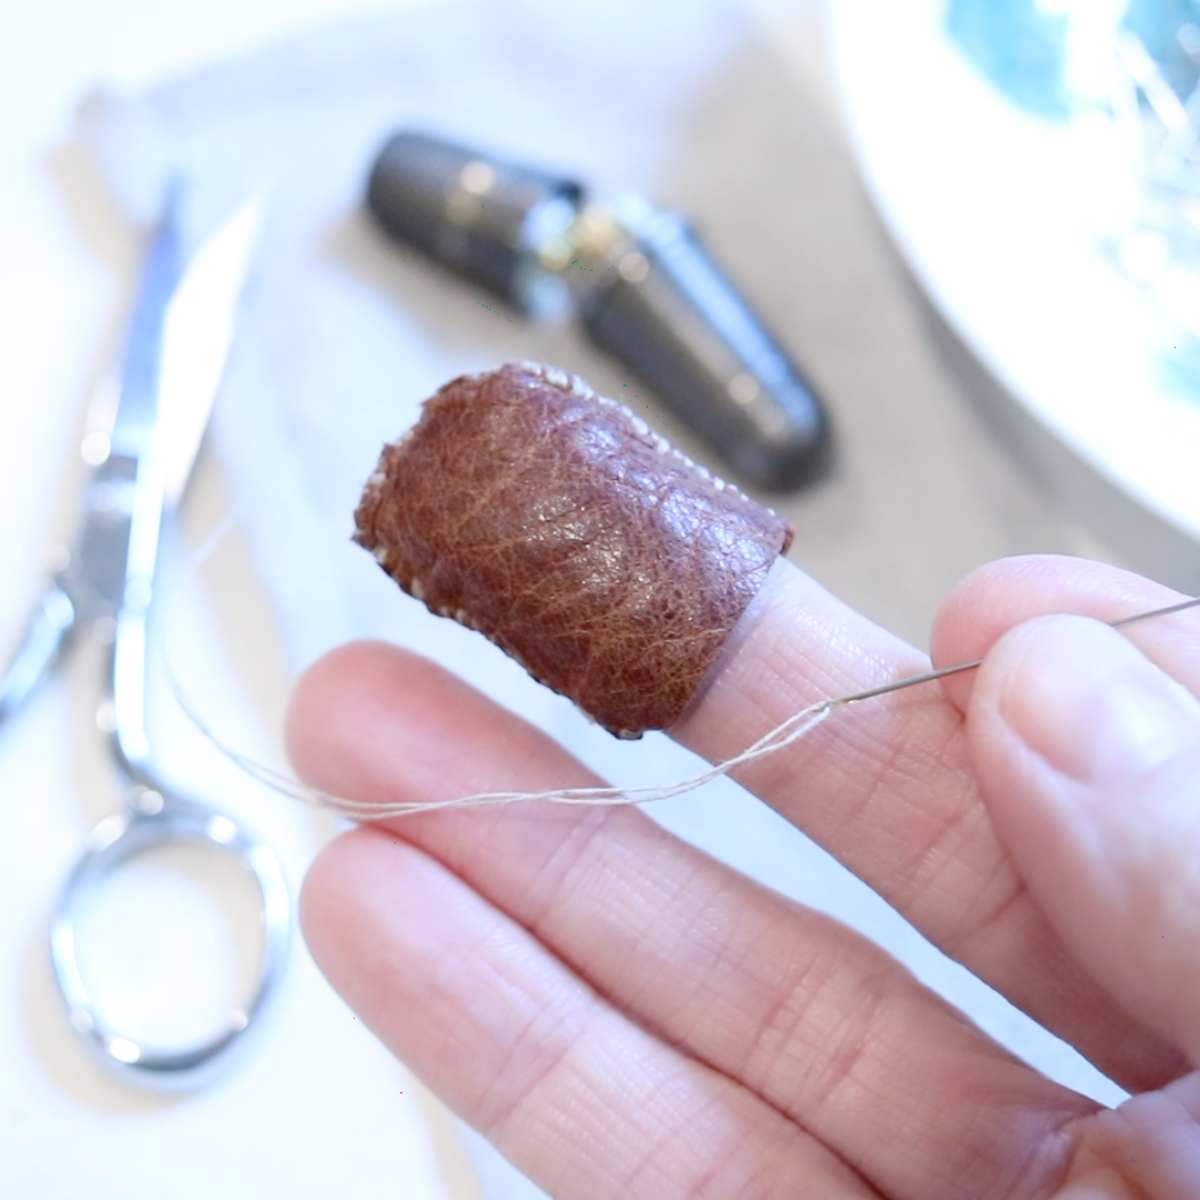
How To Make A Leather Thimble
If you are doing any hand sewing, having a proper fitting thimble is key! Learn how to make your own leather thimble using leather scraps.
Photo Credit: Homemade On Our Homestead