How To Make Wool Dryer Balls
Wool dryer balls are essential to any natural laundry routine. Today I’m sharing how to make wool dryer balls so you can enjoy the benefits of them too.
This is a really simple project that is super budget-friendly and will save you time and money.

Some of these links are affiliate links. You can read my full disclosure HERE.
Why Use DIY Wool Dryer Balls
DIY wool dryer balls are a great eco-friendly and natural alternative to conventional fabric softeners and dryer sheets. Making your own is fun, cost-effective, and a great craft project that kids can help with.
Homemade Felted Wool Dryer Ball Benefits
Wool dryer balls help your clothes dry faster by separating your clothes in the dryer, allowing the heated air to circulate better. This not only saves energy but also reduces drying time, which is good for both the environment and your budget.
Felted wool dryer balls also help reduce static cling in your laundry. As they tumble around, they capture static and prevent your clothes from sticking together.
Since wool is a natural material, you can eliminate synthetic chemical-filled dryer sheets and other store-bought fabric softeners.
Another benefit of wool dryer balls is their ability to soften your clothes. As they bounce around with your wet laundry, they help to soften fabrics and reduce wrinkles.
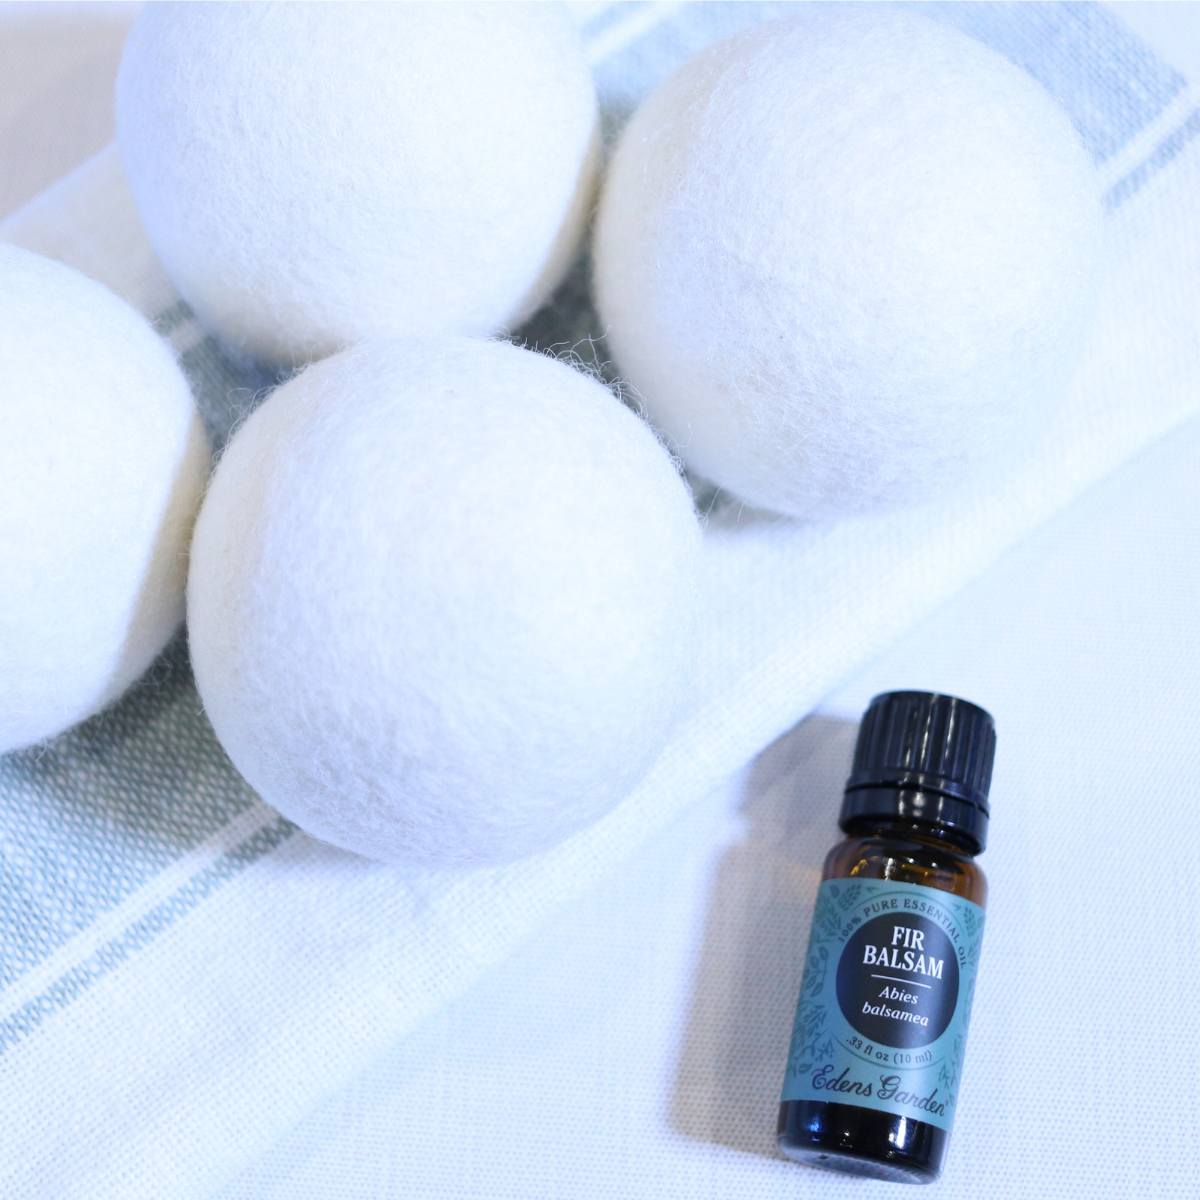
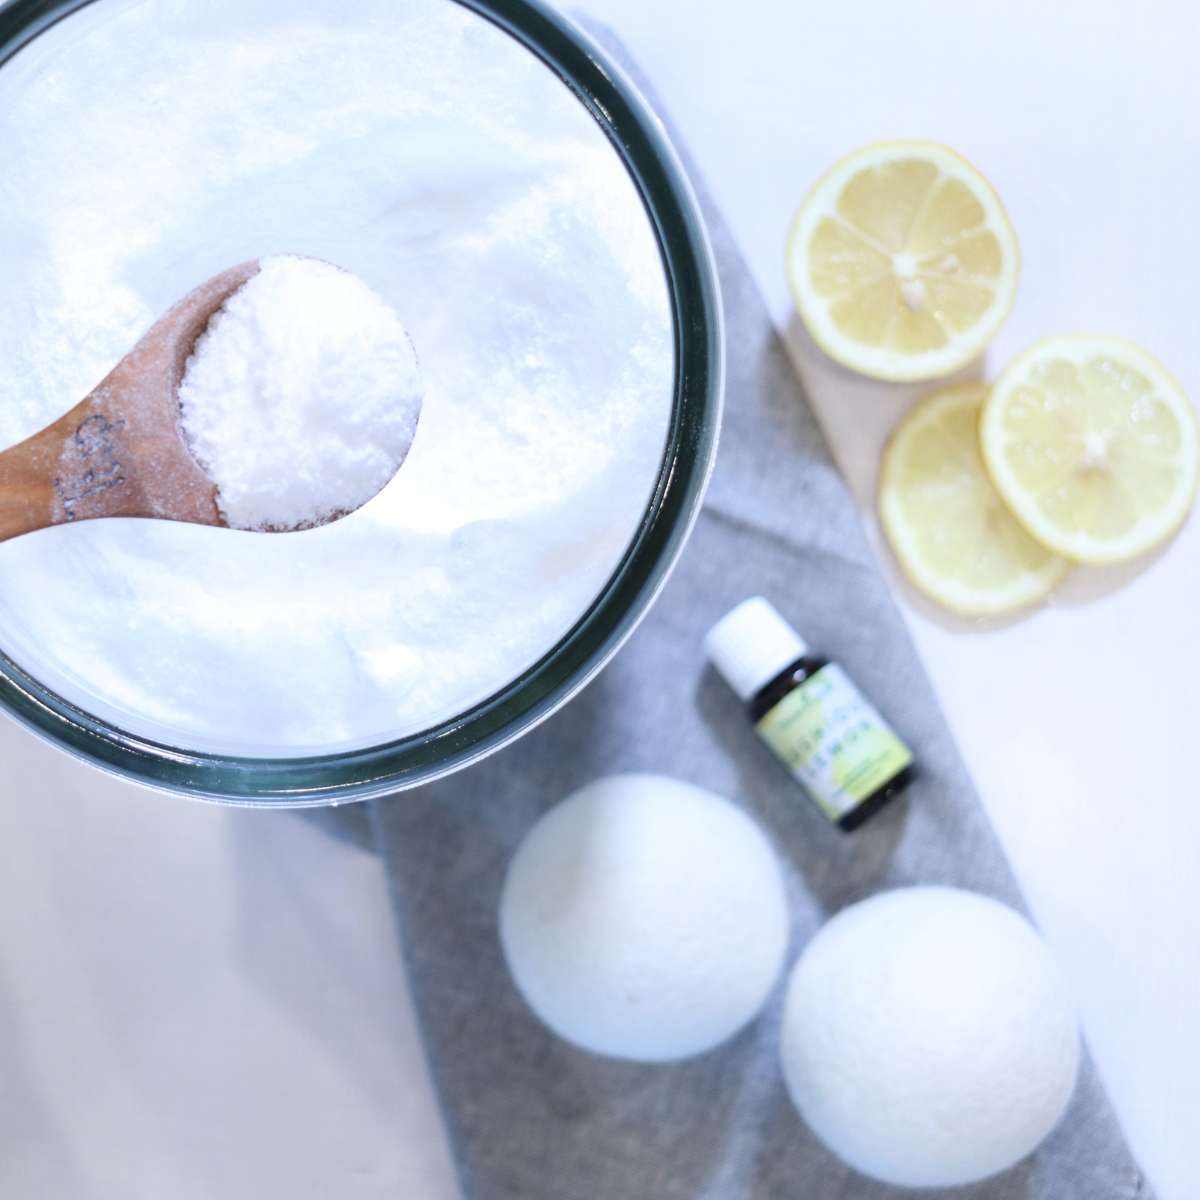
You can also customize the fragrance of your clean laundry by adding a few drops of your favorite essential oils directly onto the dryer balls. This way, your clothes will come out smelling fresh and clean, without the use of artificial fragrances.
Supplies and Materials
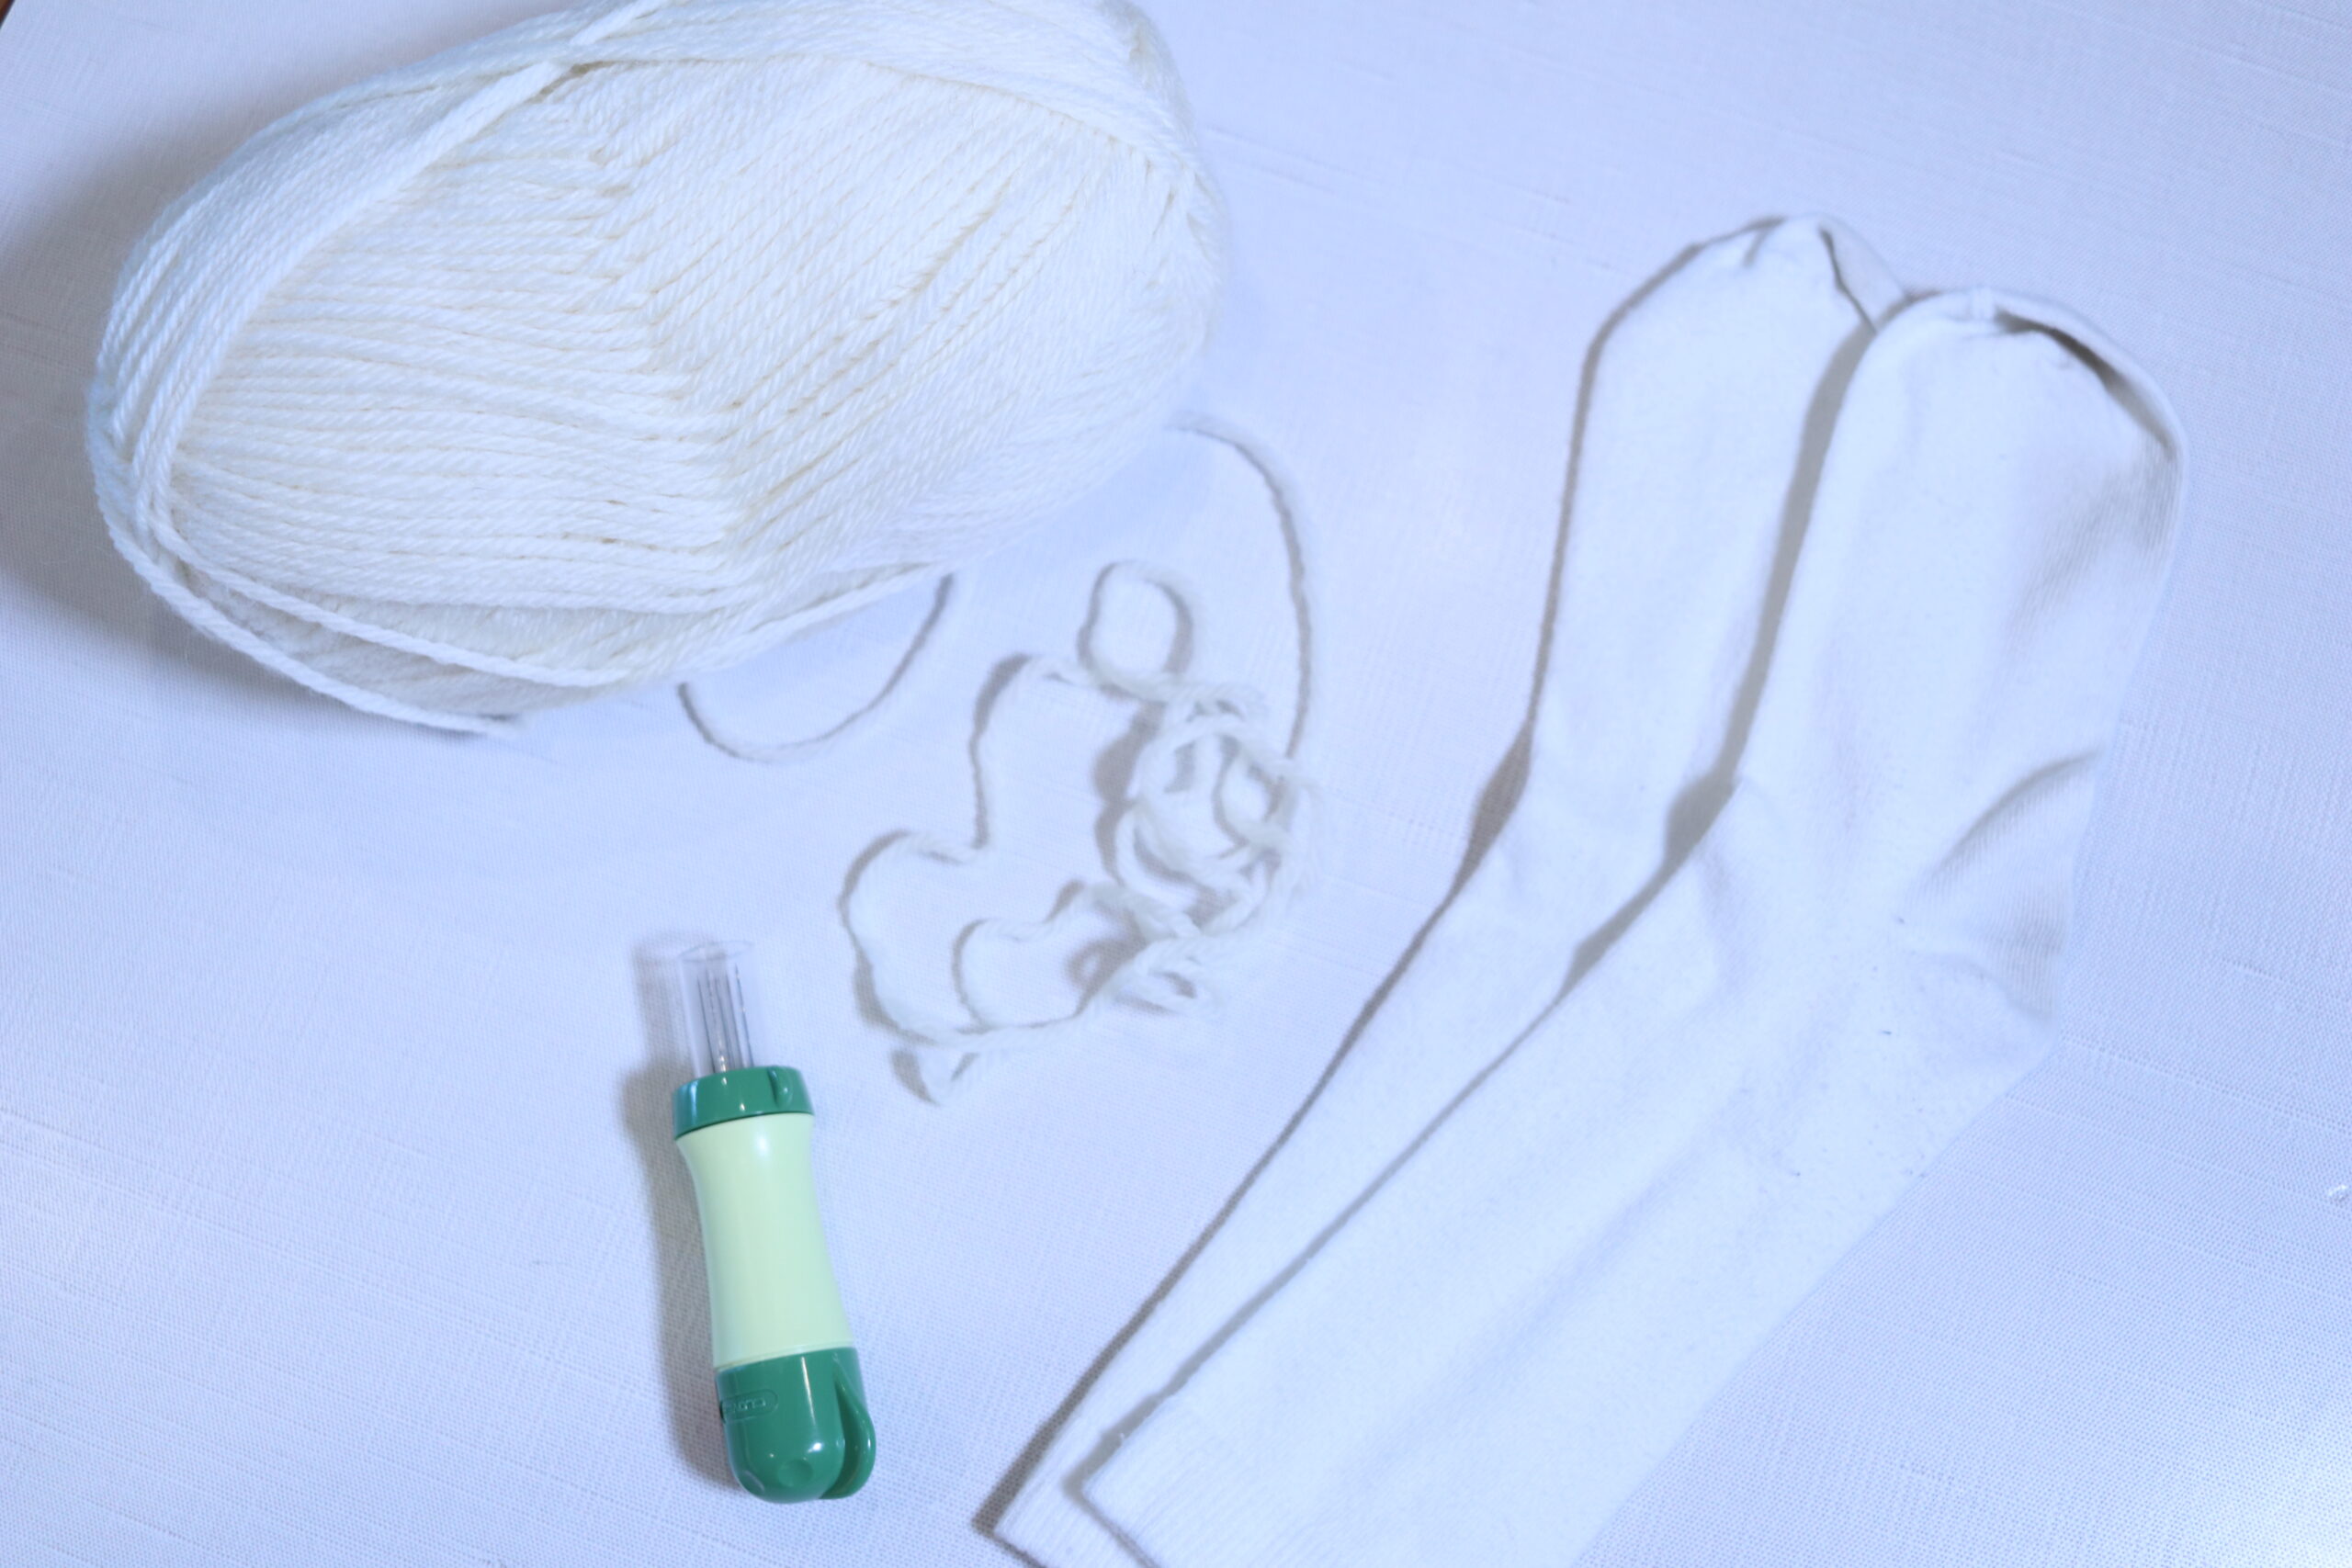
Supplies and Materials for DIY Wool Dryer Balls
Some of the supplies on the list that say optional next to the I will discuss in the felting section of this post. You will only need these items if you are using that method for felting your dryer balls.
Yarn Considerations
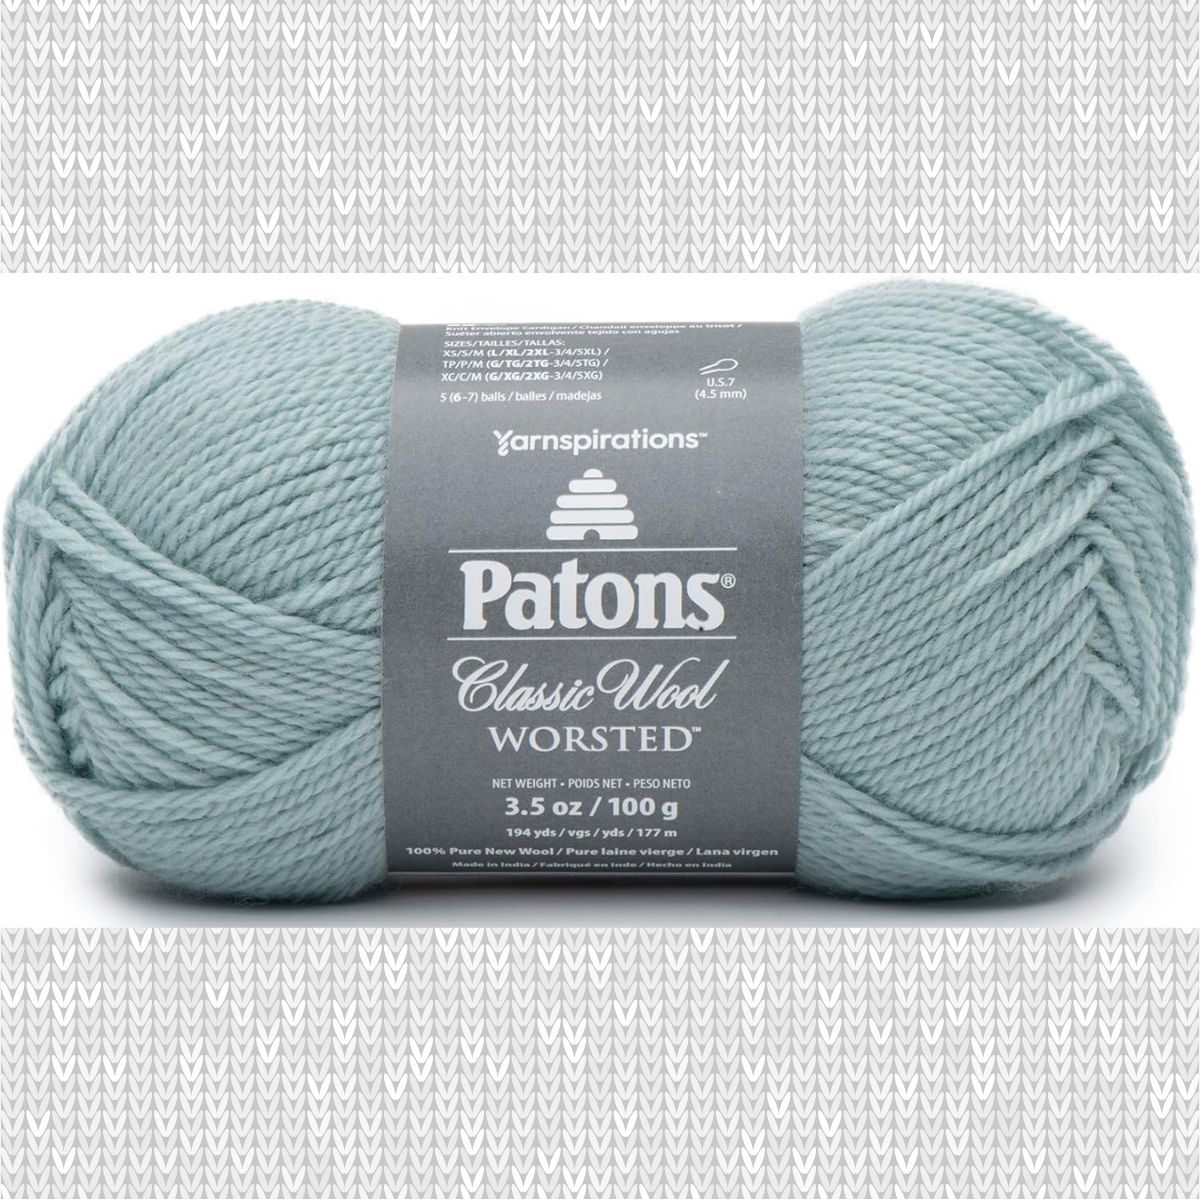
When choosing yarn for this DIY project, be sure and buy yarn that is 100% wool. The yarn label will indicate what the yarn fiber is made up of.
Most yarn in big box stores is not wool. Having real wool is important for felting your wool dryer balls. Acrylic yarns do not felt.
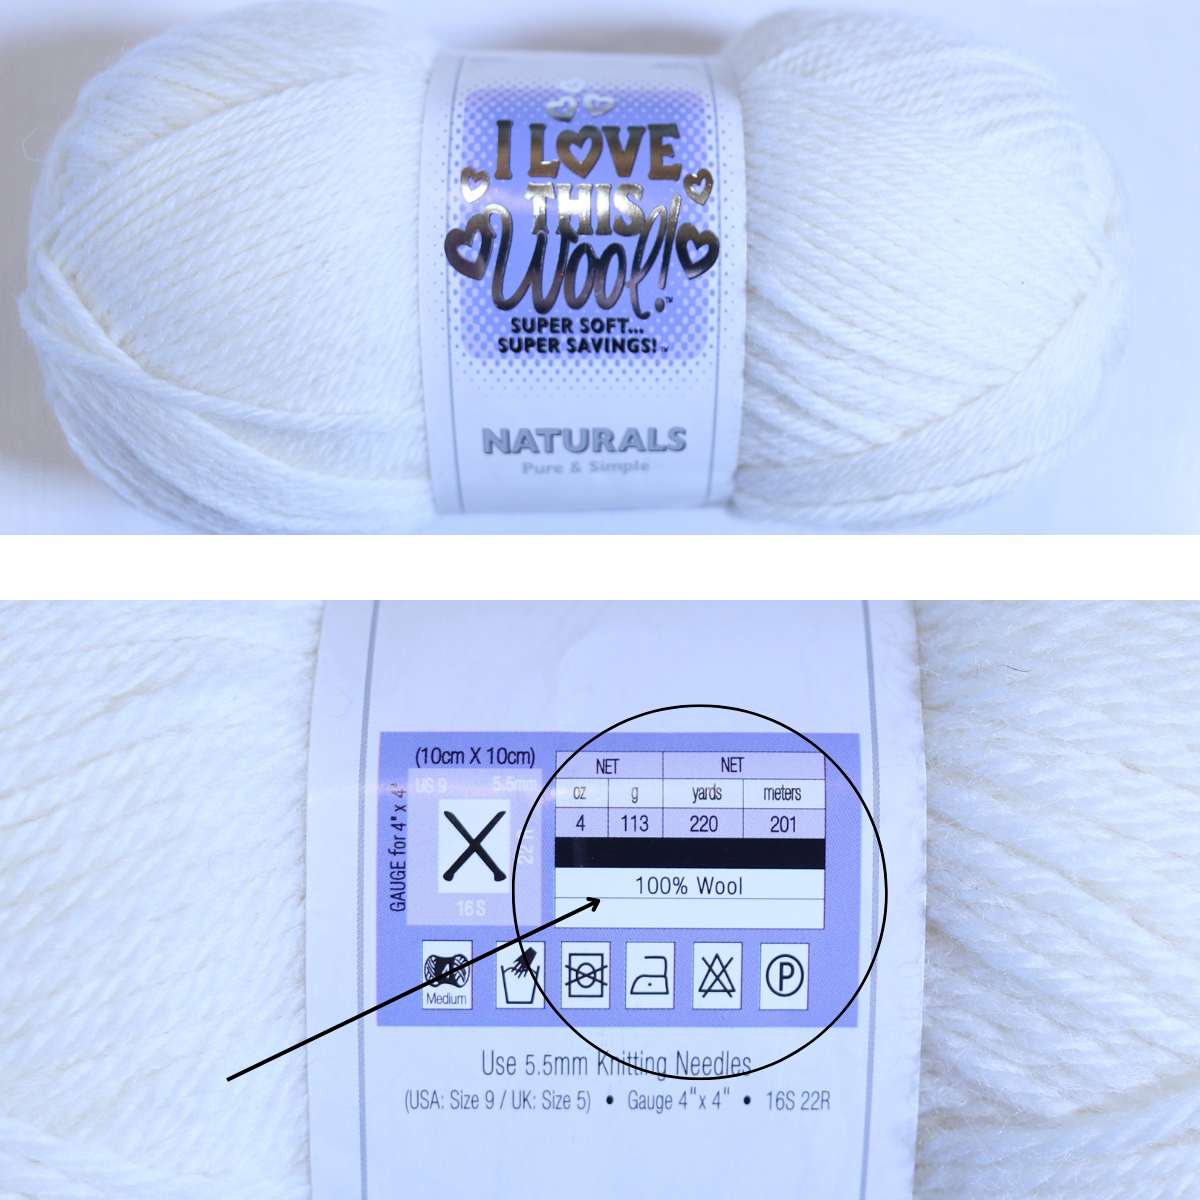
Just because a yarn says “wool” on the front of the label, doesn’t mean that the yarn is 100% wool. It just means that some percentage of the yarn contains wool. Be sure and read the back of the label to find the fiber contents.
This is what a yarn label looks like and here is where you’ll see the fiber content and percentages in the yarn. Luckily this yarn was 100% wool and inexpensive. A great option for homemade dryer balls.
Felting
Felting wool just means that the natural fibers in yarns start to get all fuzzy and bind together with the other strands of yarn. Eventually, you will not be able to see the individual strands of yarn in your DIY dryer balls because they have felted together.
Once your homemade wool dryer balls have been felted, they will not fall apart. Felted wool is very strong. The more felted the yarn is, the stronger it becomes.
How To Make Wool Dryer Balls
- Step One- Gather your supplies and materials.
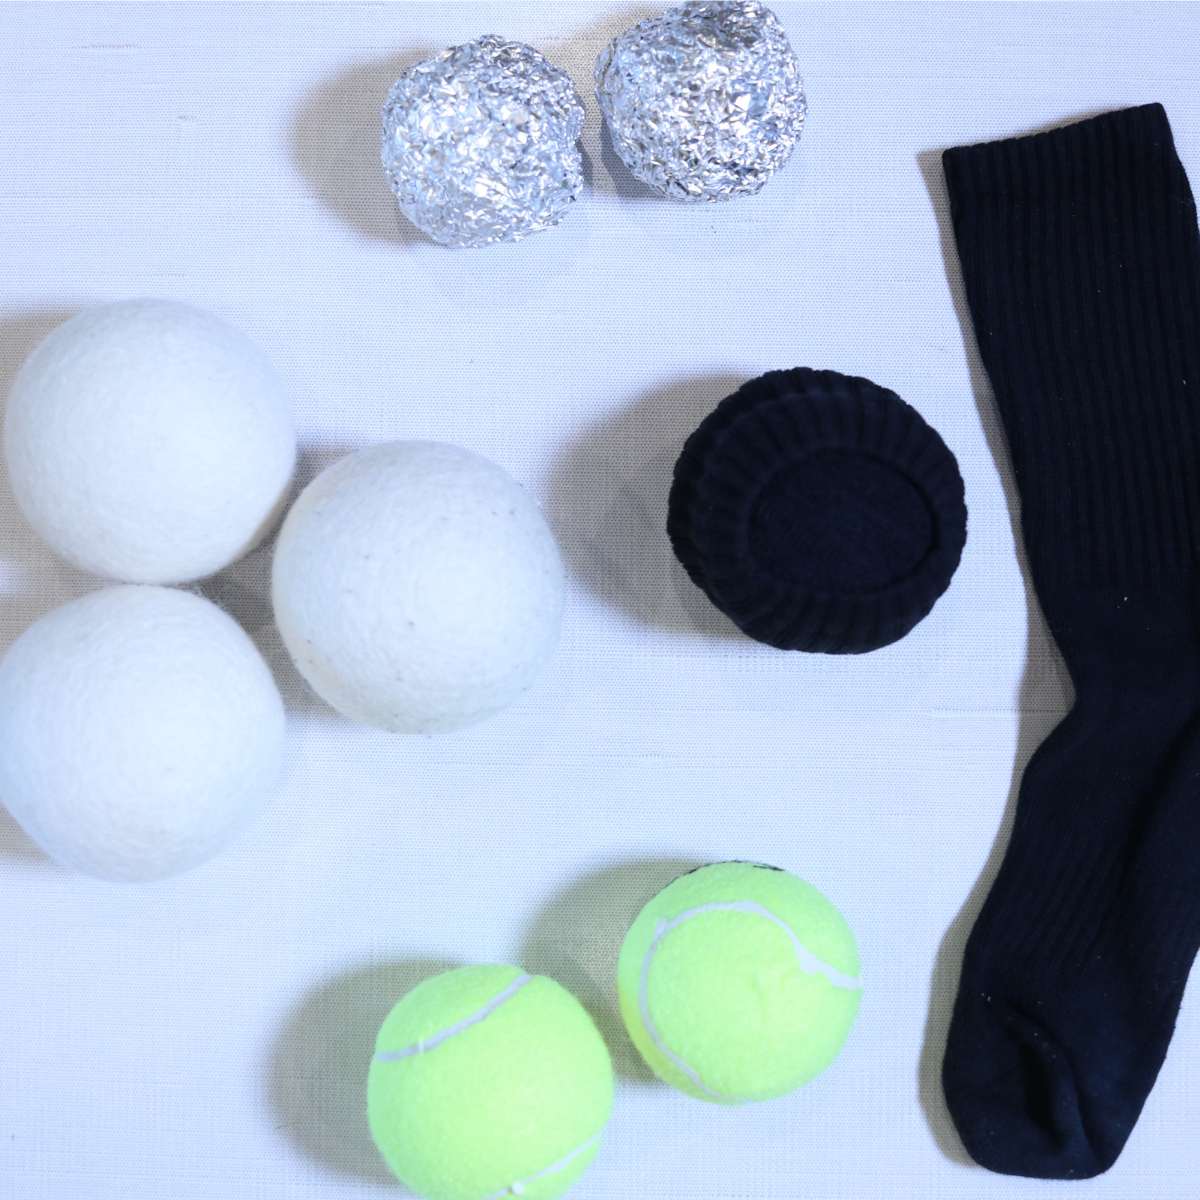
- Step Two- Determine what you would like to use for the center of your dryer ball (socks and tennis balls are just a couple of good options).
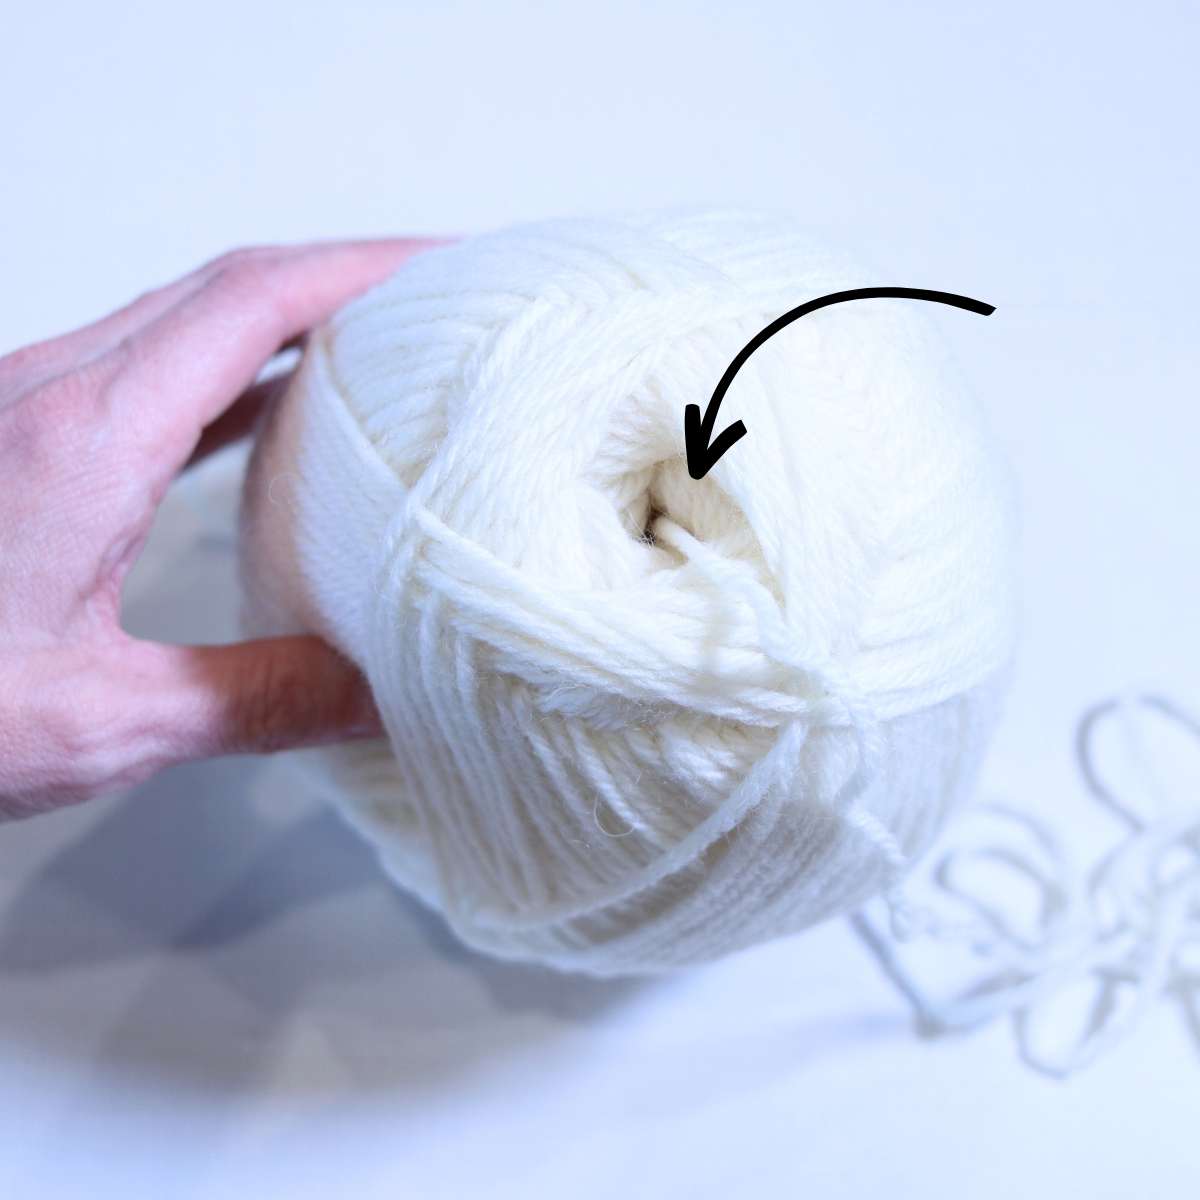
- Step Three- Pull the strand of yarn from the center of the skein of yarn you are going to be using to make your dryer balls.
- Step Four- Begin wrapping the yarn tightly around your balls of socks or the tennis ball. Wrap yarn 15-20 wraps in the same direction.
- Step Five- rotate the ball 90 degrees and repeat. Wrapping the yarn 15-20 more times.
- Step Six- Continue wrapping the yarn 15-20 wraps continuing around your sock or tennis ball until it is no longer visible and the yarn is nice and thick.
- Step Seven- Snip yarn thread and tuck it under a wrapped strand of yarn to secure.
- Step Eight- Using the detergent method, the washing machine felting method, felt the wool dryer balls you created.
- Step Nine- Place 2 DIY felted wool dryer balls into a load when drying.
Find the printable materials list and how-to below!
Creating the Center of the Wool Dryer Ball
If you are using an old pair of socks, begin by creating a ball with the socks. This will help ensure that your dryer balls stay in the desired shape.

Preparing The Yarn
Once you have created the center of your dryer balls, it’s time to begin wrapping the yarn. If you are using a skein of yarn similar to the one I’m showing here, try and find the tail of the yarn that is in the center of the ball. This makes it easy to just pull the yarn to wrap it without the yarn ball rolling all over.
Pulling the yarn from the center of the ball is much more controlled. If you can’t find the center of the yarn, it’s perfectly fine to use the yarn from the outside of the ball as well.
These are just some added tips from a knitter.
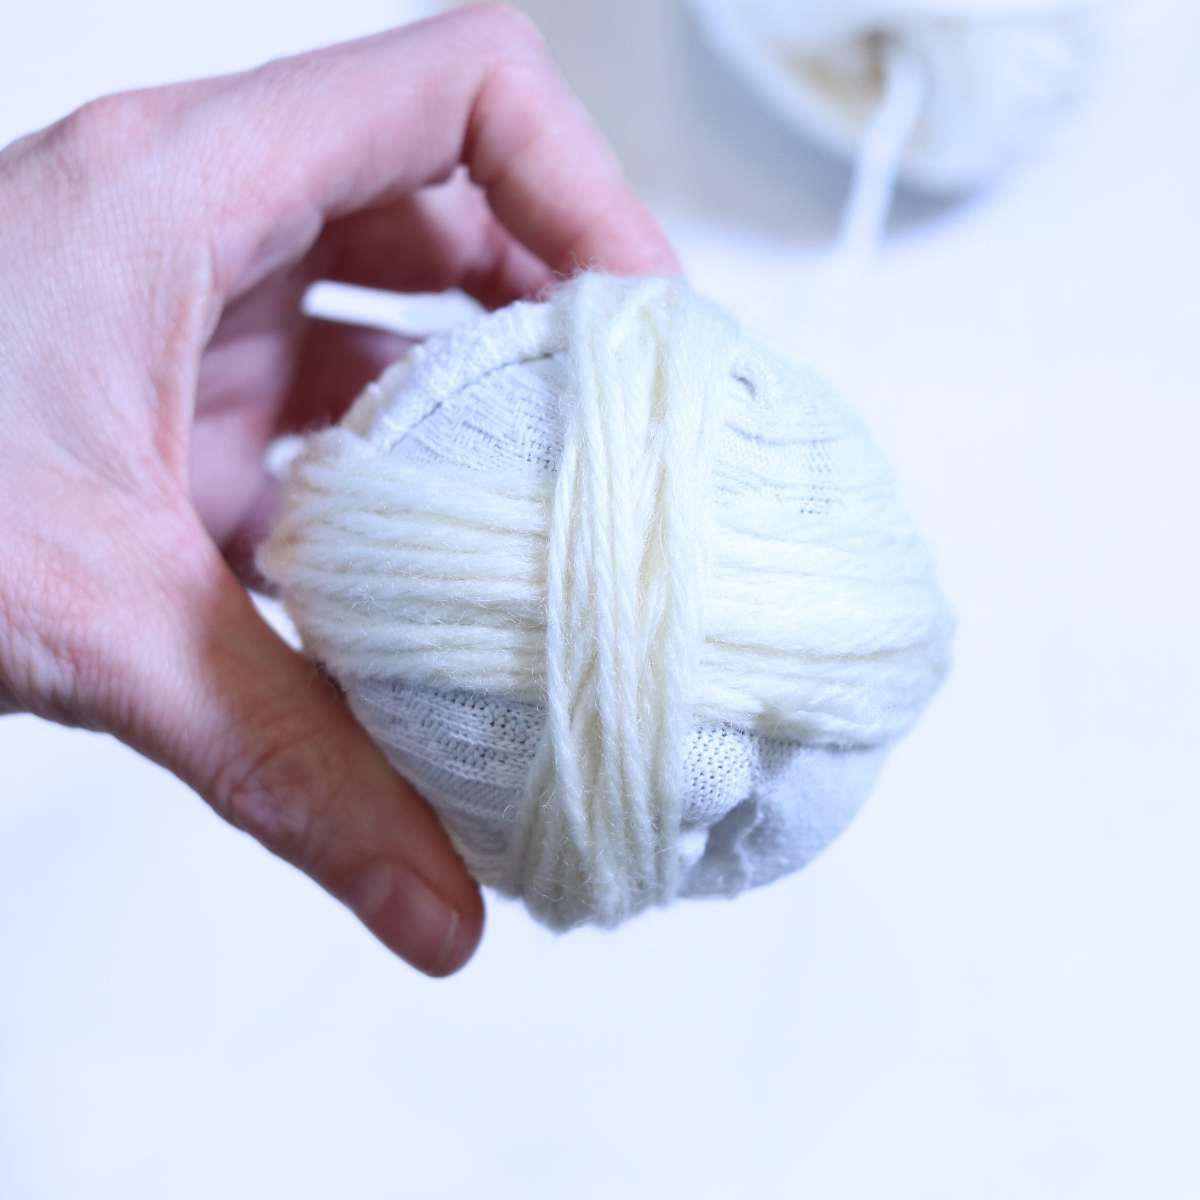
Wrapping The Dryer Ball

Begin by tightly wrapping the 100% wool yarn around your ball of old socks or your tennis ball. I like to wrap 15 to 20 wraps around before I change the direction of the yarn.

Once you have wrapped your yarn 15 to 20 wraps, it’s time to rotate the ball and begin wrapping the yarn in a different place. You’ll continue to do this until the entire ball of socks or tennis ball is wrapped completely.
A nice thick layer of yarn should be covering the center of your dryer ball.
To do this, simply place your thumb over the string of yarn in the center of the ball and rotate it 90 degrees.
Then, begin wrapping the yarn another 15 to 20 wraps on this side.


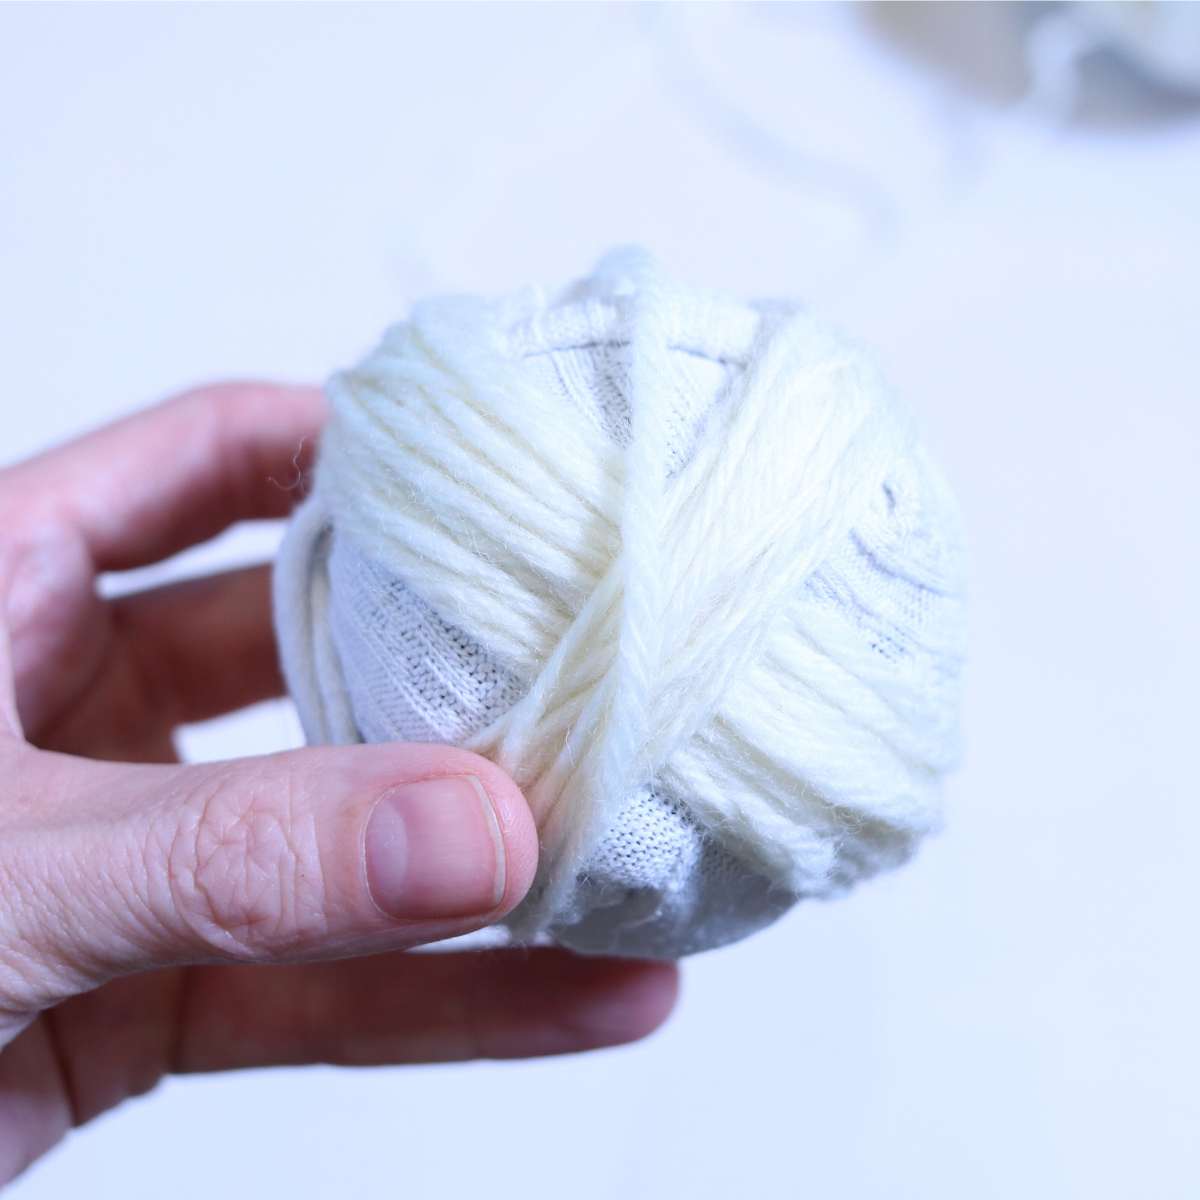

Every so often throughout the yarn wrapping process, give the ball a squeeze to help it stay in a nice round shape. If your ball doesn’t look even, you can easily fix it by wrapping the yarn more in that place.
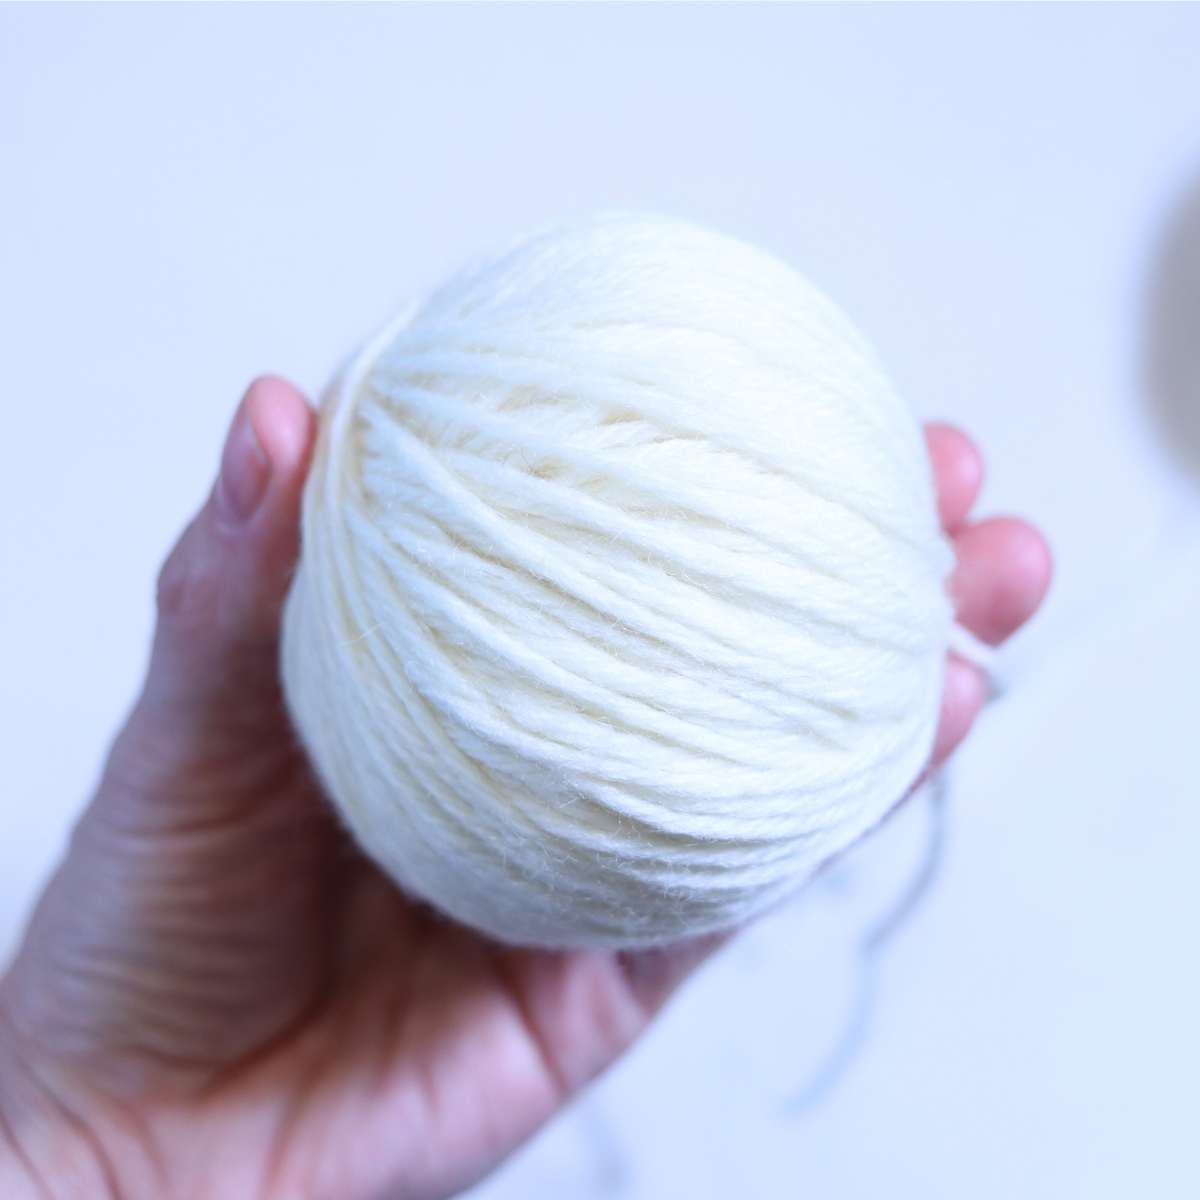
Trimming
Once you have a nice thick layer of wool wrapped around the ball of socks or tennis ball, cut the yarn with your scissors, leaving a small tail.

Tuck In The Tail of Yarn
Tuck the yarn tail securely under a few layers of the wrapped yarn to make sure it stays in place as the dryer ball is used.
I will also show you how to secure it by felting it with a tool. This isn’t necessary, but if you already happen to have felting needles, it would be a great time to use them.

How To Felt DIY Dryer Balls
There are several methods you can use to felt your homemade dryer balls. I will discuss all of them and you can decide which method you use. The easiest method is using roving yarn and a washing machine with an agitator. But more on that later.
Felting with detergents by hand
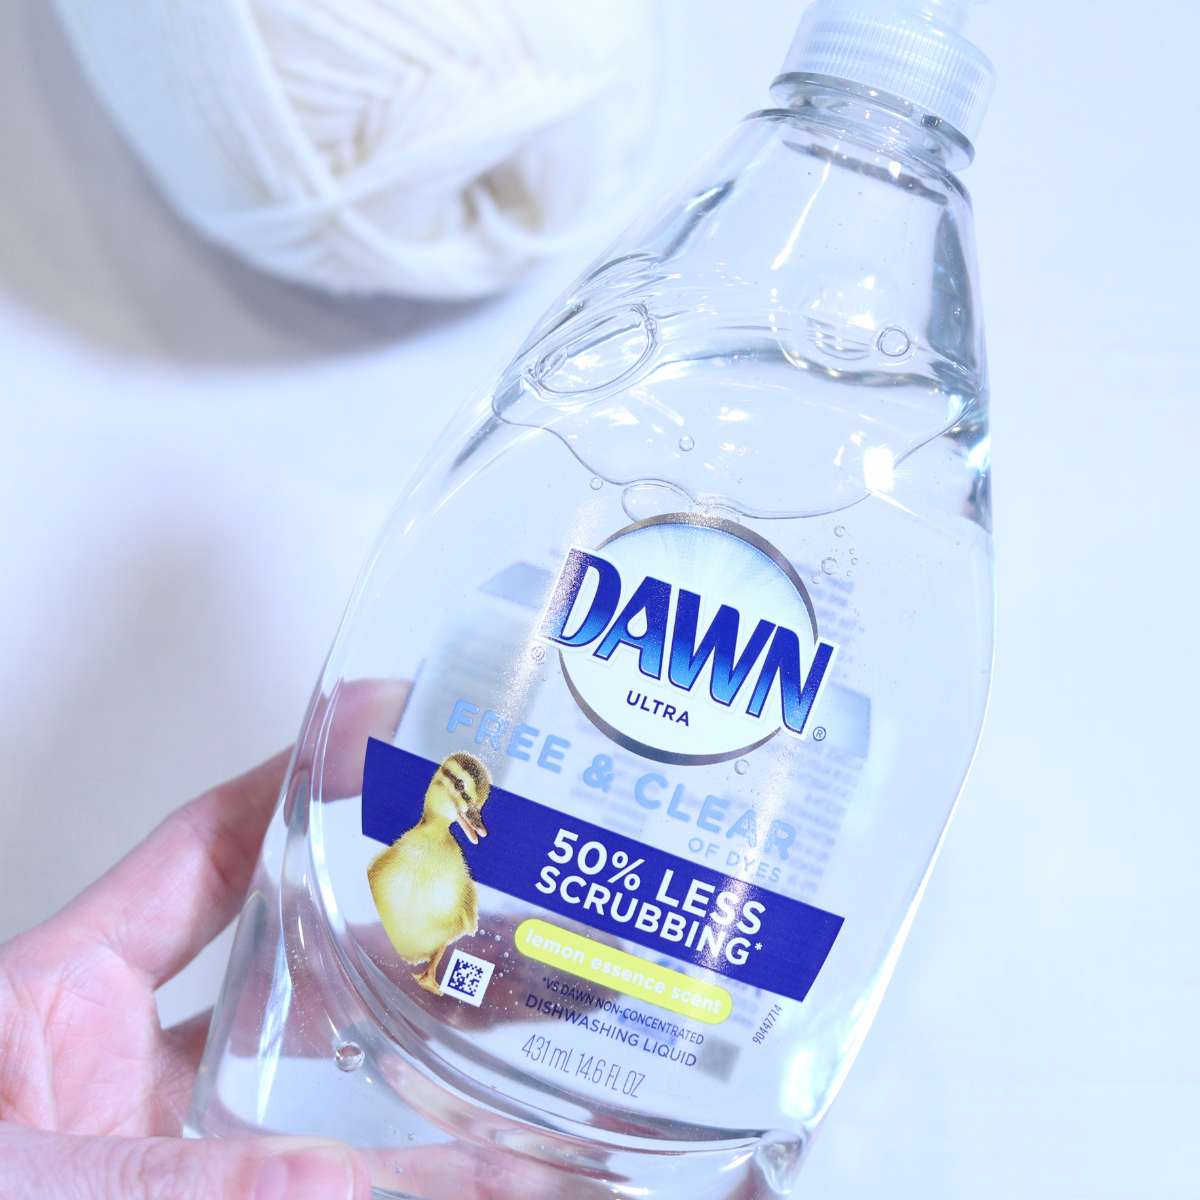
This method is not one that I have personally tried. When I was researching ways to felt yarn, I came upon a post about detergent felting and thought it would be worthy of a mention here.
So the basic idea is to take a dishwashing detergent soap, place a bit on each of the two dryer balls, get damp and rub the dryer balls together vigorously. This will cause agitation that will cause the wool to felt.
A few notes on this method of felting:
- If you don’t use harsh dish detergents or prefer not to, then you are buying soap you’ll never otherwise use.
- This seems like a lot of work to felt yarn when other methods would be more efficient and faster.
- You’ll need to wash these in the washing machine when you are finished felting them and I’m not sure how regular or H.E. washing machines would do with dish soap. So if you are trying this, proceed with caution.
Needle Felting
Needle felting I think is a great option if you already have needle felting tools at home or are interested in getting started in needle felting.
Felting tools are long needles that are lined with tiny barbs on the shaft of the needles. When the needles are pressed into wool, the barbs catch the fibers and intertwine them with other wool fibers causing them to interlock (felt) together.
I do felting (well I use to) so I just happen to have one of my felting tools to show you. When the tool is pressed onto the surface of the wool, the plastic needle protector retracts causing the needles to be able to puncture the yarn and begin the felting process.
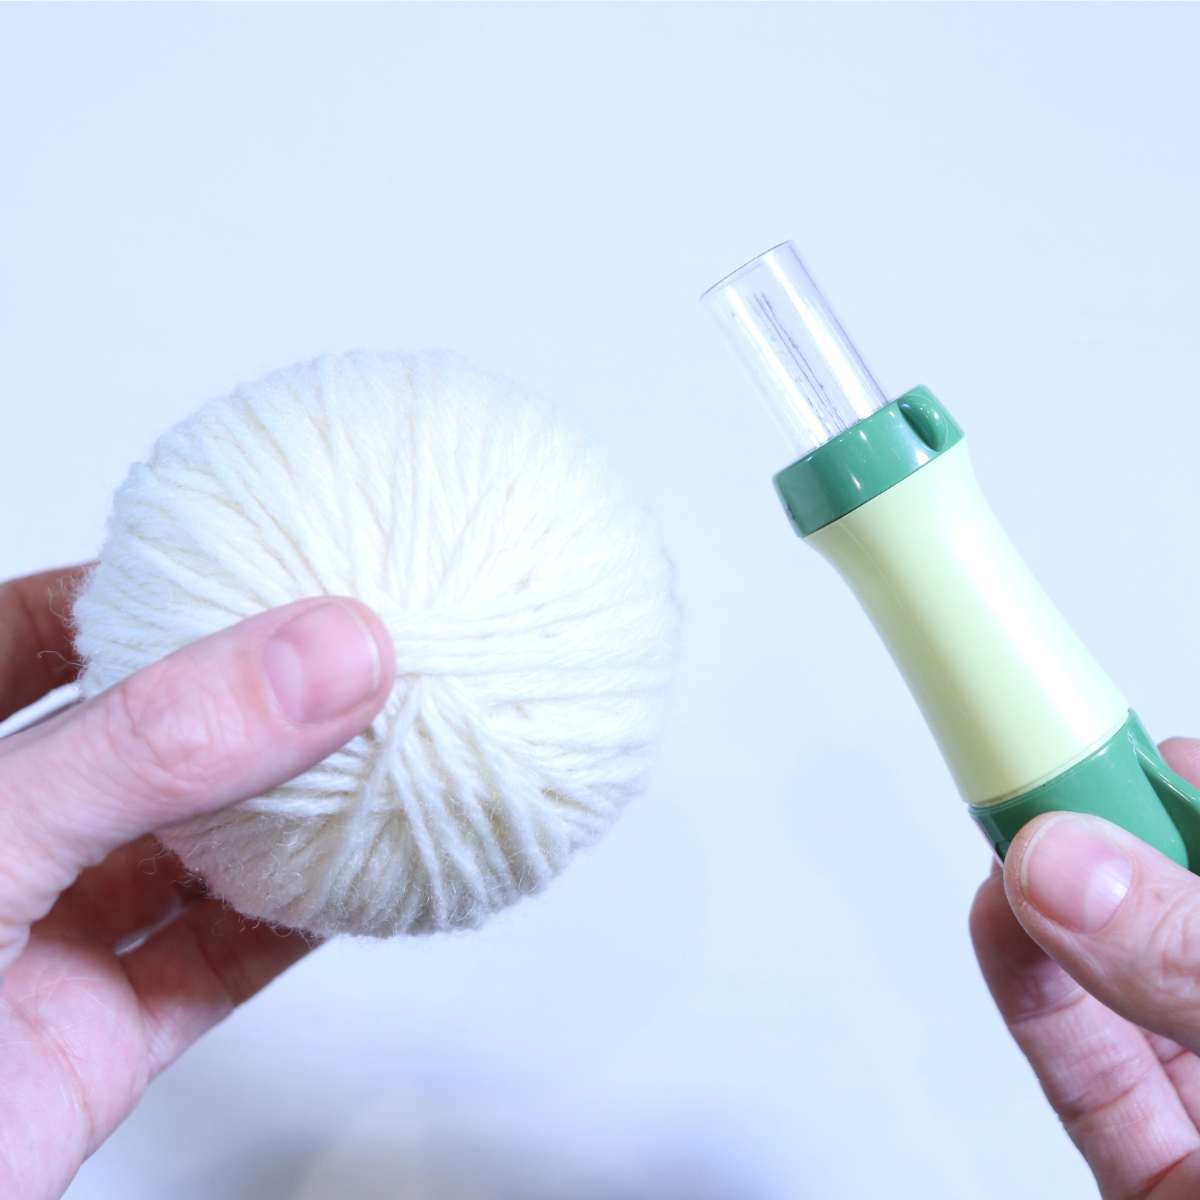

DISCLAIMER: There Is a safety lock on this tool. However, I wouldn’t recommend children using this as it is extremely sharp and potentially dangerous.

A needle felting tool would be a great way to felt in the tail of the yarn to ensure it didn’t unravel.
But it would easily take you over an hour to needle felt an entire DIY dryer ball with this tool.
I sat and felted a small area for 10 minutes and the felting was barely visible. So for this reason, I’ll say give it a shot if you have a tool like this, but I won’t recommend running out to buy one or calling it essential for this project.
Washing Machine Felting
Machine felting is by far the easiest way to felt your homemade wool dryer balls. It may take a few washes to achieve the desired smooth effect, but it is by far the easiest method.
- Take a sock or the leg from a pair of old pantyhose and carefully place your wool dryer balls inside it. Make sure the sock is snug around the ball, as this will help with felting the wool strands. Tie or secure the open end of the sock to keep the balls in place during washing.
- Add the socks with your wool balls to your washing machine, and run a hot water cycle. This helps the wool fibers felt together even more. You can add your regular laundry to the load to avoid wasting water. After the wash, dry the balls on high heat to further help the felting process. Repeat the laundering process two or three times to ensure proper felting.
- Once the wool balls have gone through the wash and dry cycles, carefully remove them from the socks. The wool fibers should be more tightly compacted, forming a solid, felted dryer ball. If they are not fully felted, you can repeat the wash and dry cycles.
Caring for Felted Wool Dryer Balls
Wool dryer balls are low maintenance, but occasionally, they may need some care. If you notice that your balls are losing their effectiveness, it might be time to freshen them up a bit.
To do this, simply wash and dry them with a load of laundry, preferably using hot water. This process will help remove any buildup of lanolin or other residues and re-felt the wool.

Keep in mind that wool is a natural fiber, and over time, it may show signs of wear. However, properly cared-for wool dryer balls can last for hundreds of loads. In the long run, using these eco-friendly laundry aids will help save energy, time, and money while taking care of your clothes and the environment.
How To Use Wool Dryer Balls
Wool dryer balls are a fantastic addition to any laundry routine as they offer several benefits in comparison to traditional dryer sheets. They not only help you save time and energy by reducing drying time, but they also provide a more eco-friendly and cost-effective laundry solution.
- To use, simply add three to four of them into your dryer drum along with your wet laundry. Multiple dryer balls help maximize their effectiveness and ensure even drying of your clothes. Just make sure not to overload your dryer.
Advantages
One significant advantage of using wool dryer balls is that they can effectively reduce wrinkles in clothes. Since they work by moving around and separating laundry items, they help to maintain airflow and prevent clothes from clumping together. This action reduces wrinkles and lessens the need for ironing after drying.
Wool dryer balls are also great at preventing static build-up in your laundry. By rubbing against the fabric, they can break up and disperse static charges. This eliminates the need for disposable dryer sheets, which can often contain chemicals that are harsh on sensitive skin.
Wool’s softening properties mean you can skip using fabric softeners too, making them an ideal option for those with sensitive skin.
By incorporating wool dryer balls into your laundry routine, you’ll enjoy numerous benefits, including shortened drying times, reduced wrinkles, decreased static, and a decreased need for additional laundry products. Plus, you’ll be making a positive impact on the environment by reducing waste and using a natural, sustainable solution for your laundry needs.
Additional Tips and Considerations
When making your own DIY wool dryer balls, there are a few important factors to keep in mind.
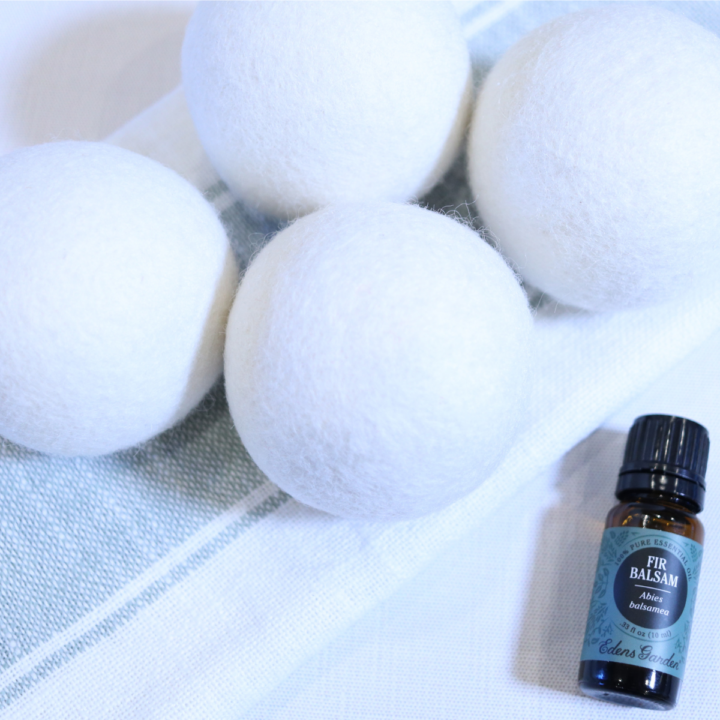
First, consider using wool roving instead of yarn, as it felts more easily and creates a denser ball. If you prefer using yarn, ensure it’s made of pure wool and not a synthetic blend or is a superwash wool yarn since these types of yarns have been treated and won’t felt properly.

Wool roving yarn
Wool roving is a great option for wool dryer balls. It can be more expensive. However, you will use less of this since it’s a bulkier weight yarn and felts easier.
Regular wool yarn
100% wool yarn is a perfectly suitable yarn for your homemade dryer ball project. Check out all the colors and buy what you prefer!
If you have alpaca yarn available, you can also use that to make dryer balls. Just like wool, it is an environmentally friendly and naturally hypoallergenic material that can help reduce static and soften your laundry. Keep in mind that alpaca yarn can be a bit more expensive and you won’t find it at any big box store.
If you use cloth diapers for your baby, wool dryer balls are particularly beneficial. They can help your diapers dry faster, reduce static, and even keep them softer for your baby’s delicate skin.
When making homemade wool dryer balls, make sure they are tightly wound and roughly the size of a baseball (3 to 3 1/2 inches in diameter). The denser the ball, the more effective it will be in softening your laundry and reducing your drying time.
After you’ve made your wool dryer balls, they need to be felted using a machine-washable or hand-felting method.
Place the balls inside a fabric tube, like a compression sock, and tie a knot to secure them inside. Wash the balls in hot water with a small load of laundry, and then dry them on high heat to help the fibers felt and shrink together.
Finally, remember that even DIY wool dryer balls require occasional maintenance. Over time, they might become less effective due to wear, so inspect them regularly and replace any that are losing their shape or density.
By following these tips and considerations, you’ll be on your way to creating eco-friendly, cost-effective, and efficient wool dryer balls to enhance your laundry routine.
FAQ
How to add fragrance to wool dryer balls
To create scented wool dryer balls, try adding a few drops of your favorite essential oil directly onto the balls before you toss them into the dryer.
I prefer to leave a bottle of opened essential oil sitting inside the jar where I store my dryer balls. That way they are always infused with a beautiful scent and it’s so easy to just grab them and toss them into the dryer. Plus this method doesn’t stain your wool dryer balls either.
Keep in mind that using a high-quality, pure essential oil will give the best and longest-lasting fragrance to your wool dryer balls.

Laundry Collection Essential Oil Blends

New Beginnings Essential Oils
Can I use fleece for dryer balls?
Although wool is the most common material for dryer balls, you can also use fleece to make them. Make sure to choose a dense fleece material and follow the same process as when making wool dryer balls.
However, fleece tends to be less absorbent than wool, which may affect the performance of your dryer balls in terms of reducing drying time and static control.
Again, use what you have and what your budget allows.
The best yarn for DIY dryer balls
When making your own dryer balls, it’s best to use 100% wool yarn, as it has natural moisture-absorbing and static-reducing properties. Wool roving yarn provides a smoother finish and helps the balls hold their shape better. But as long as the yarn fiber content states that it is 100% wool, it will work.
Avoid using synthetic or blended yarns, as these do not have the same benefits as wool.
How much wool yarn is needed per dryer ball?
The amount of wool you’ll need depends on the size of the dryer balls you’d like to make. On average, each wool dryer ball should weigh about 2 to 3 ounces. The larger the center you create or use, the less yarn you will need.
Do homemade dryer balls work?
Yes, homemade dryer balls can effectively reduce drying time, soften clothes, and control static. Wool or rubber dryer balls help separate your clothes and get more air to them, which cuts the drying time. They can also reduce static, eliminating the need for dryer sheets or other store-bought fabric softeners.
I prefer to make all my own laundry products to avoid the harsh detergents and chemicals in most store-bought products.
Alternatives to wool dryer balls
If you prefer not to use wool dryer balls, there are other alternatives to help reduce static and soften clothes.
You could try making some homemade dryer sheets or adding a ball of aluminum foil to your dryer which can also help with static cling too. If hang-drying your laundry is an option, you may like that result as well.
You can also just use tennis balls in the dryer. I’d say this is my least favorite option as they are quite loud when tumbling around. Do they work? Yes. However, they are quite a bit more noisy than the other options.
There are quite a few options out there that don’t involve using wool dryer balls in your dryer. Them out and see which one works best for you and your laundry needs.
Where to buy wool dryer balls
If you have come this far in the post and decided you don’t want to try and make your own dryer balls, here are some that you can buy pre-made. The benefits are the same although the cost is a bit higher.
If taken care of properly, and used regularly, they will still last for years and are far less expensive than store-bought dryer sheets filled with chemicals. You and your family’s health are worth the investment.
Tie-dye wool dryer balls
simple wool dryer balls
adorable woodland friends’ dryer balls


These of course are just a few examples of the adorable options available when you purchase wool dryer balls pre-made.
Shop
- Wool Roving Yarn (cream, tan, light aqua, amber yellow, gray)
- Regular wool yarn (what I used)
- Scissors
- Needle felting tool (optional)
Wool roving is a different type of yarn. You will use less and it will felt easier than regular yarn will. However, use what you prefer of these two yarn varieties and whatever best suits your budget.
More DIY Laundry Ideas
Homemade Laundry Detergent
DIY Laundry Scent Booster
Homemade Dryer Sheets
How To Make Wool Dryer Balls
Learn how to make wool dryer balls for a more natural laundry routine. Ditch the chemicals from conventional dryer sheets and use wool dryer balls for a more eco-friendly, budget-friendly, drying time. Easy to add natural fragrances too!
Materials
- 100% wool roving yarn or regular 100% regular wool yarn
- Old socks or tennis balls for the center of your dryer balls
- Pantyhose or old sock to wash and felt dryer balls before use
Tools
- Scissors
- Washing machine
Instructions
- Gather your supplies and materials.
- Determine what you would like to use for the center of your dryer ball (socks and tennis balls are just a couple of good options).
- Pull the strand of yarn from the center of the skein of yarn you are going to be using to make your dryer balls.
- Begin wrapping the yarn tightly around your balls of socks or the tennis ball. Wrap yarn 15-20 wraps in the same direction.
- Rotate the ball 90 degrees and repeat. Wrapping the yarn 15-20 more times.
- Continue wrapping the yarn 15-20 wraps continuing all the way around your sock or tennis ball until it is no longer visible and the yarn is nice and thick.
- Snip yarn thread and tuck it under a wrapped strand of yarn to secure.
- Using the detergent method, the washing machine felting method, felt the wool dryer balls you created. See notes section below for felting information.
- Place 2 to 4 DIY felted wool dryer balls into a load when drying.
Notes
FELTING: Washing machine felting is by far the easiest way to felt your homemade wool dryer balls. It may take a few washes to achieve the desired smooth effect, but it is by far the easiest method.
1. Take a sock or the leg from a pair of old pantyhose and carefully place your wool dryer balls inside it. Make sure the sock is snug around the ball, as this will help with felting the wool strands. Tie or secure the open end of the sock to keep the balls in place during washing.
2. Add the socks with your wool balls to your washing machine, and run a hot water cycle. This helps the wool fibers felt together even more. You can add your regular laundry to the load to avoid wasting water. After the wash, dry the balls on high heat to further help the felting process. Repeat the laundering process two or three times to ensure proper felting.
3. Once the wool balls have gone through the wash and dry cycles, carefully remove them from the socks. The wool fibers should be more tightly compacted, forming a solid, felted dryer ball. If they are not fully felted, you can repeat the wash and dry cycles
ADDING NATURAL FRAGRANCE: Choose an essential oil or essentail oil blend that you love. Add 5 drops of the essential oil directly onto the dryer ball. Allow to absorb for a few minutes before adding to a load of laundry to be dried.
Another method to infuse fragrance into your wool dryer balls is by opening a bottle of esential oil and placing it right side up in your storage jar with an airtight lid. The fragrance from the essential oil with be infusing into the wool dryer balls while they are being stored.
One benefit to this method is that the dryer balls will not get oil stains on them from applying the oil directly to the dryer balls. Of course this in no way affects they use, it's just personal preference.
The cost on this DIY wool dryer project will vary depending upon the yarn or roving that you choose.
Yarn prices over the last couple of years have been on the rise due to the high price of feeding and maintaining the sheep where the wool is sourced from.
I hope you enjoyed another DIY laundry post. I have almost finished my entire series for natural laundry care. Be sure and check out the laundry section for more ideas and cost-saving tips!
Save To Pinterest
