
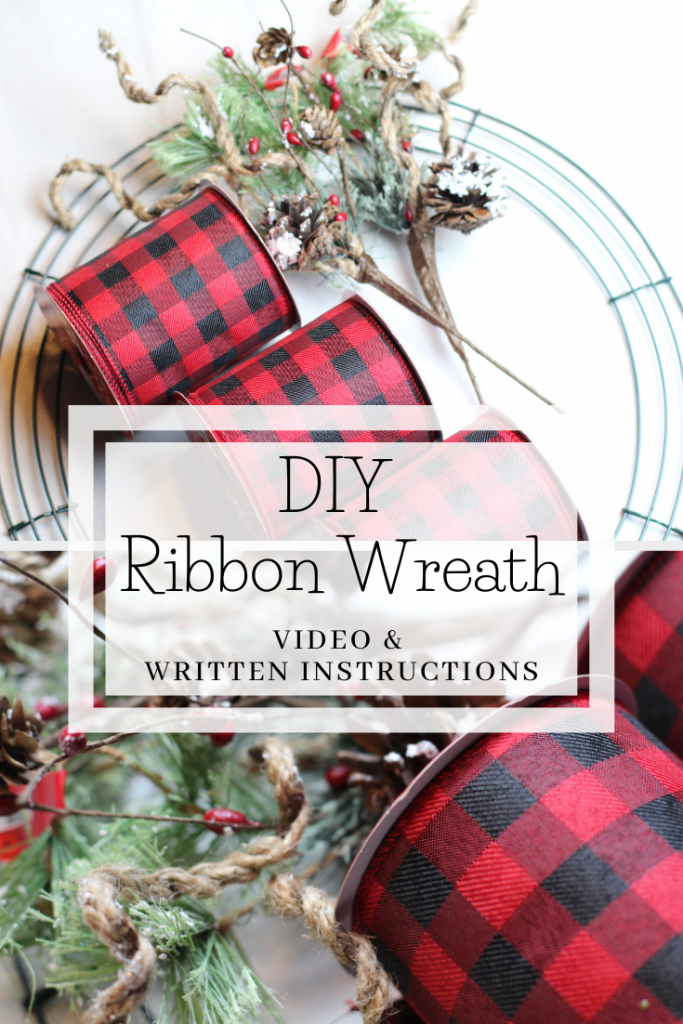
How To Make A Simple DIY Ribbon Wreath
Let’s make a simple DIY ribbon wreath with this easy to follow step-by-step tutorial.
Ribbon wreaths look beautiful hanging on a front door during the Holidays or sitting as an elegant centerpiece of a dining room table with LED candles. With so many sizes of wire frames and styles and colors of ribbon available, the possibilities are endless!
So grab your supplies and let’s make a ribbon wreath together!
Video Tutorial
Some of these links are affiliate links. You can read my full disclosure HERE.
How to Make a Simple Ribbon Wreath
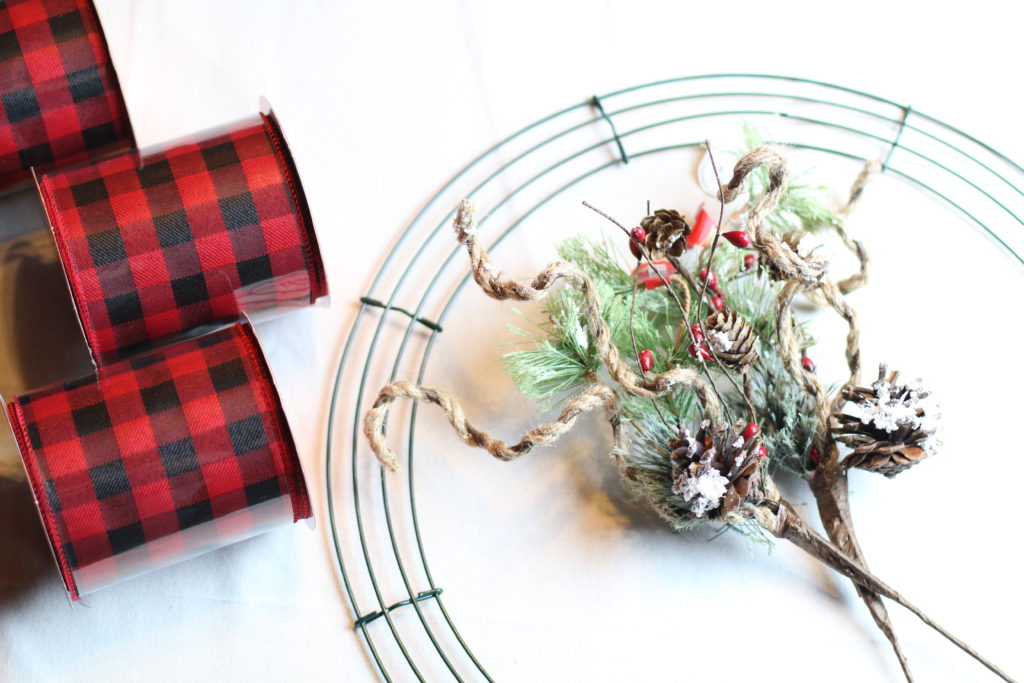
Supplies
- Wire wreath frame. These come in so many different sizes. Buy the size that suits your needs best. I find the 18-inch wreath frames are the best for my sized door.
- Ribbon– the amount you need will vary depending on the size of the wreath frame you are using.
- Wreath hanger
- Floral picks (optional)

How To Make A DIY Ribbon Wreath
- Purchase supplies needed to complete project (see list above). Watch tutorial to best gauge how much ribbon you may need. Better to have too much ribbon than not enough ( I can’t stress this enough).
- Remove all excess packaging from ribbon and floral pics and wire frame.
- With the wire frame arch facing down towards your work surface, tie a knot around and onto the 2 center wires of the wreath frame. If you are using a wired ribbon, you don’t need to double knot it. Just be sure that you leave a tail of at least an inch. If you are using a non-wired ribbon, I’d recommend a double knot. Just to be sure that its secured and won’t come undone.
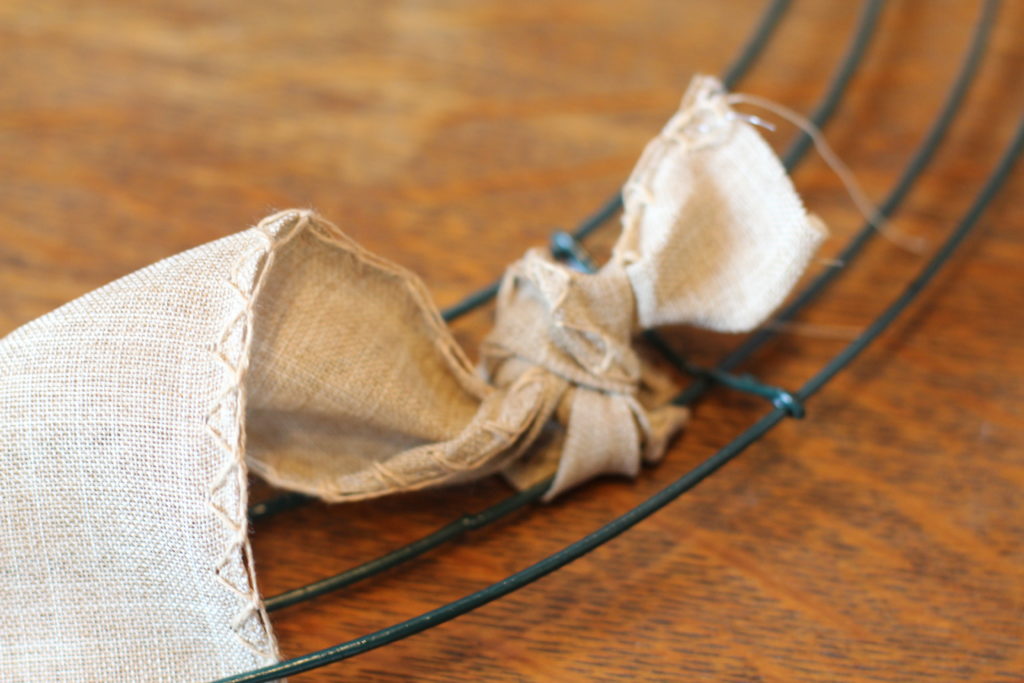
- Once your knot is secure, flip the frame over on the work surface so the knot is down (touching the work surface) and the arch of the frame is now facing up. Pull the tail of the ribbon up through the frame so it won’t be visible from the underside. This is not a big deal if you just want to leave it. You won’t see it anyhow since it will be on the back. This is just how I prefer to do mine and keep it nice and clean.
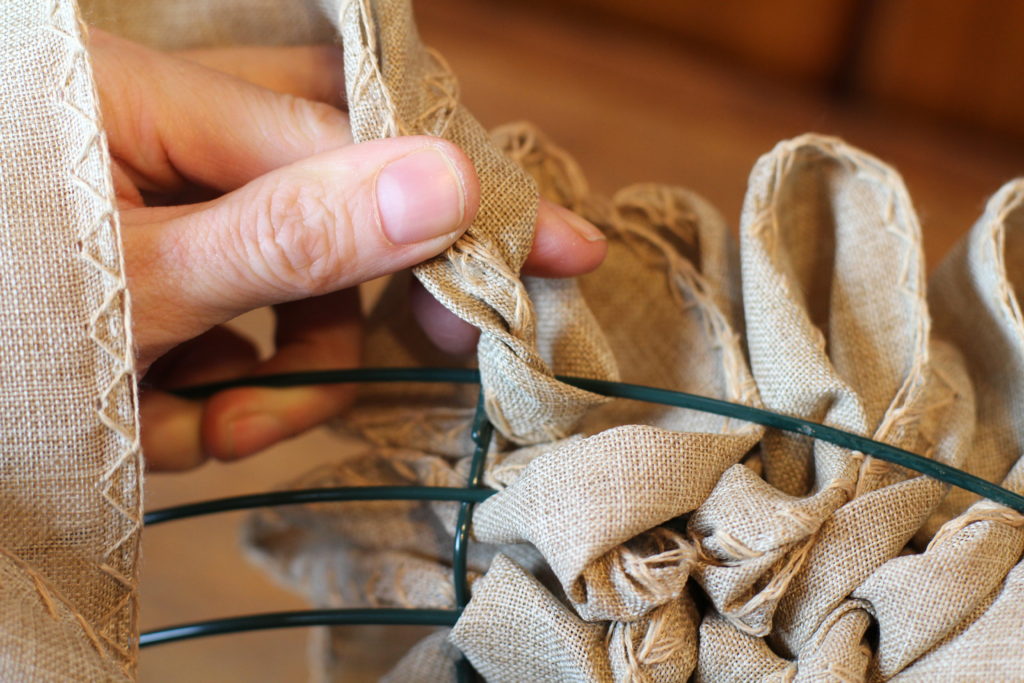
- Having the wreath frame now facing up, you can begin construction. With the inside or the outside channel (no it really doesn’t matter), pull up a loop of ribbon the desired size (the loops of ribbon I did for this project were 3.5″ and the ribbon was 4″ wide-for reference).
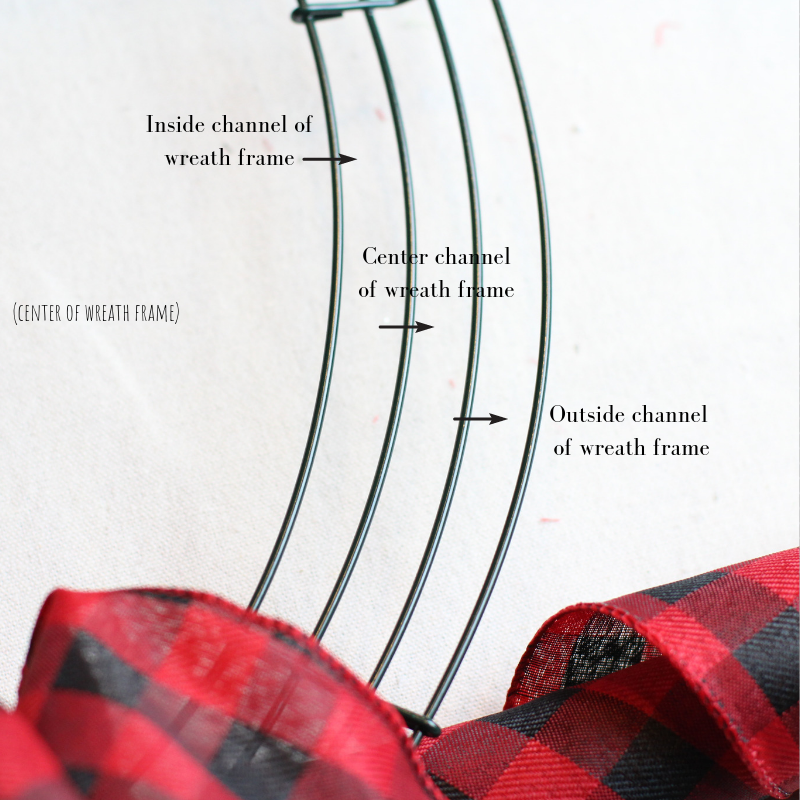
- You’ll want to try and make each one close to the same size. Perfection, however, isn’t at all necessary. (If you’d prefer to add more dimension, you can also make some of the loops larger. Again, this is entirely up to you and its really customizable for each person. Do whatever you think will look good). See detailed pictures at bottom of post as well.
- Pull up the desired size loop of ribbon either through the outside or the inside channel of the wire frame. Hold it in place with your fingers. On the underside of the frame, twist the ribbon piece once or twice.
- Now take the ribbon (while holding the loop you previously made in place) and pull-up another loop of ribbon similar in size but in a DIFFERENT channel of the wire frame (inside, center or outside). You just don’t want it in the channel just done.
- Continue this same pattern over the entire wreath frame.
Tip
Working in an “S” shape pattern works well for this project. If you need help better understanding, I encourage you to watch the video tutorial.

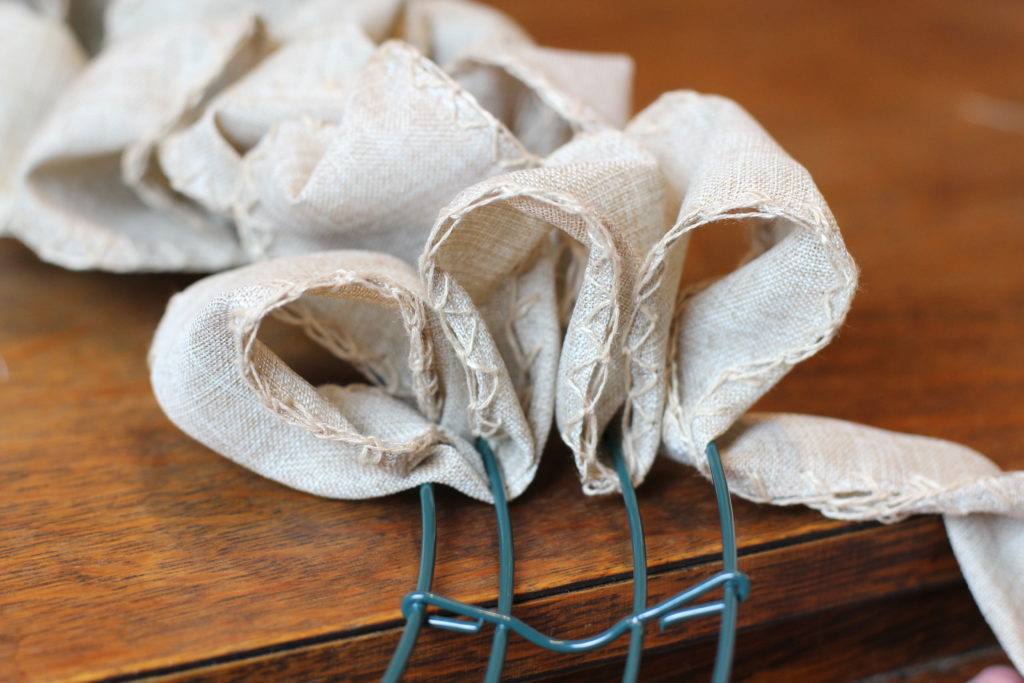
- While pulling up loops of ribbon, make sure to push the ribbon loops together after each twist and at the beginning of each new loop. This will ensure the loops stay close together keeping the wire frame concealed. You can make the wreath as dense with loops of ribbon as you’d like. The more dense the loops, the more ribbon you’ll need to finish this project.
- When you finish a spool of ribbon, be sure and tie off the completed ribbon to the frame so you can’t see it.
- Flip the wreath over (like you did when you started) and tie the new ribbon piece onto the two center channels of the frame.
- Pull the tail of the ribbon up through the adjacent channel and either cut or tuck the tail in so it won’t be visible from the top side of your wreath. You can always go back and do this when you are finished as well.
- Continue around the entire wire frame until the desired fullness of your wreath is achieved.
Decorate
Decorate your ribbon wreath with floral holiday picks and other accessories as desired.
- Add decorative picks
- Make a contrasting ribbon bow and tie it to the top
- String with mini twinkle lights for an added bit of Christmas feel
- Decorate with mini ornaments
Hanging
Hang your DIY ribbon wreath using a wreath hanger or with a removable 3M plastic hook. These hooks are so handy because you can easily remove them after the holidays and they won’t destroy your door (or wall).
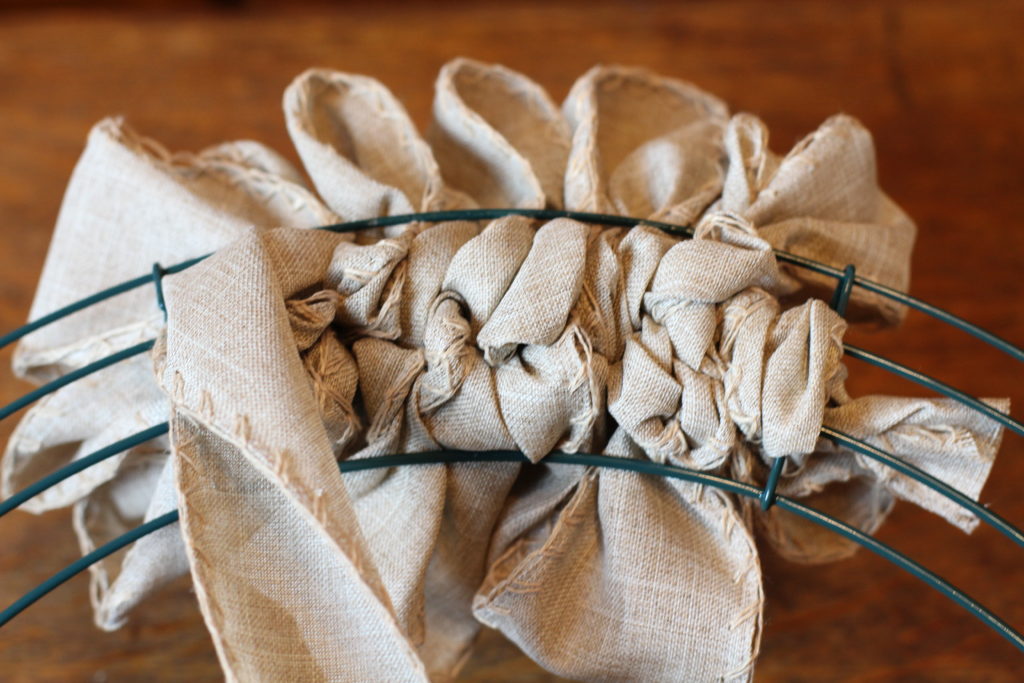
(The underside of the wreath. Don’t worry if yours doesn’t look like this-nobody will see it)
Have you made a similar style DIY ribbon wreath and have any tips or tricks you’d like to share?
Please post in the comments section below. I’d love to know how you’ve made these beautiful wreaths. What’s your favorite type of ribbon to use?
Shop
Disclosure: Some of the links below are affiliate links, meaning, at no additional cost to you, I will earn a commission if you click through and make a purchase.
- Wreath hanger
- 12″ wire wreath frame
- 14″ wire wreath frame
- 18″ wire wreath frame
- Black & white buffalo check ribbon 2.5″
- Red & black buffalo check wire ribbon 2.5″
- Holiday floral picks (optional)
I hope you all enjoyed making your wreath. Happy holidays.

Yes smaller size ribbon will def work for this project. The only thing I will say is that with smaller sized ribbon, you will use more of it but it will for sure work. Good luck with your project, let me know if you have any other questions.