
How To Thread A Sewing Machine
Learn how to thread a sewing machine for absolute beginners in this easy to follow tutorial.
If you have any questions, I’m here to help! Leave your questions down below.
Let’s kick off this learn to sew series with how to thread your sewing machine.
Some of these links are affiliate links. You can read my full disclosure HERE.
How To Set Up A Sewing Machine
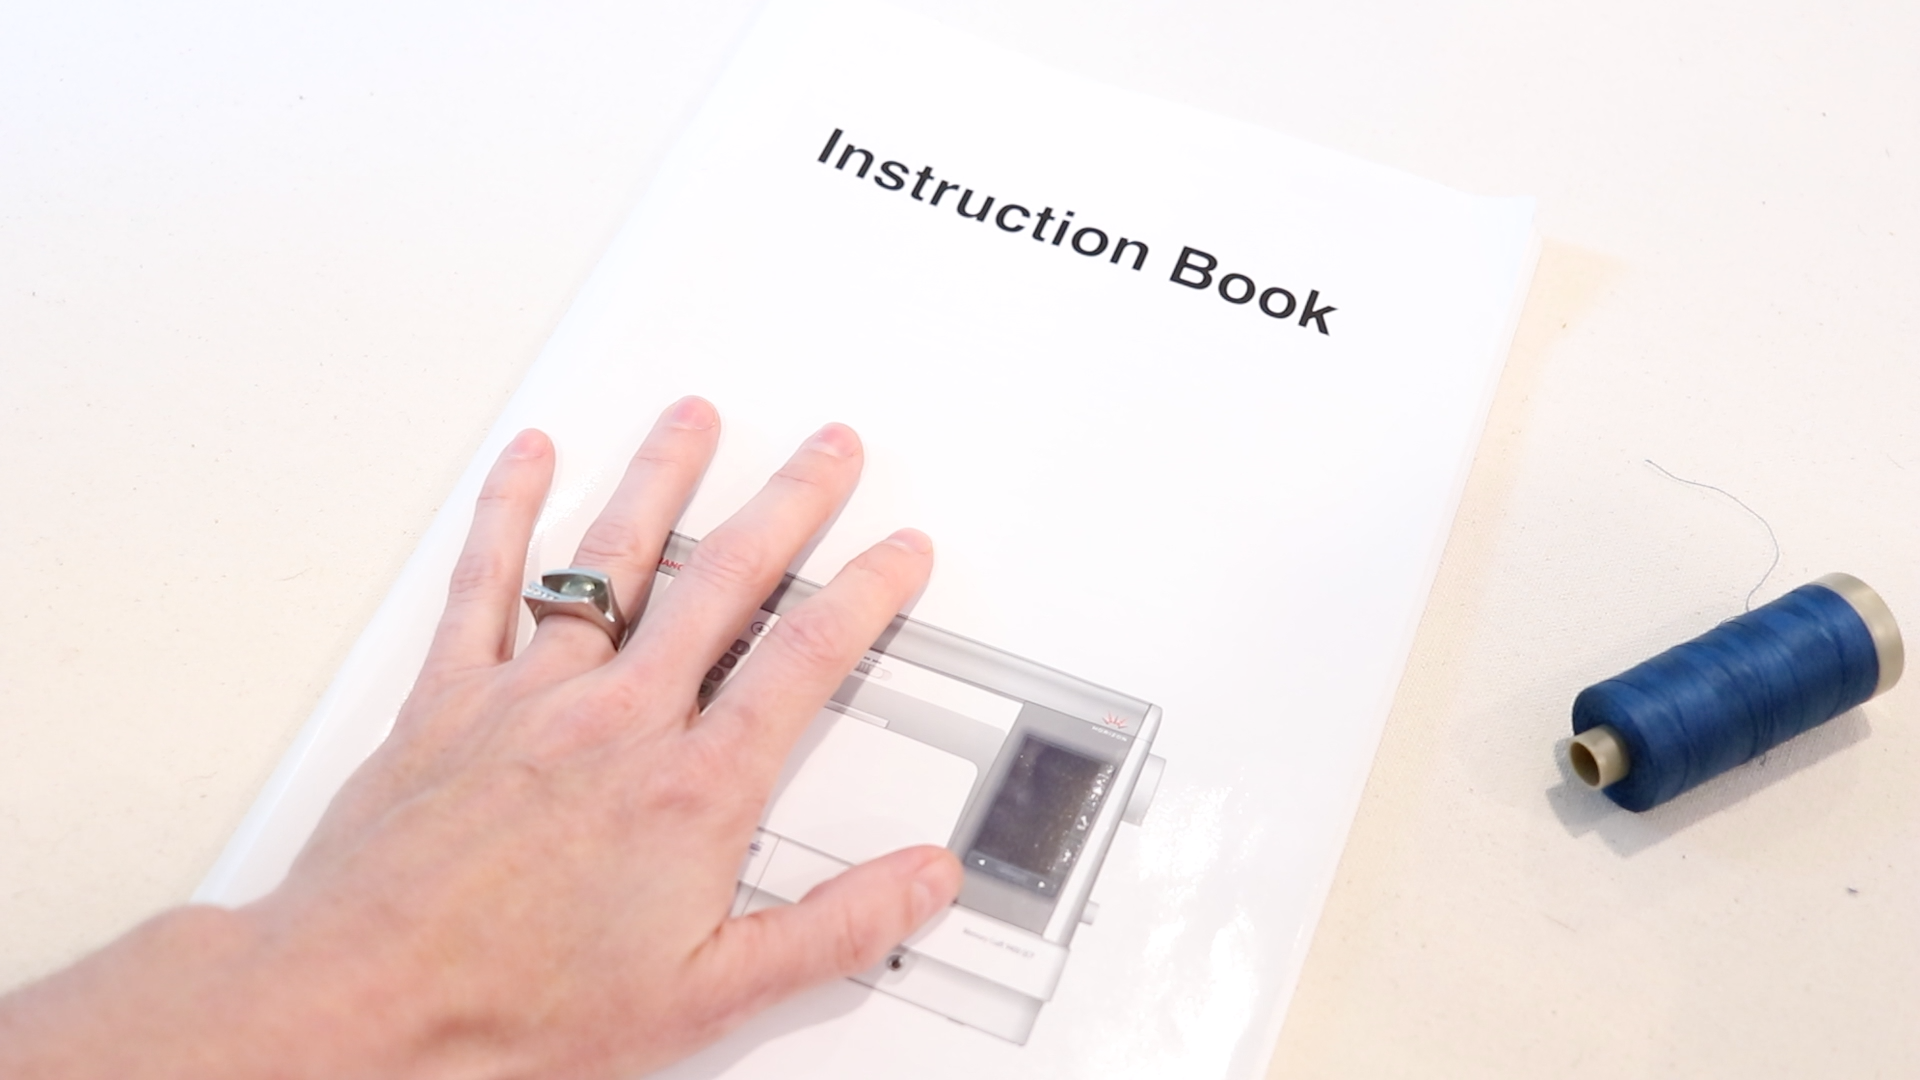
- Look through your sewing machine manual. Become familiar with where things are for easy reference.
- Your sewing machine instruction book should have a picture guide of how your machine is supposed to be threaded. It’s good to look this over as not all sewing machines are exactly the same.
- It’s a good idea when sewing to keep your machine instruction book close by for troubleshooting and referencing if needed.
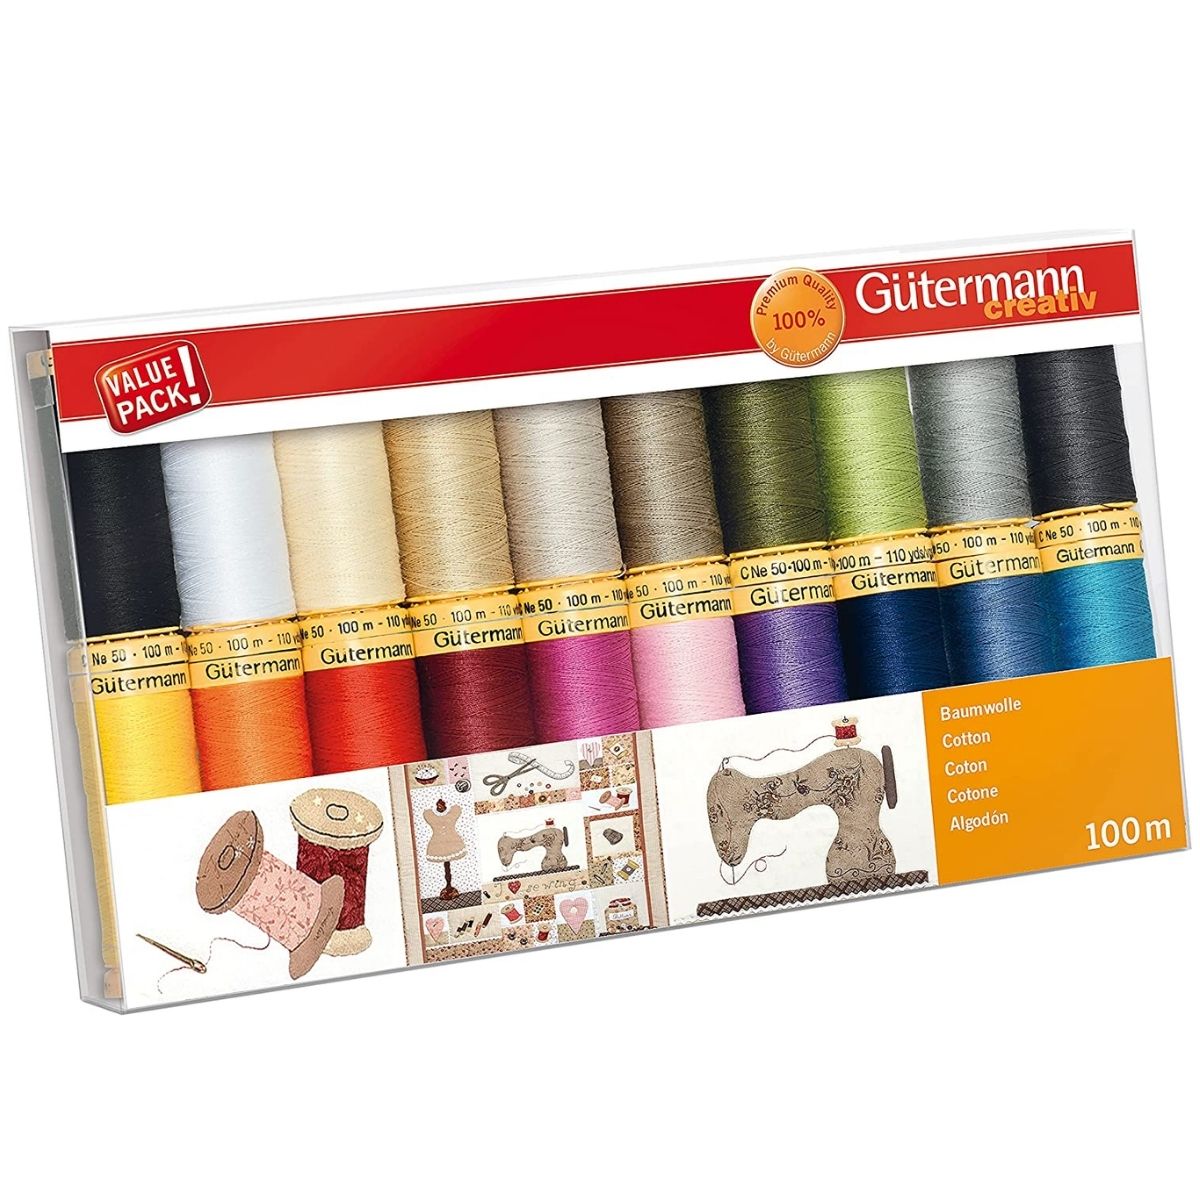
The Best Thread for A Sewing Machine
When it comes to choosing a thread, buy a brand that has colors you need for your project.
There are certain brands of thread that I have like more than others. I could do an entire post just on thread. But for now, I’m going to list off a few brands that I use that have worked well with this particular singer sewing machine.
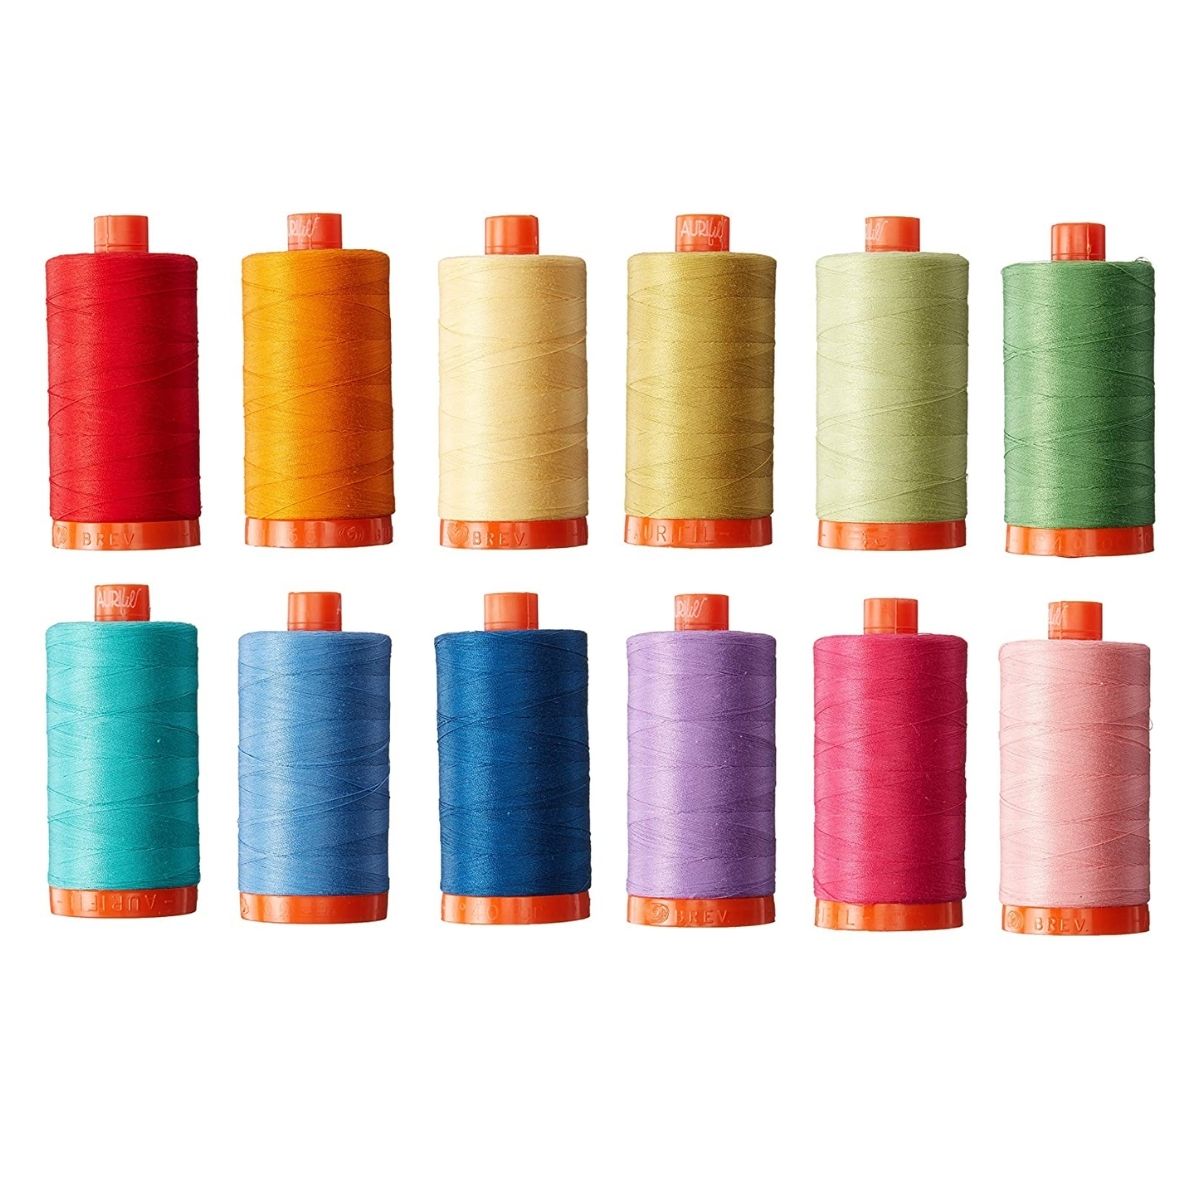
- Aurafil Thread (my all time favorite thread)
- Select the thread you will be using for your sewing project.
- Be sure that it is a standard sewing thread and not a “heavy-duty” style thread. Heavy-duty threads will require a different-sized needle for your machine and will also require some tension adjustments. Most thread that is a heavier weight thread will say “heavy duty” or something similar on the spool.
- Some basic sewing machine threads are Gutermann, Coats and Clark, Sewology, as well as Aurafil- to name a few.
- Aurafil is my personal favorite thread to use for most sewing projects, however, use what’s best for you and fits into your budget.
How To Thread A Sewing Machine Video
If you are more of a visual learner and prefer video tutorials, I have created one that walks you step by step how to thread a sewing machine.
I also have quite a few different beginner friendly sewing tutorials for sewing hair scrunchies, skirts, bags and more!
Winding The Bobbin
How To Thread A Bobbin
So before we can thread our entire sewing machine, it’s easiest to begin by winding or “threading” the bobbin first.
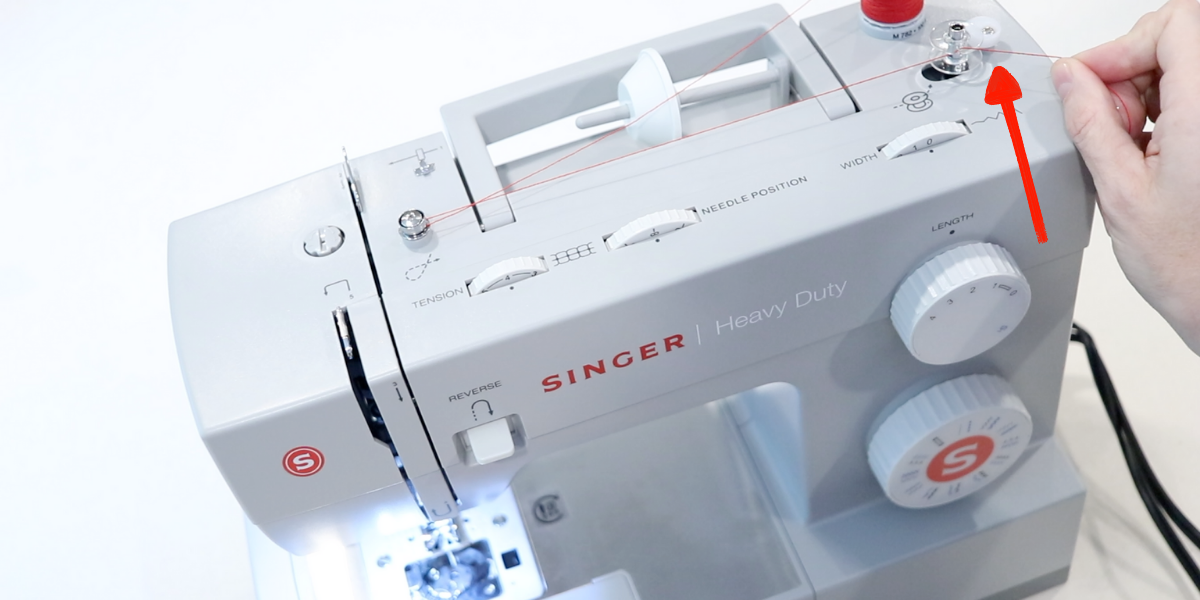
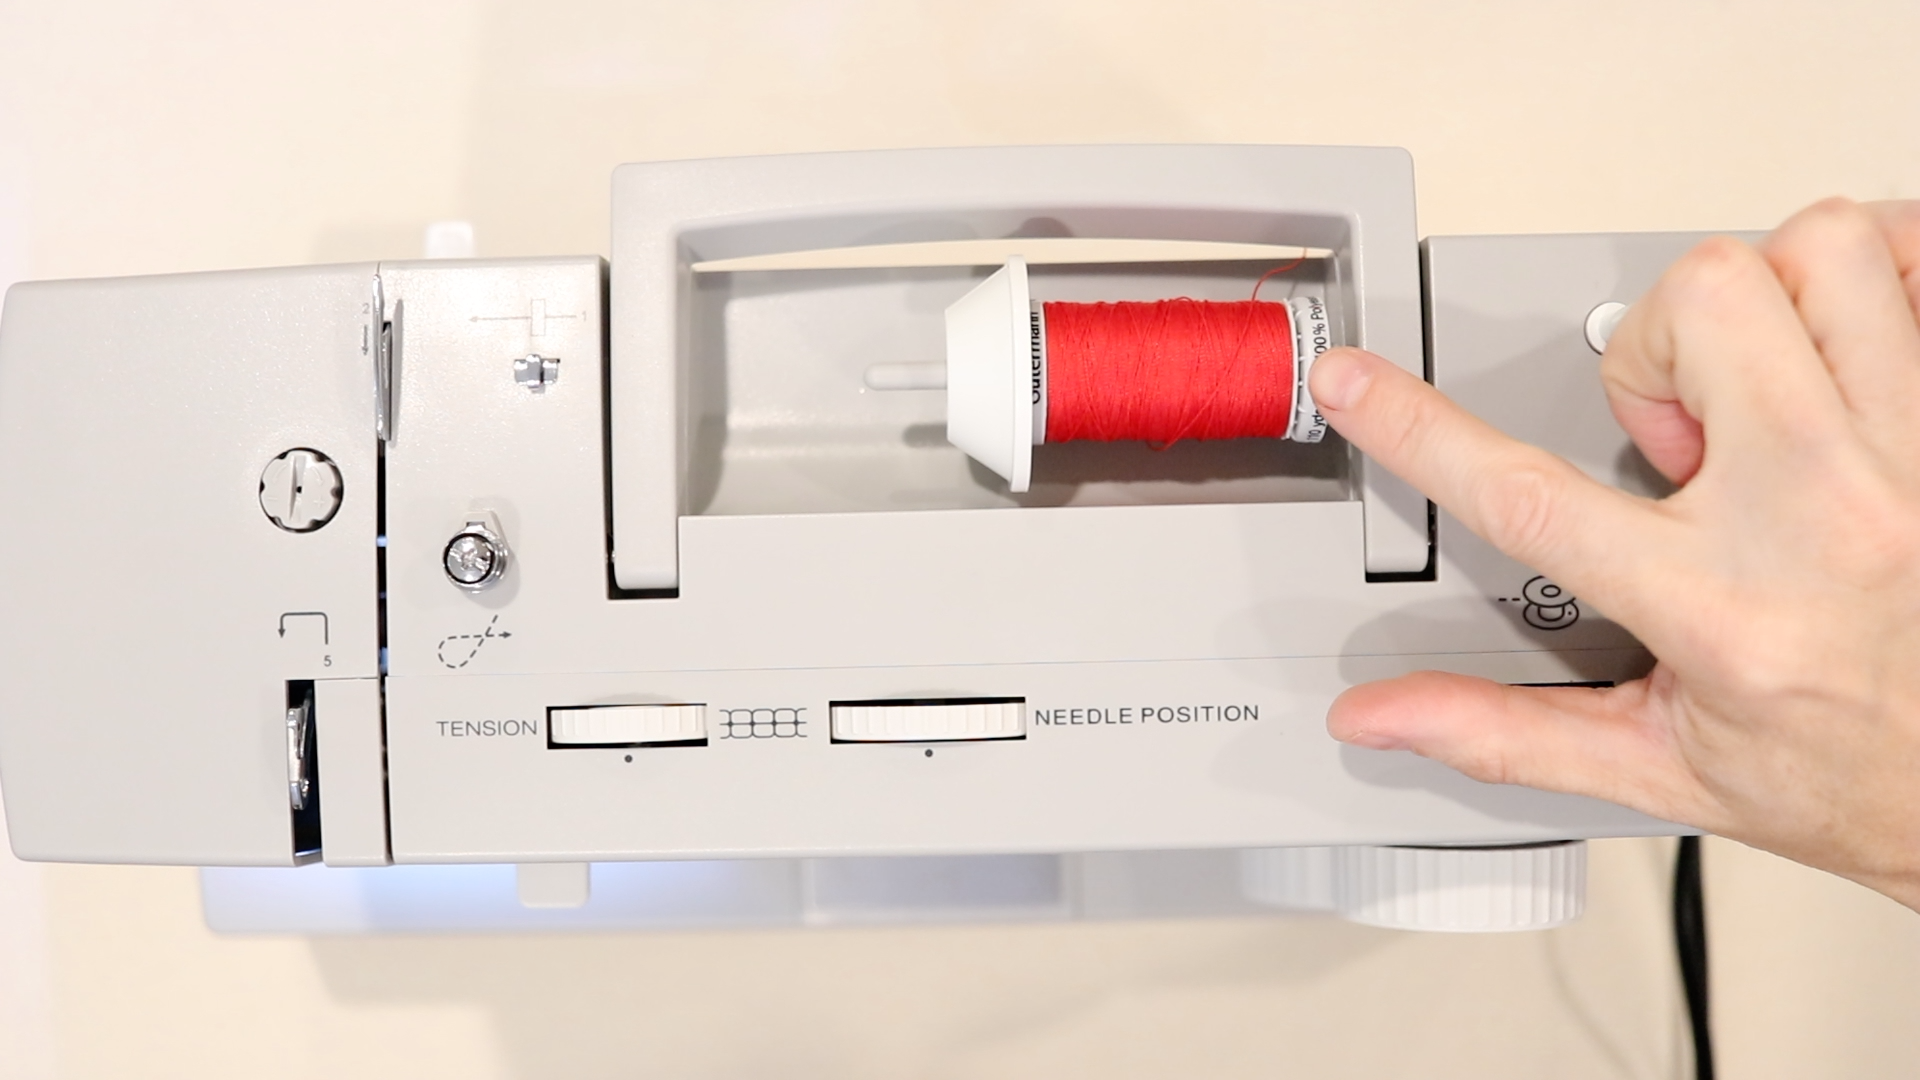
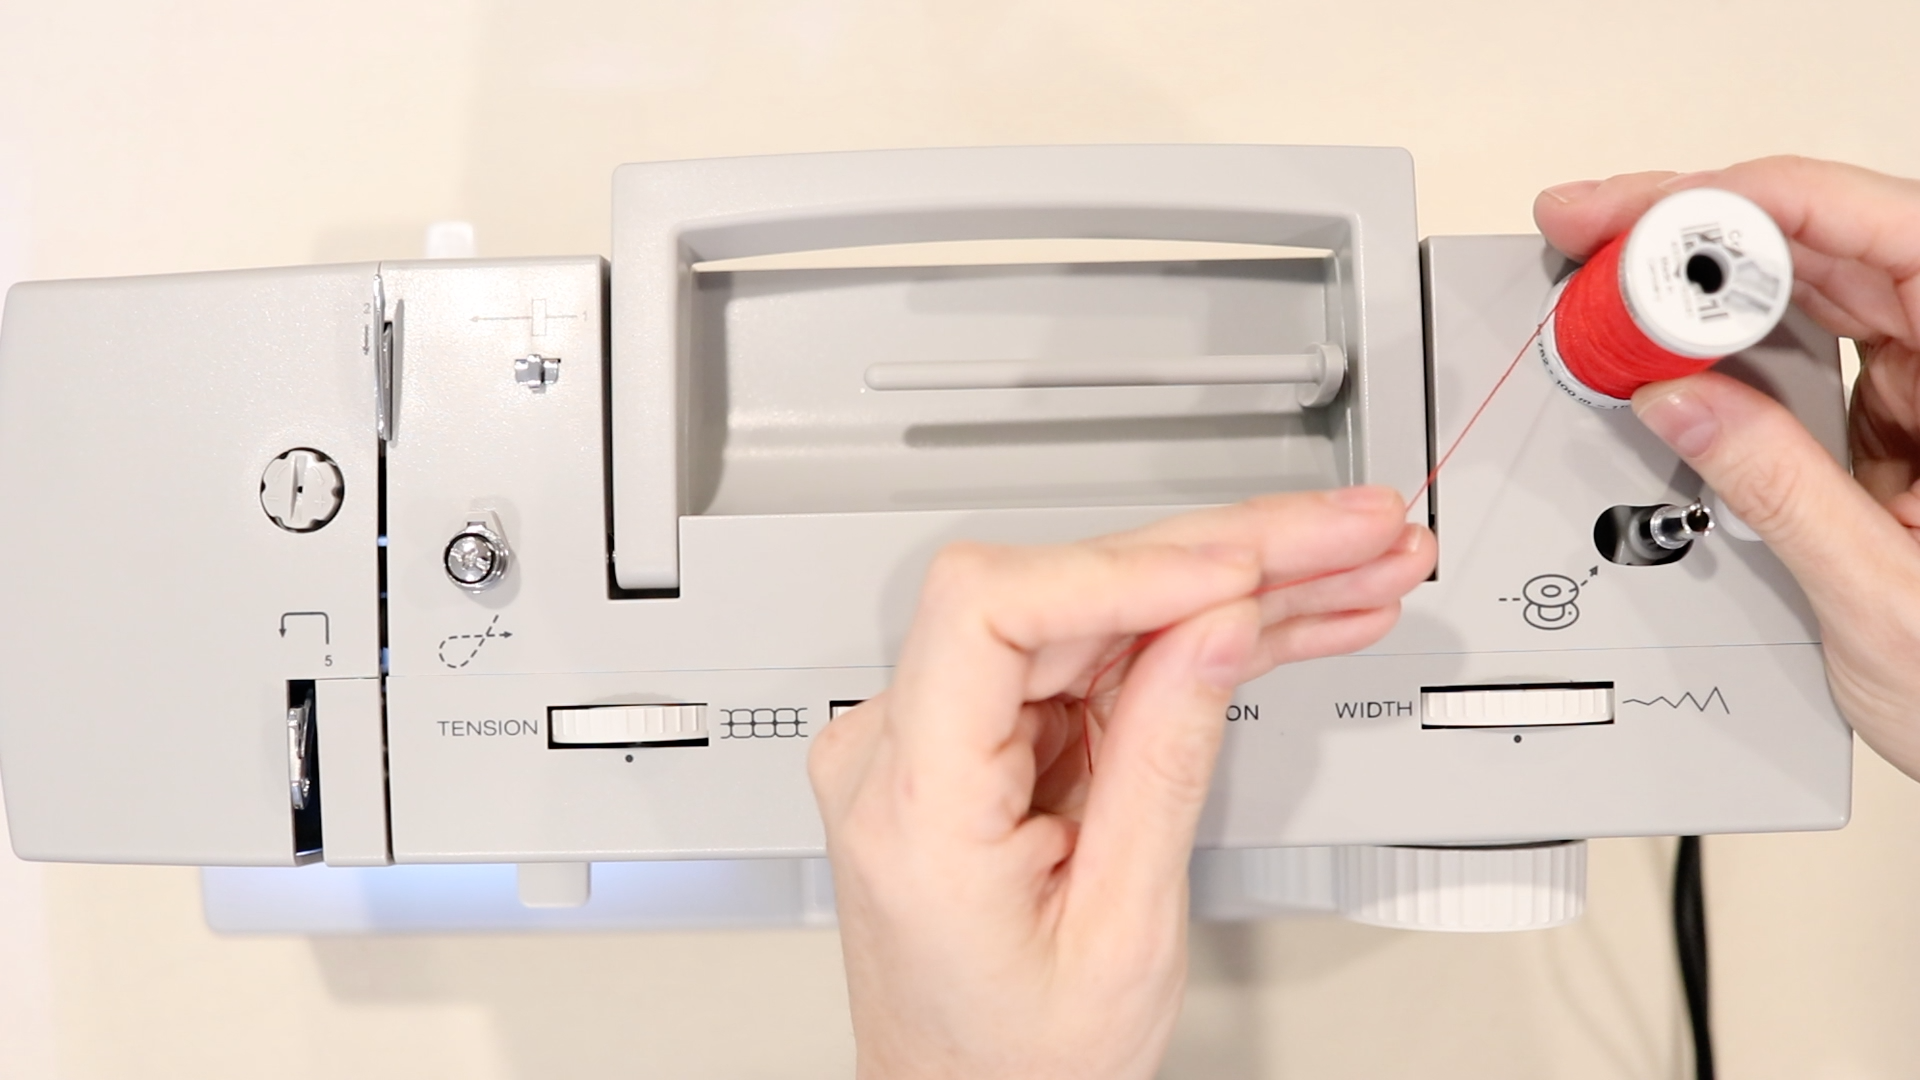
After you have chosen the thread you want for your sewing project, place the spool on your spool pin.
Following the guide on your machine, wrap your thread around the bobbin thread guide.
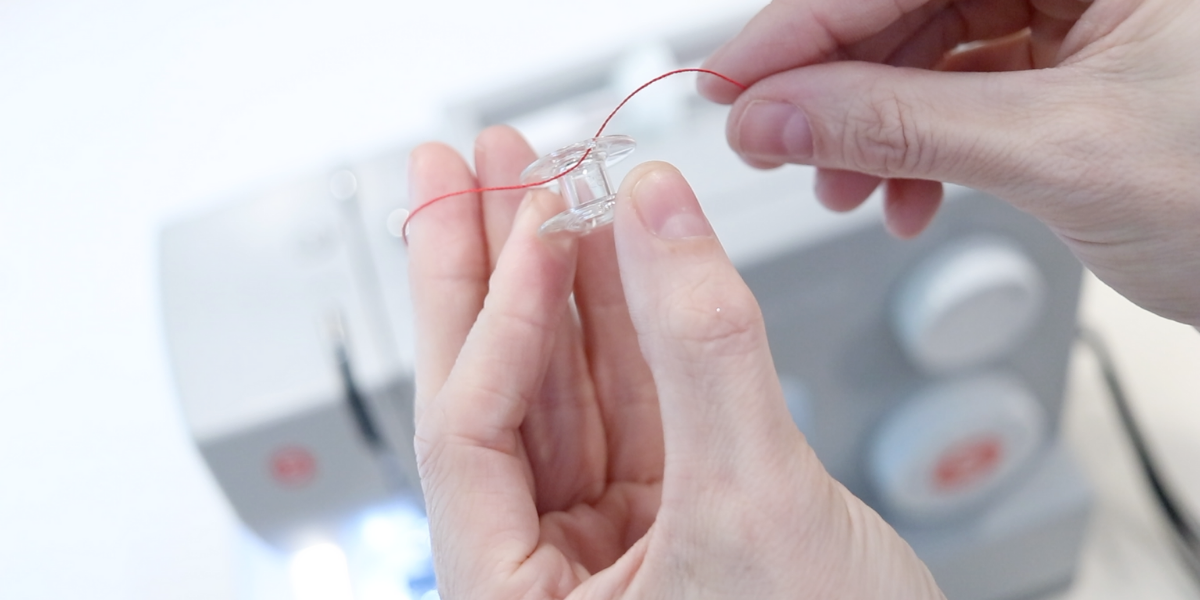
Next, thread your bobbin with your thread.
To do this, start with your thread at the center of the bobbin, and thread up through the small hole that’s on the top of your bobbin.
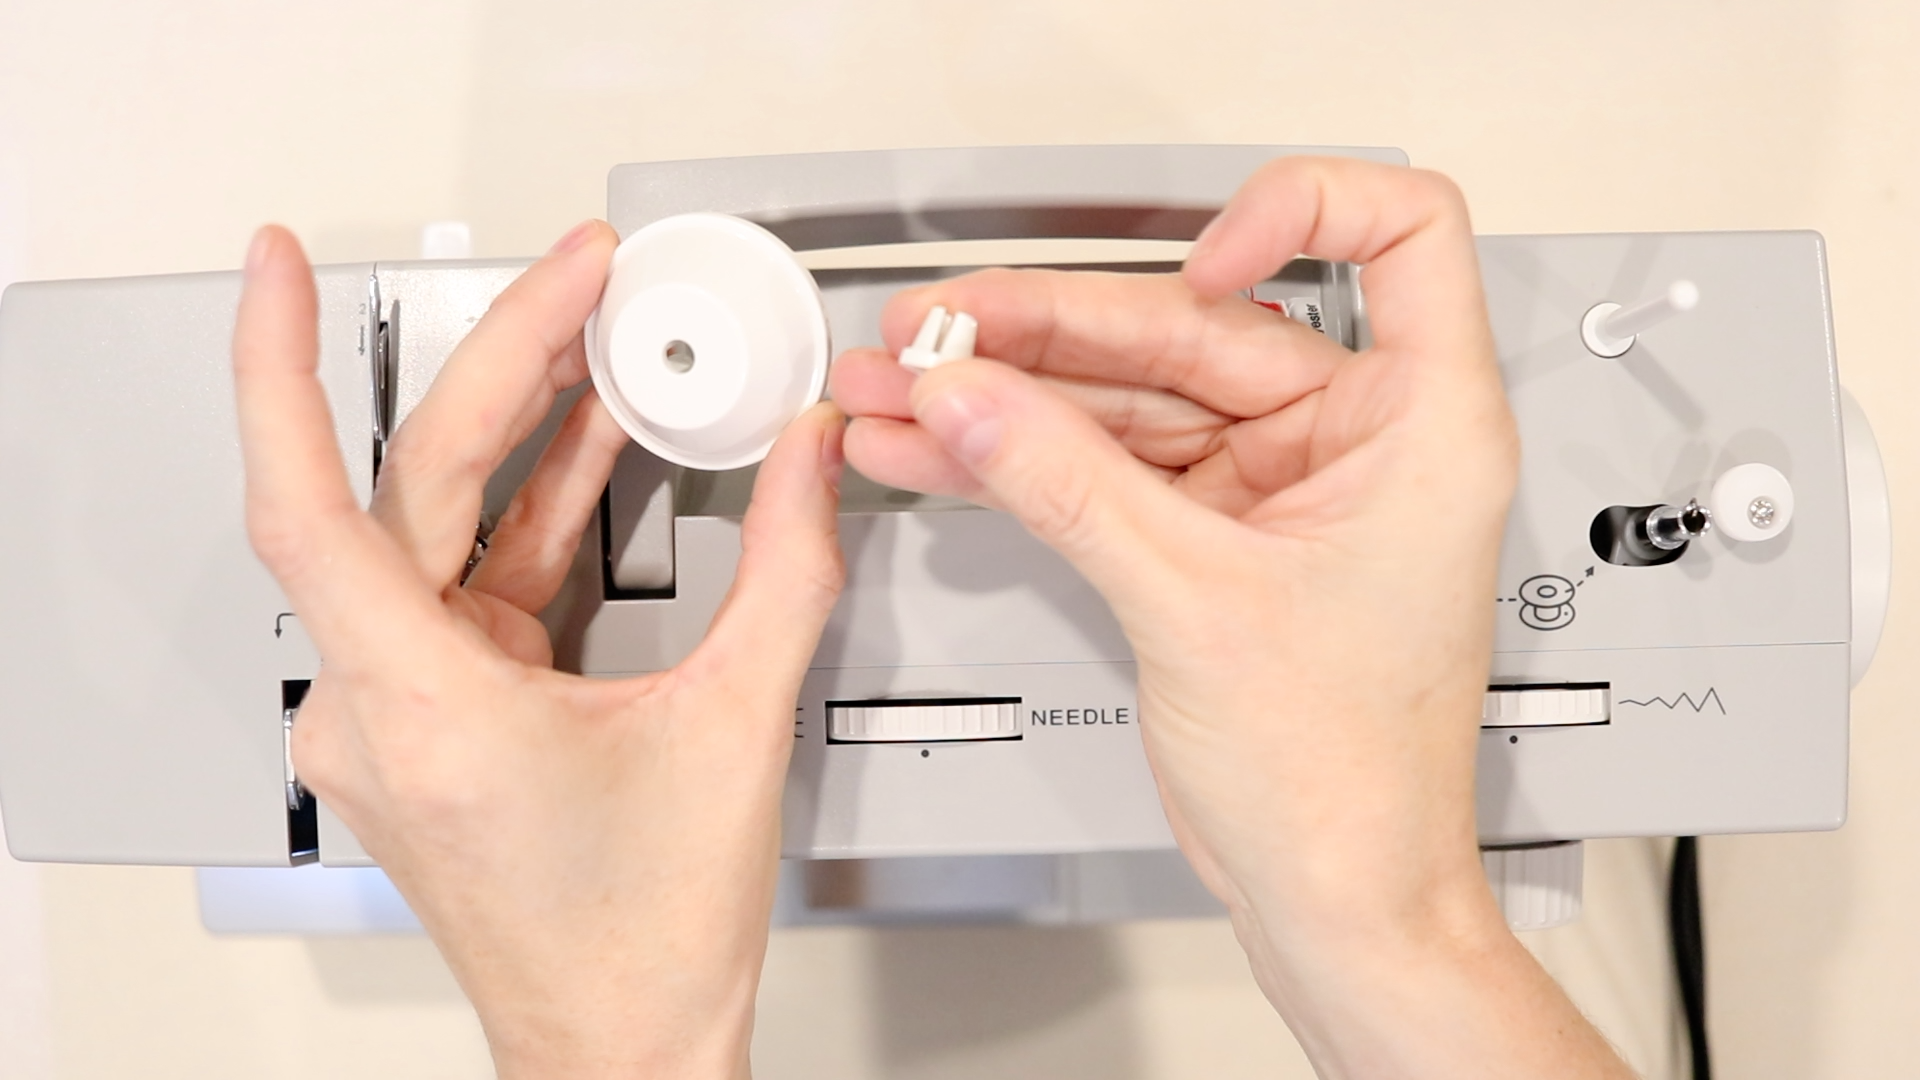
Now that you have threaded the bobbin, it’s time to place the bobbin on the bobbin winding pin.
The pin should be to the left BEFORE you place the bobbin on it. This position is disengaged. You’ll engage it (push it to the right) once the bobbin is secured on the pin.
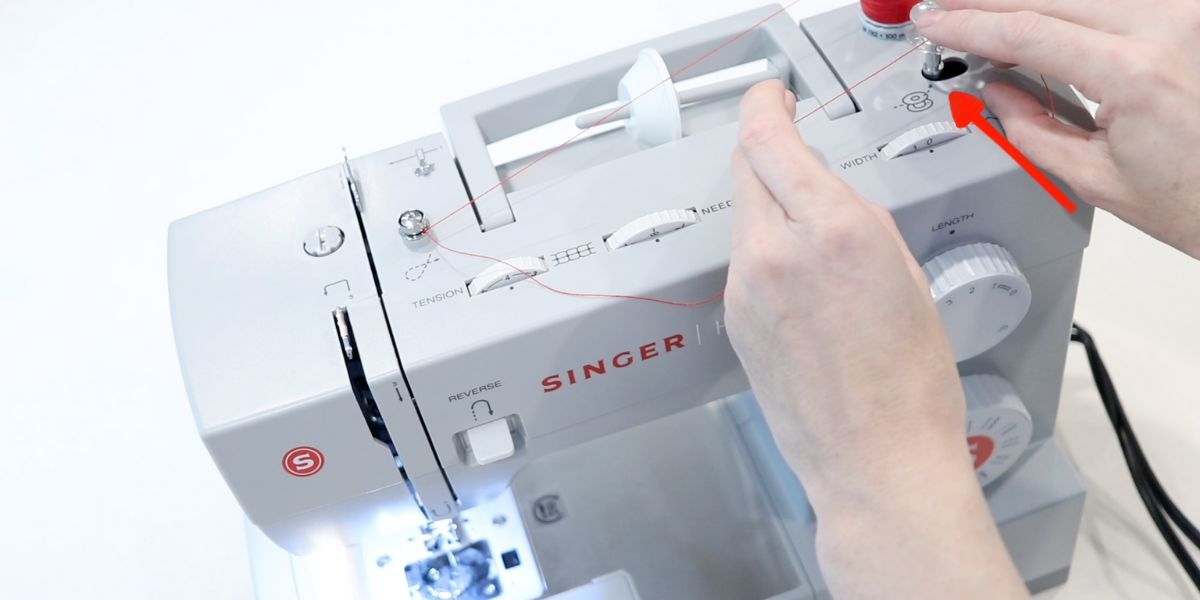
Engage The Bobbin Winding Function
To engage the bobbin winding function of your sewing machine, push the bobbin on the pin to the right. Again, you should hear it “snap” into place.
You will know that the bobbin winder is engaged when you press on the foot pedal.
NOTE: The bobbin winder should start winding, and the sewing function on the sewing machine shouldn’t be working (the needle won’t be going up and down). This is a safety feature of most modern home sewing machines.
Slowly press the foot pedal while holding slight tension on the thread coming out of the top of your bobbin. This will keep the thread from accidentally becoming tangled under the bobbin while trying to wind it.
Once you have wound the thread around the bobbin a few times, stop and trim the thread.
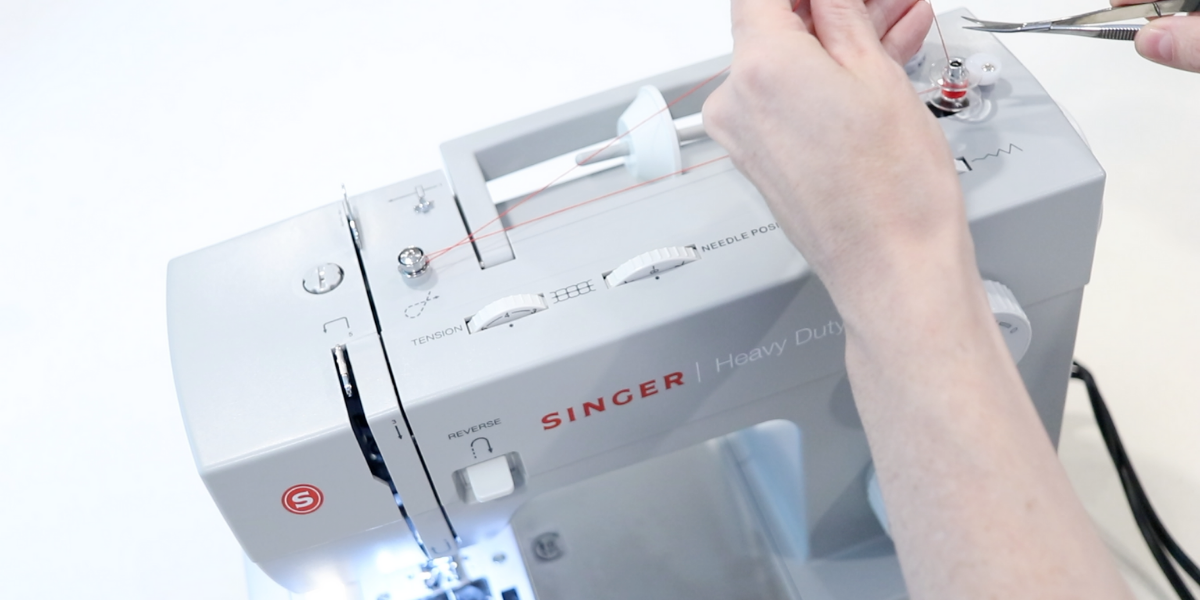
Now you can continue winding your bobbin.
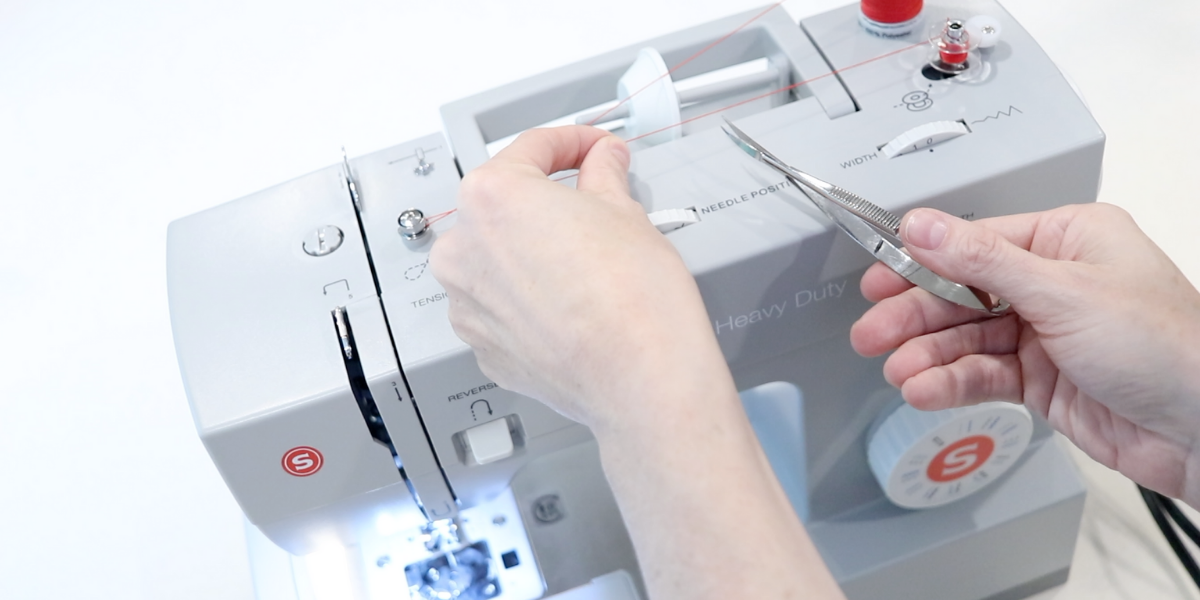
Once your bobbin is almost full (don’t over-wind), dis-engage the bobbin winder by pushing it back to the left.
Clip the thread.
You have now finished winding your bobbin and we can begin threading the upper part of the sewing machine.
Question and Answer about Sewing Machines
Before we begin threading the upper part of our sewing machine, I want to point out a couple things you may have questions about.
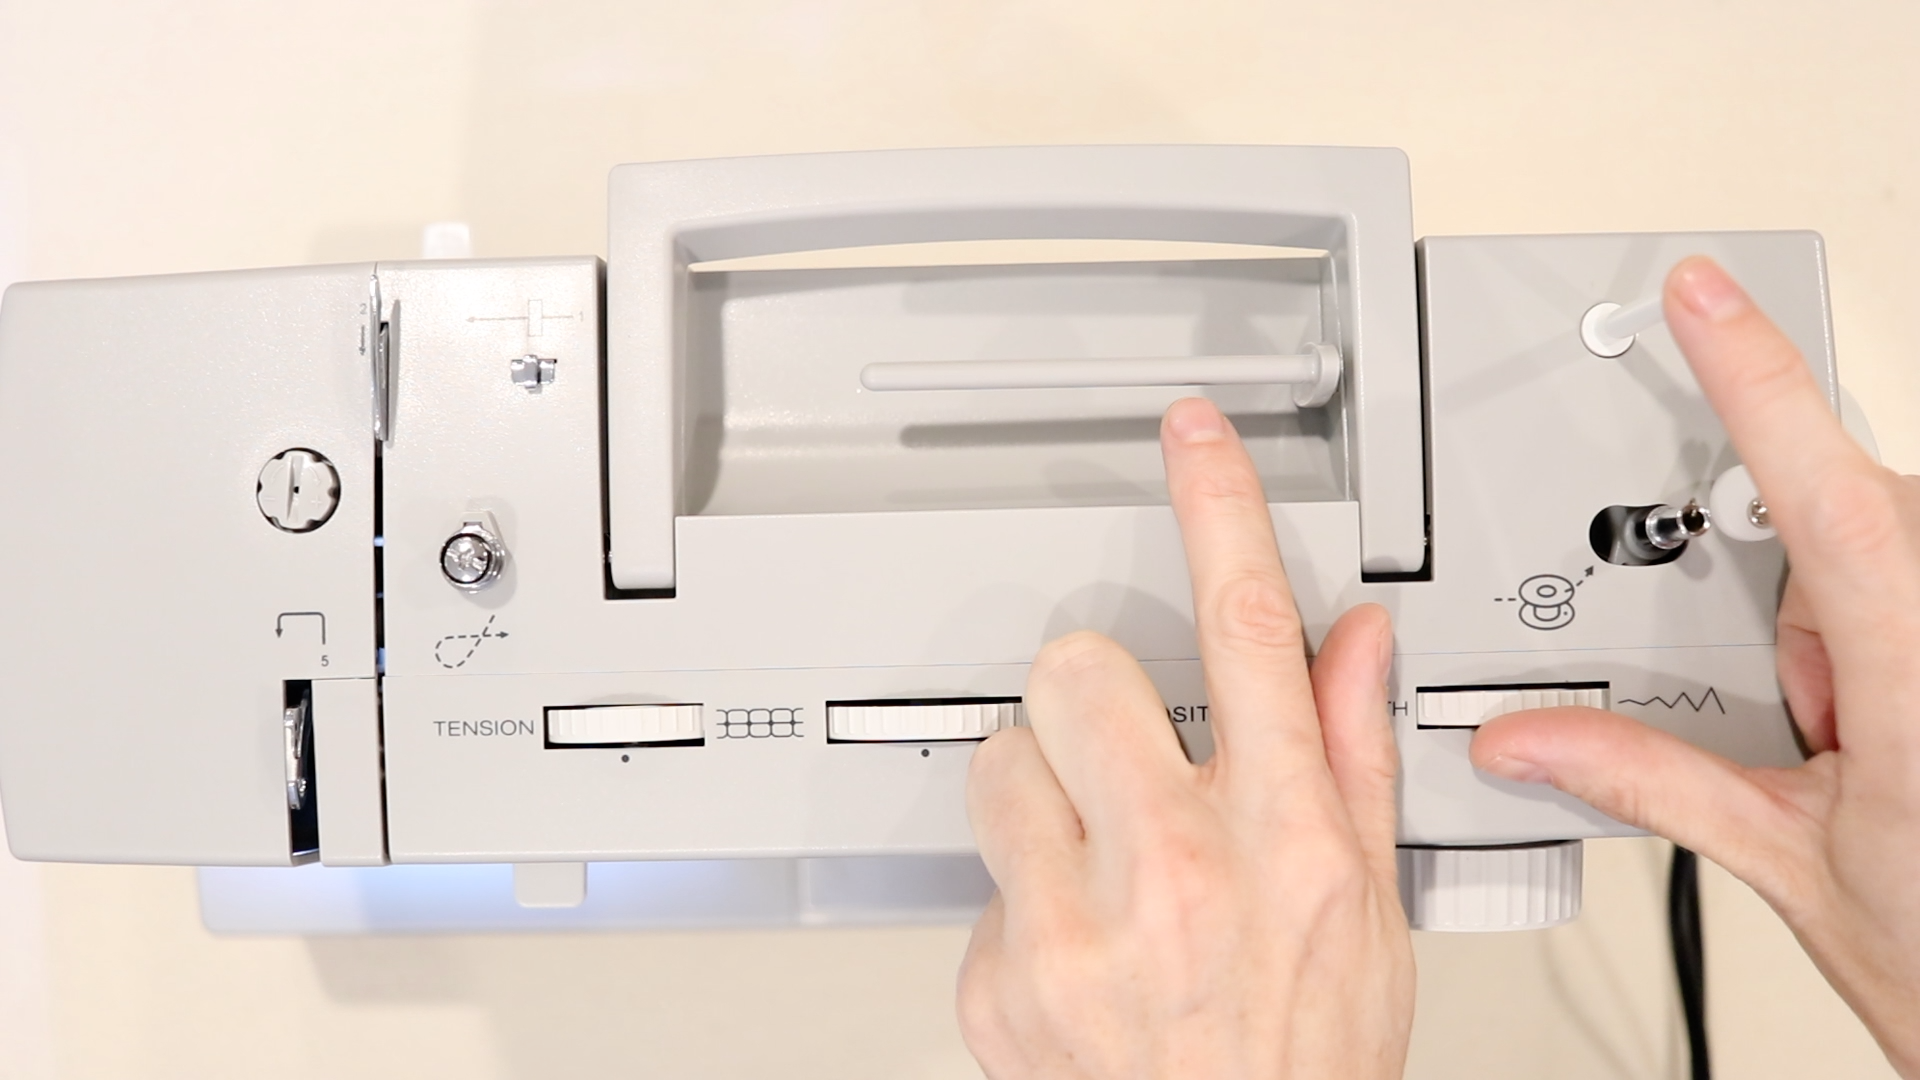
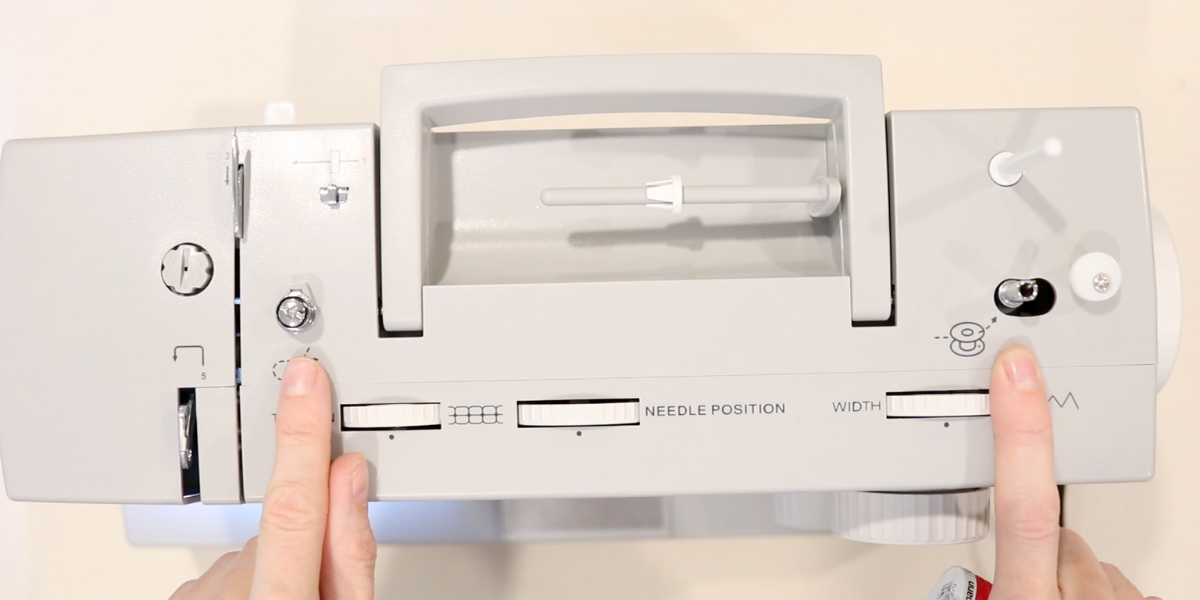
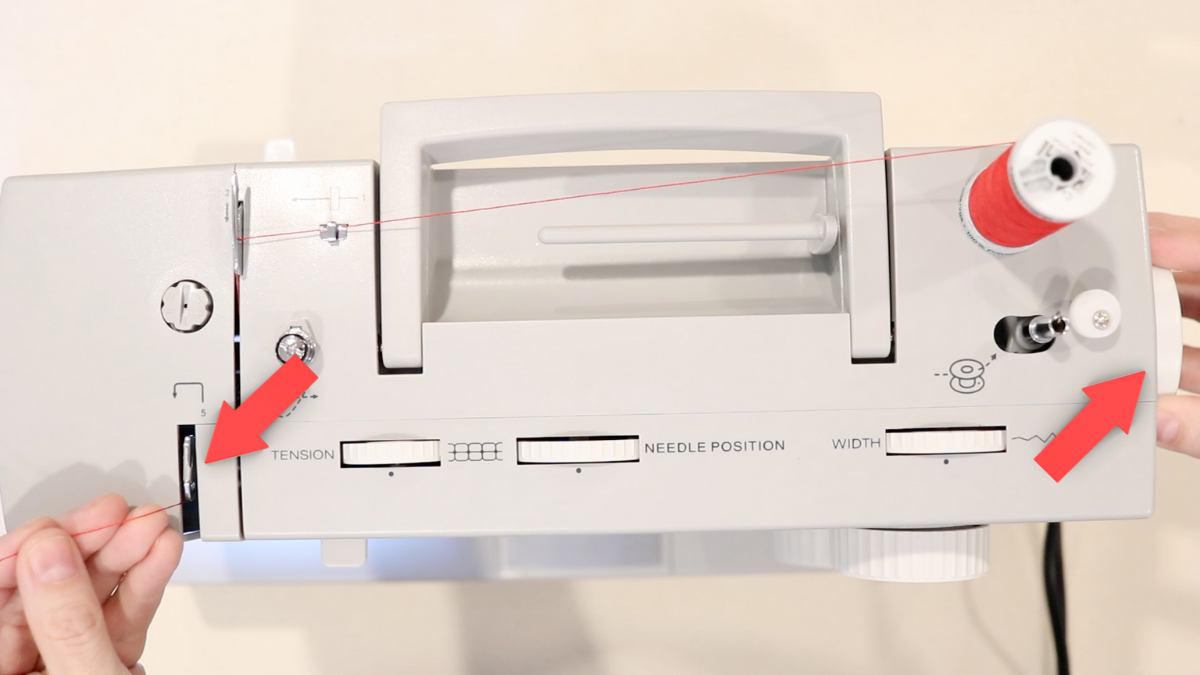
Q: What’s the difference between the horizontal spool pin and the vertical spool pin on my sewing machine?
A: Either style of spool pin will work for sewing on a home sewing machine. It’s good to know however that some sewing machines will have one style or the other, sometimes both (as in the case with the machine I’ll be demonstrating on).
Q: Why does my sewing machine have two spool pins?
Great question!
A: Some machines come with both a horizontal spool pin as well as a vertical spool pin because this will enable you to be able to wind a bobbin without having to pull the thread out of your machine. If of course you have two spools of the same thread:)
One spool will stay threaded through your machine, and the other (usually the vertical spool pin) will be used when extra bobbins need winding.
The feature of two spool pins also allows for dual needle or “twin needle” sewing. Which we will cover in another lesson.
- If you are using a horizontal spool pin, you’ll want to make sure that you place a spool pin or spool cap on the end of the spool pin to keep your thread from coming off while sewing.
How To Thread A Sewing Machine
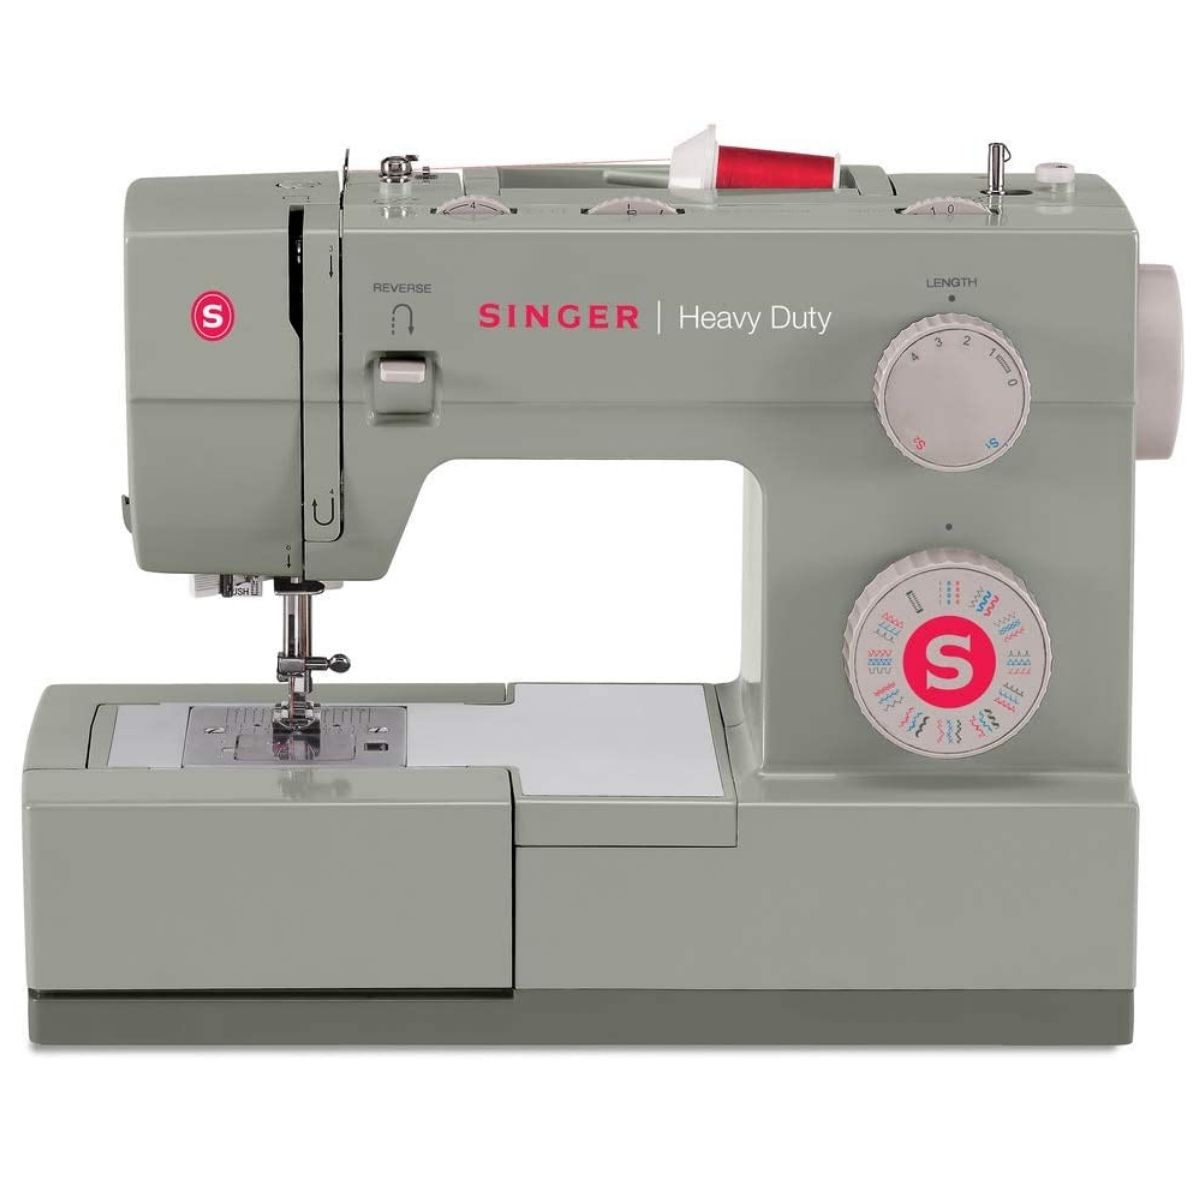
This tutorial is demonstrating how to thread a newer singer sewing machine.
If you are looking for tutorials on how to thread an old singer sewing machine, check YouTube. That is a great resource for all makes and models of older Singer sewing machines.
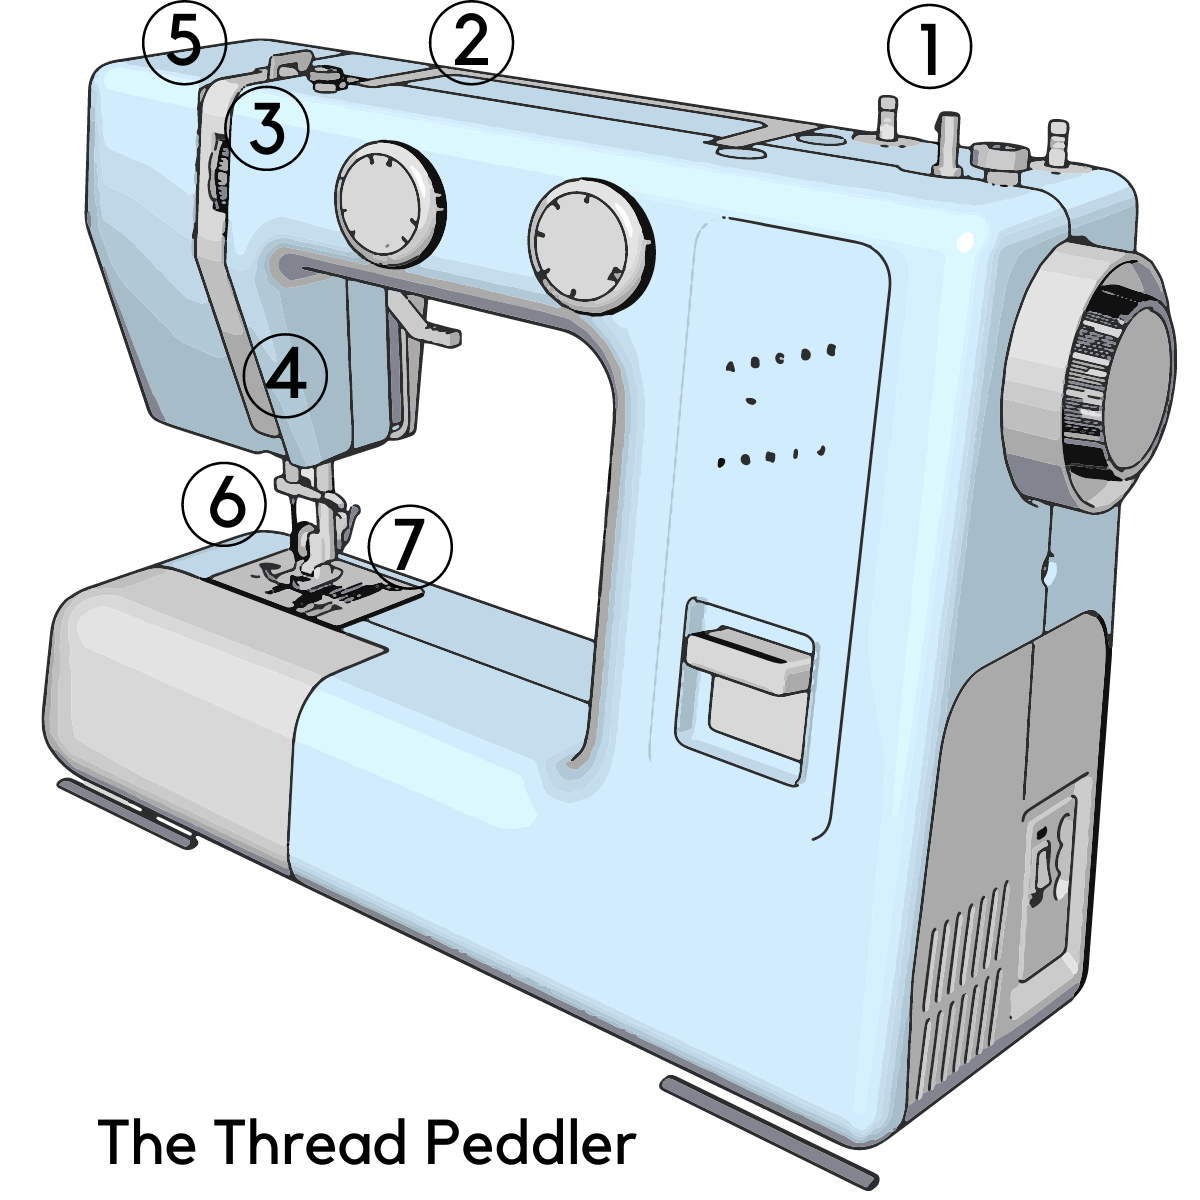
Step 1- Place thread on spool pin
Place your spool of thread on your spool pin. You will not need a spool cap.
Look for the number guide on your sewing machine. Some machines will have this guide more visible than others.
Find the number 1 and pass your thread through the guide or pull the thread into the guide through the slit on the back.
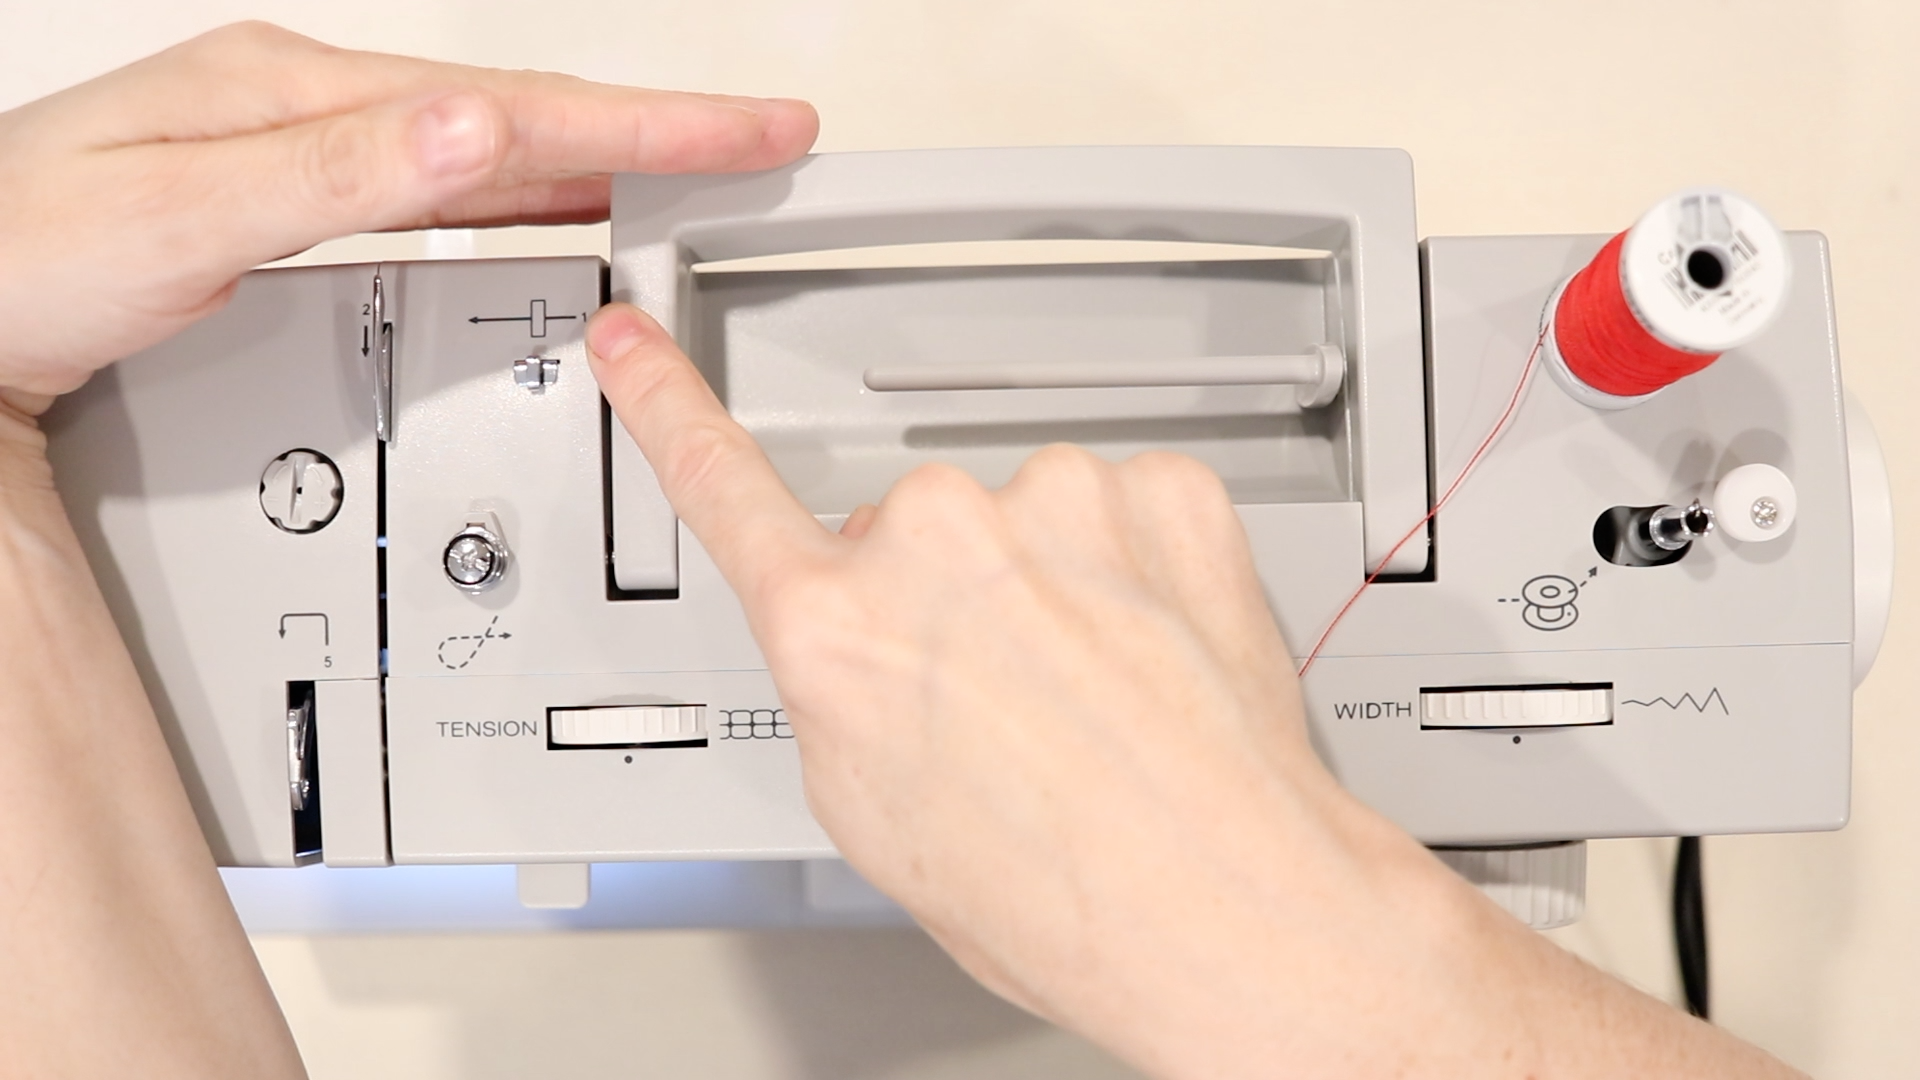
Step 2- Sewing machine thread guide
Find the number 2 on your machine and pass your thread around that guide.
You’ll notice that next to the numbers on your machine you’ll see a series of arrows. The arrows are showing you which way the thread should be traveling on your machine.
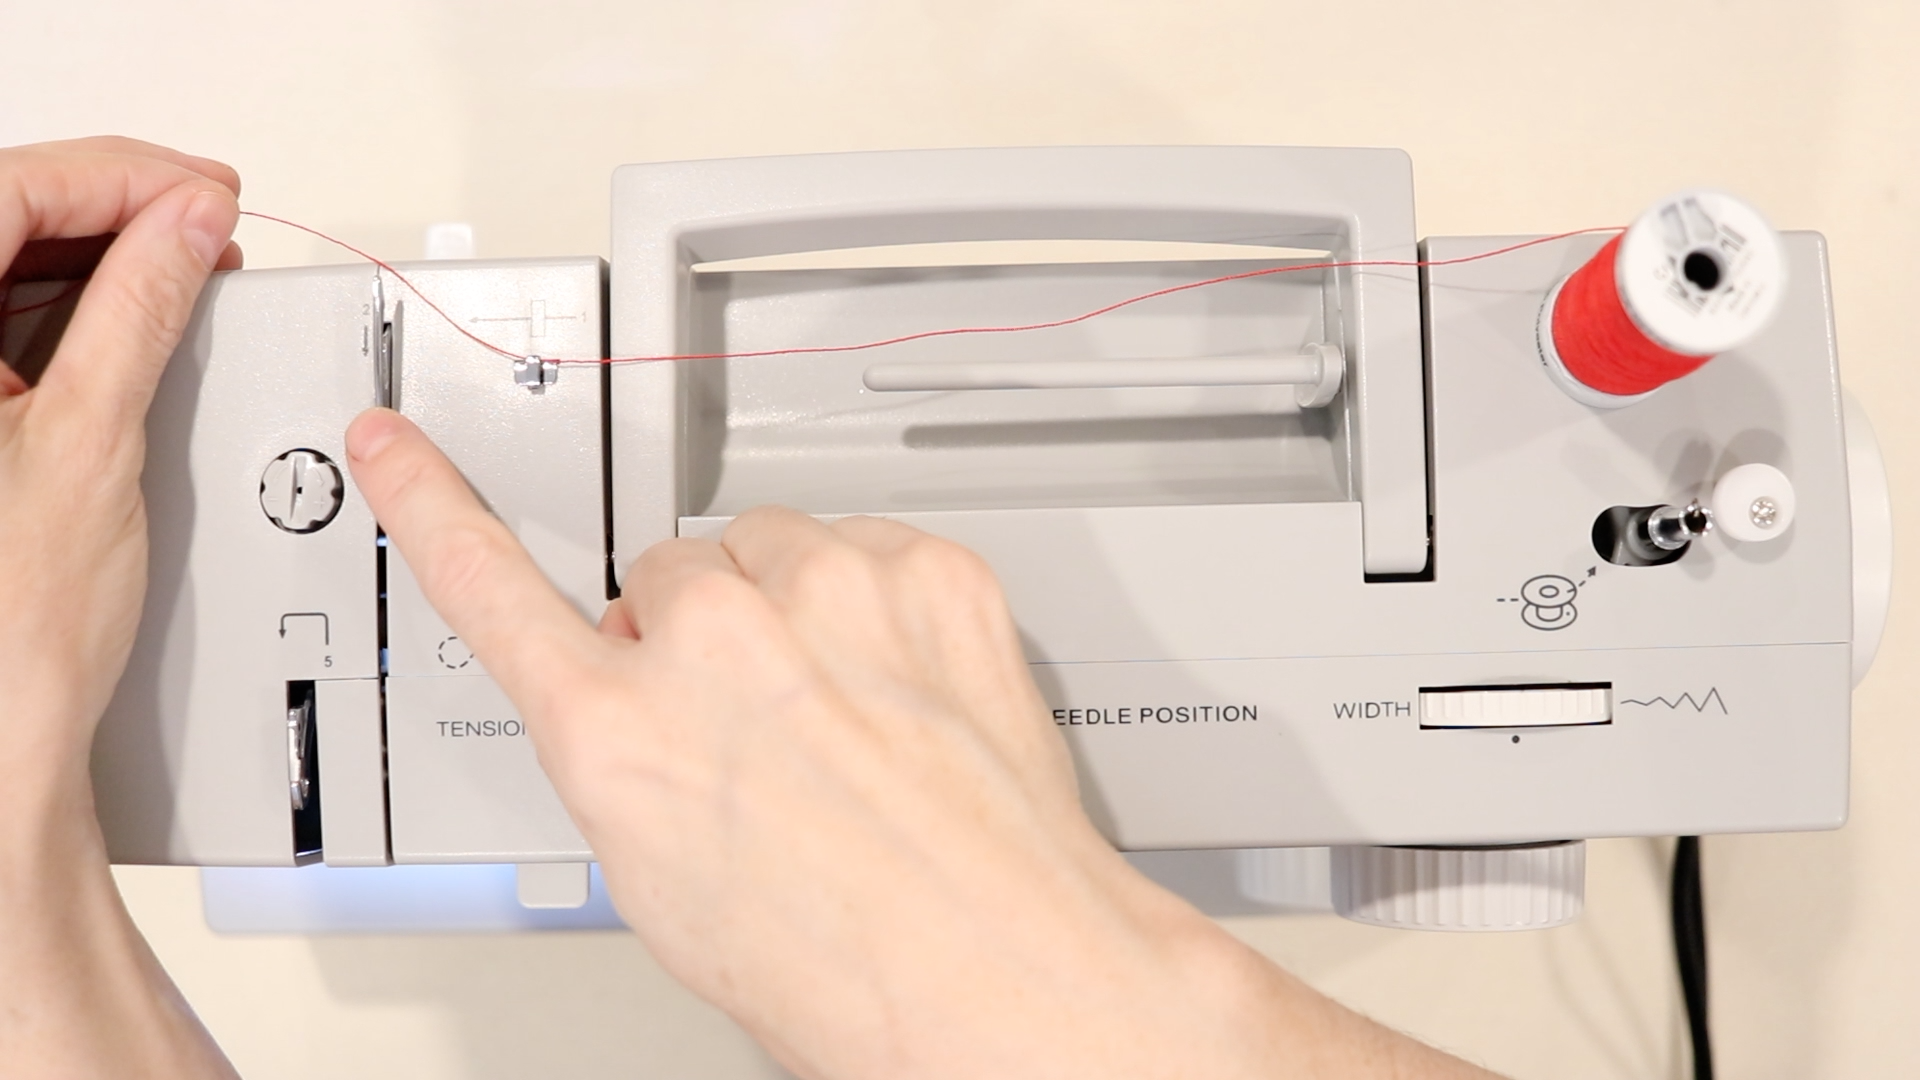
Step 3- Thread Guide
Usually, by step number 3, your thread should be going down a channel that passes from the top to the front of your machine. Continue to follow the arrows.
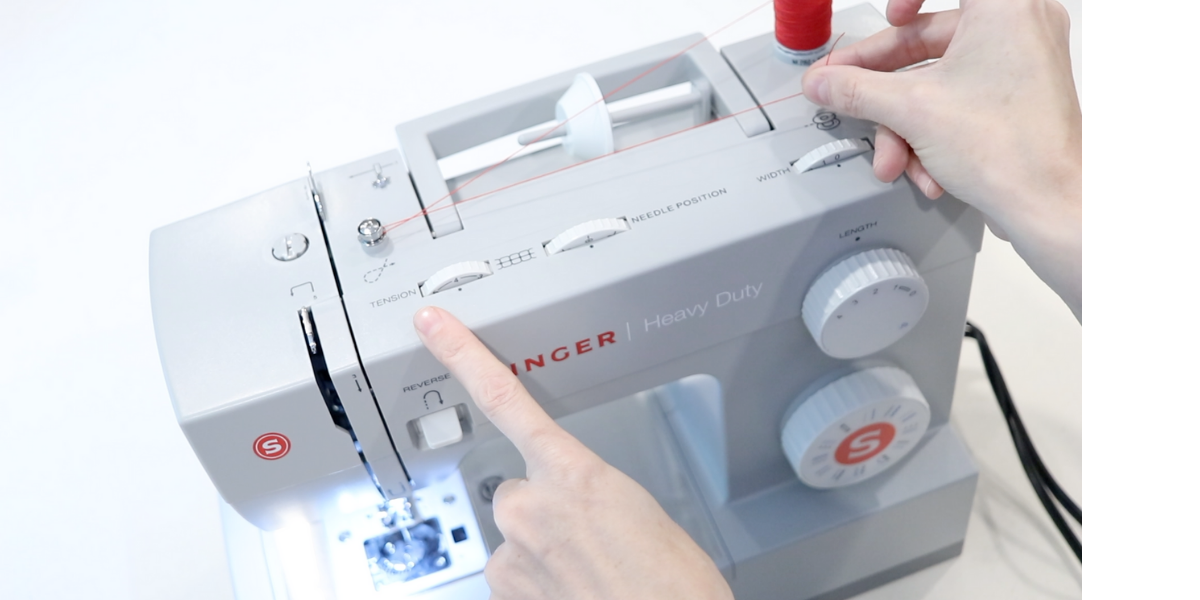
Step 4- Threading around the tension knob
As the arrow on the from of the sewing machine indicates, pass the thread around and work your way back up again.
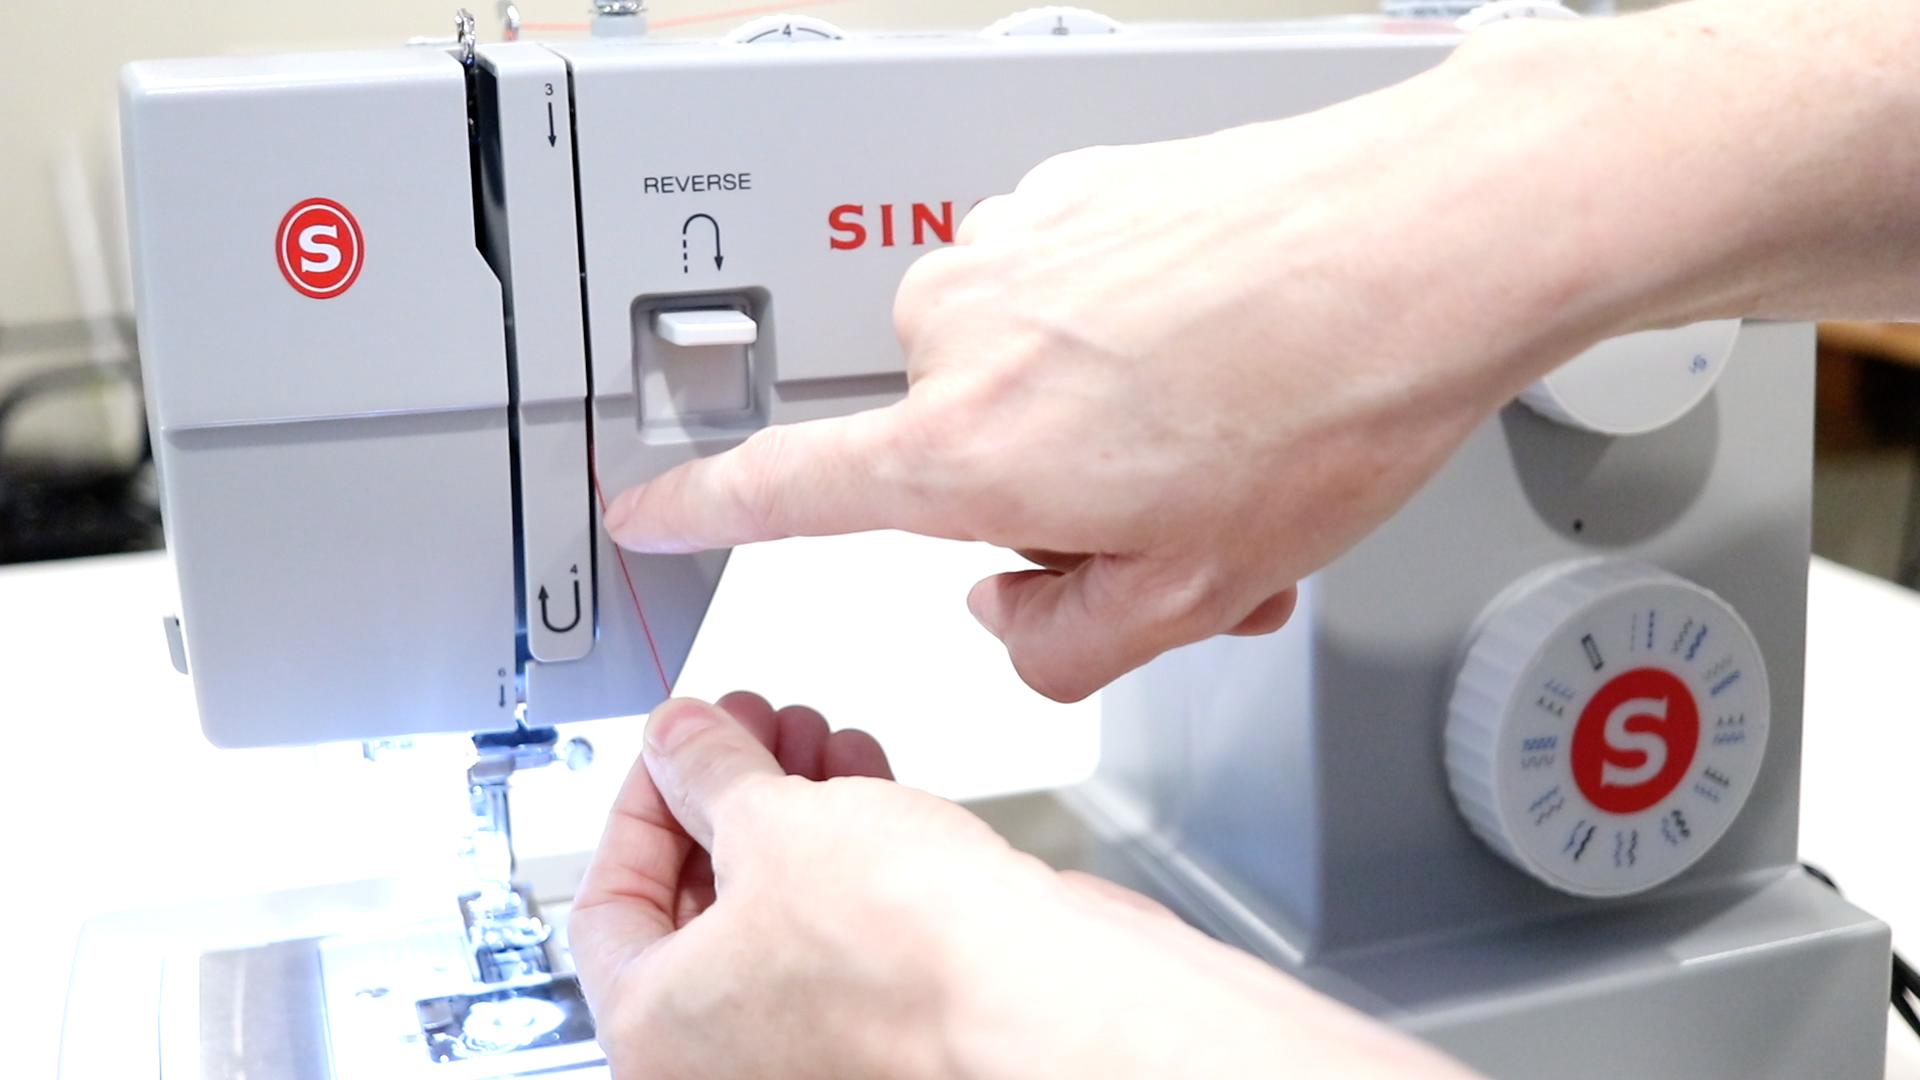
Step 5- Threading the take-up lever
After you’ve passed the thread back up the channel in step 4, it’s now time to hook your thread on the uptake lever of your sewing machine.
If you don’t immediately see the uptake lever, don’t panic! Your machine has one-I promise.
With your right hand on the handwheel of your sewing (large round wheel on the right of the machine), slowly turn the wheel clockwise. Doing this will move the uptake lever up and down so you can pass the thread around it easily.
Stop turning the hand wheel as soon as the uptake lever is in the highest position.
Now gently slide the thread into the uptake lever. Moving from the back of the machine towards the from with your thread. This will make sure that the thread is in the correct place within the lever.
After your thread has been pulled into the uptake lever, begin moving that thread down the cannel on the front of the sewing machine again and look for number 6.
Almost done!
Step 6- Pass thread around the hook above the needle
Now you’re moving down to the front of the machine.
This is where you’ll want to make sure you don’t miss a step. So if your sewing machine looks a bit different from mine on the front, Make sure you look in the instruction book for your machine.
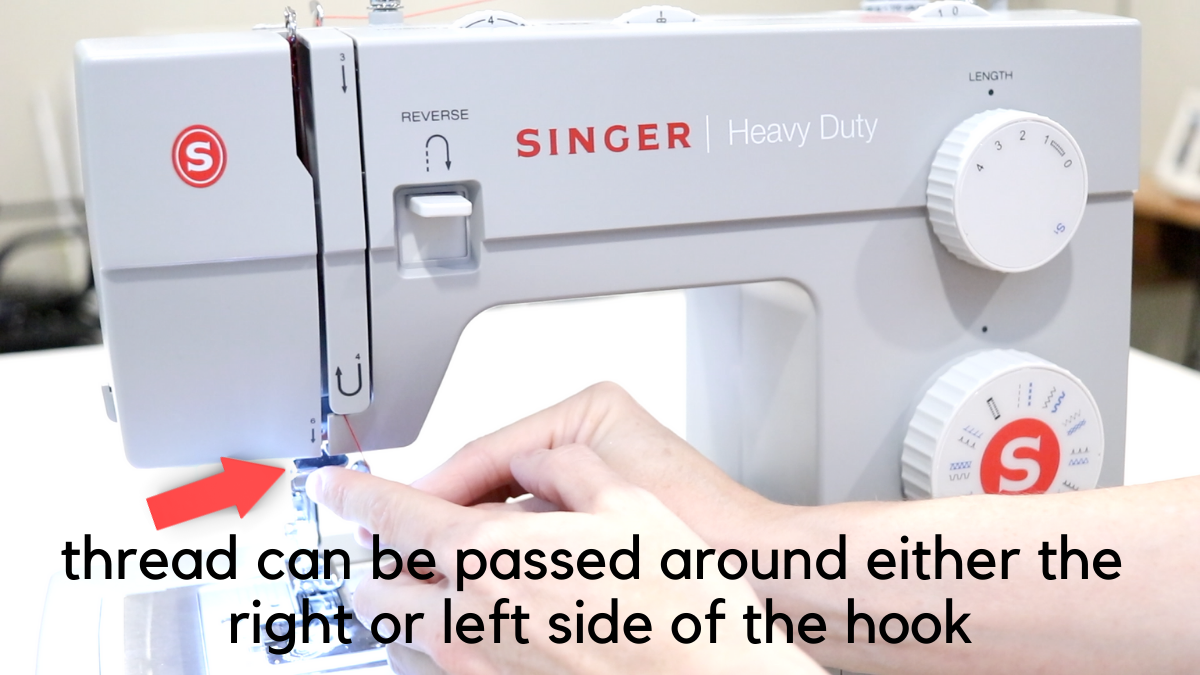
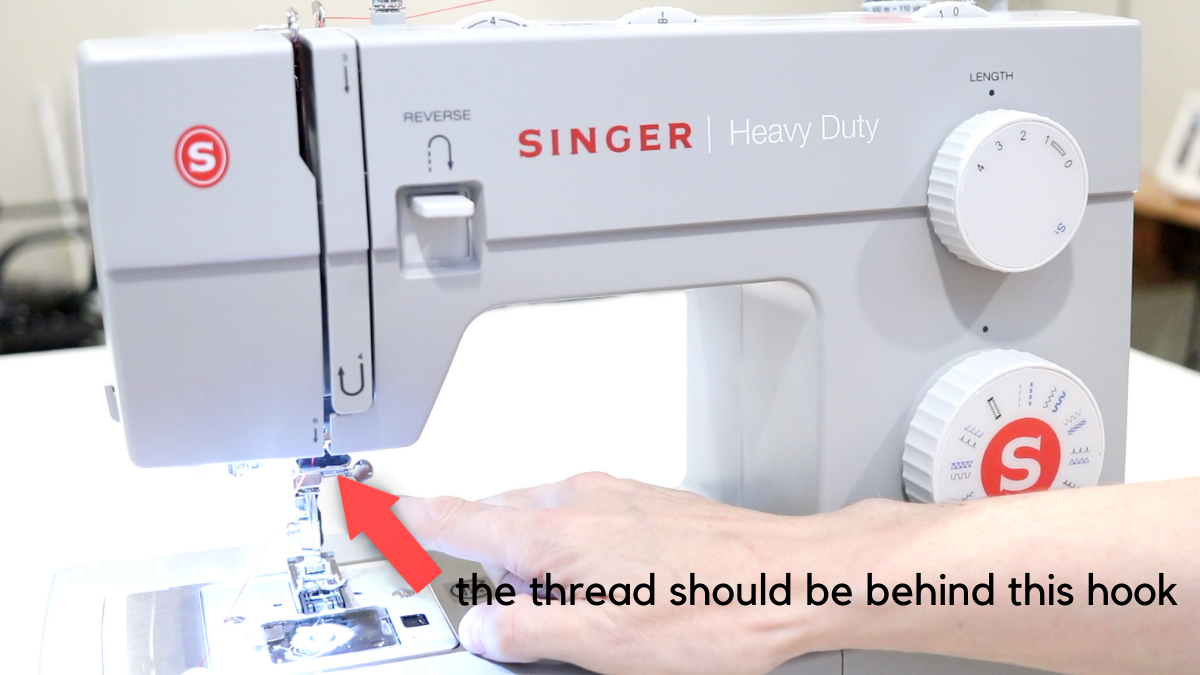
Step 7- Hook above the singer sewing machine needle
Now you’ll likely have one more small hook that that your thread will rest behind before you thread your needle.
This hook may be similar in size to the one above it, slightly smaller or look exactly the same. It will vary depending on your sewing machine make and model.
Refer to the picture below to give you a general idea of what you’ll want to look for when threading.
Note: not all sewing machine will have (2) hooks above the needle. But your sewing machine might. So it’s something to look out for.

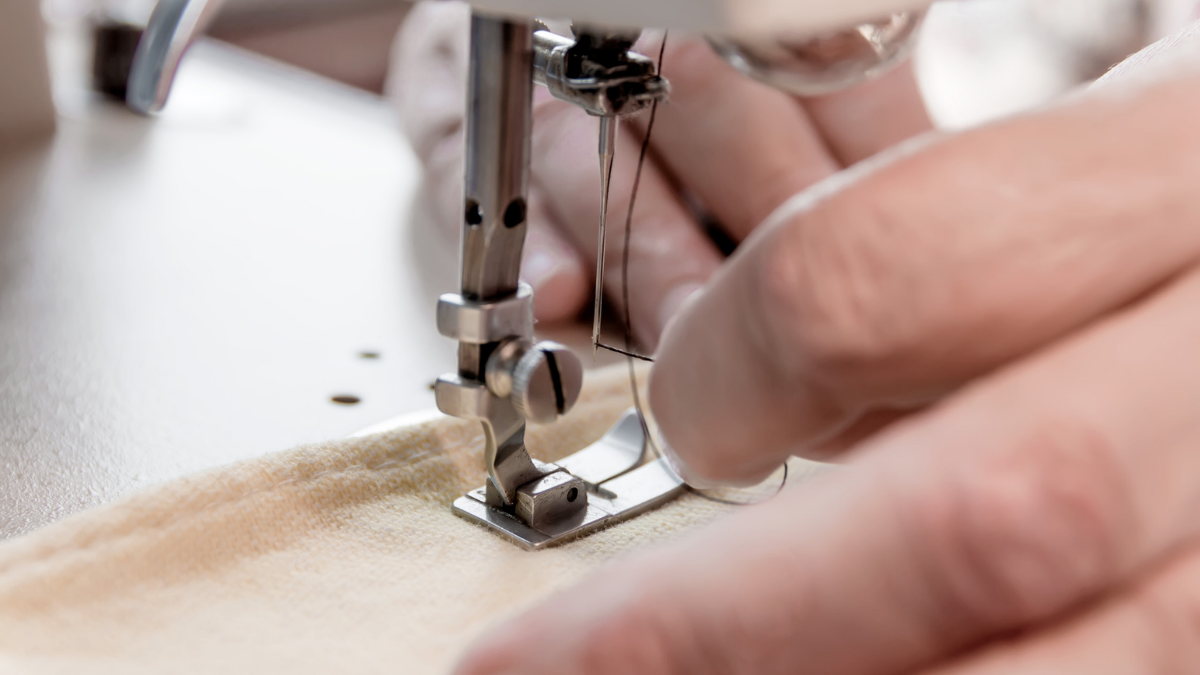
Step 8- Thread the sewing machine needle
Be sure that when you are getting ready to thread your machine needle that your foot is NOT on the foot pedal.
Now that you have passed the thread down the front of your sewing needle, it’s time to thread the needle.
This is another step that may be a bit different depending on your machine.
The thread will either pass through the needle from front to back, or from one side to the other side. Usually LEFT to RIGHT.
I have machines that do both.
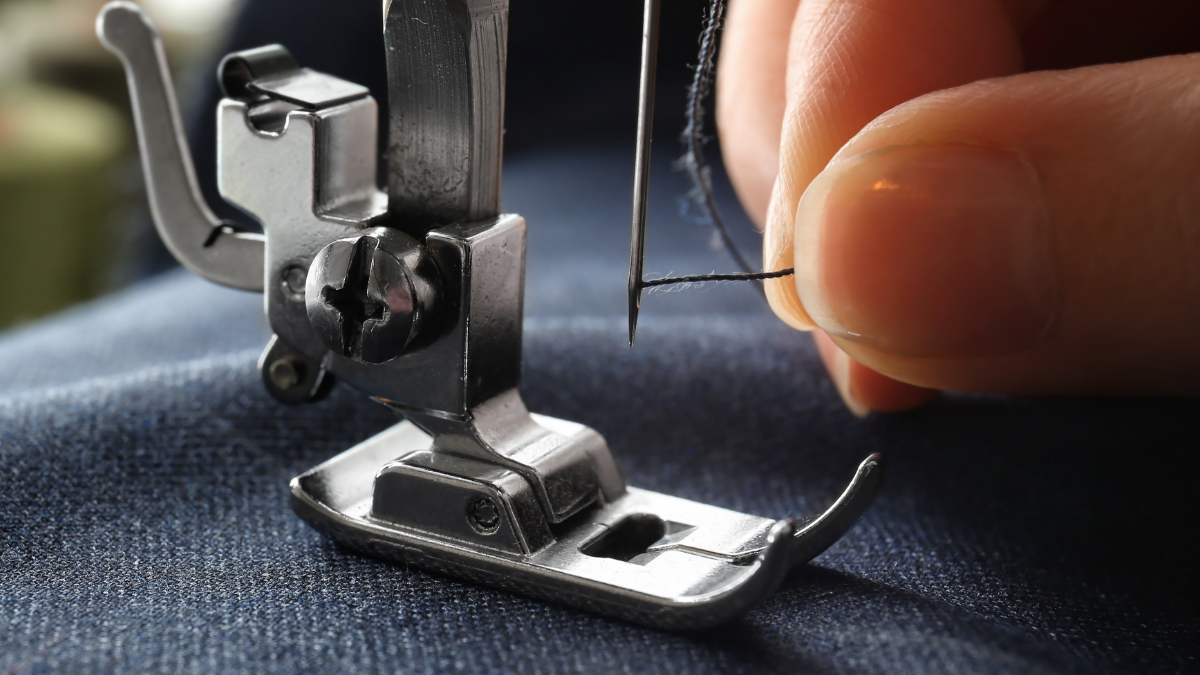
If the needle that is in your sewing machine when you buy it is has the eye of the needle differently, you’ll simply pass the thread through the side of the needle from LEFT to RIGHT.
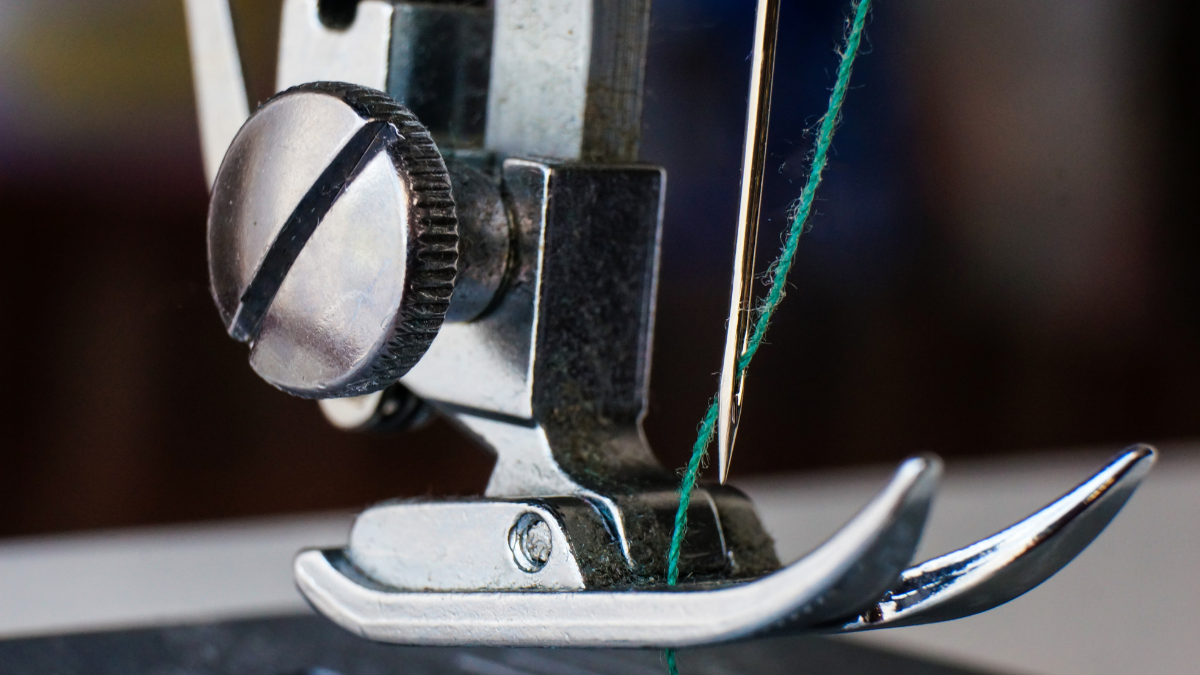
Step 9- Pull the threads towards the back of the sewing machine
Once your thread has been passed through your sewing machine needle, it should then pass through the slit or opening on your sewing foot from front to back.
When the thread is in place you should be able to pull it gently and have it pull freely and fairly easily.
You have now just learned how to thread the upper part of your sewing machine.
Let’s move on to the final step.
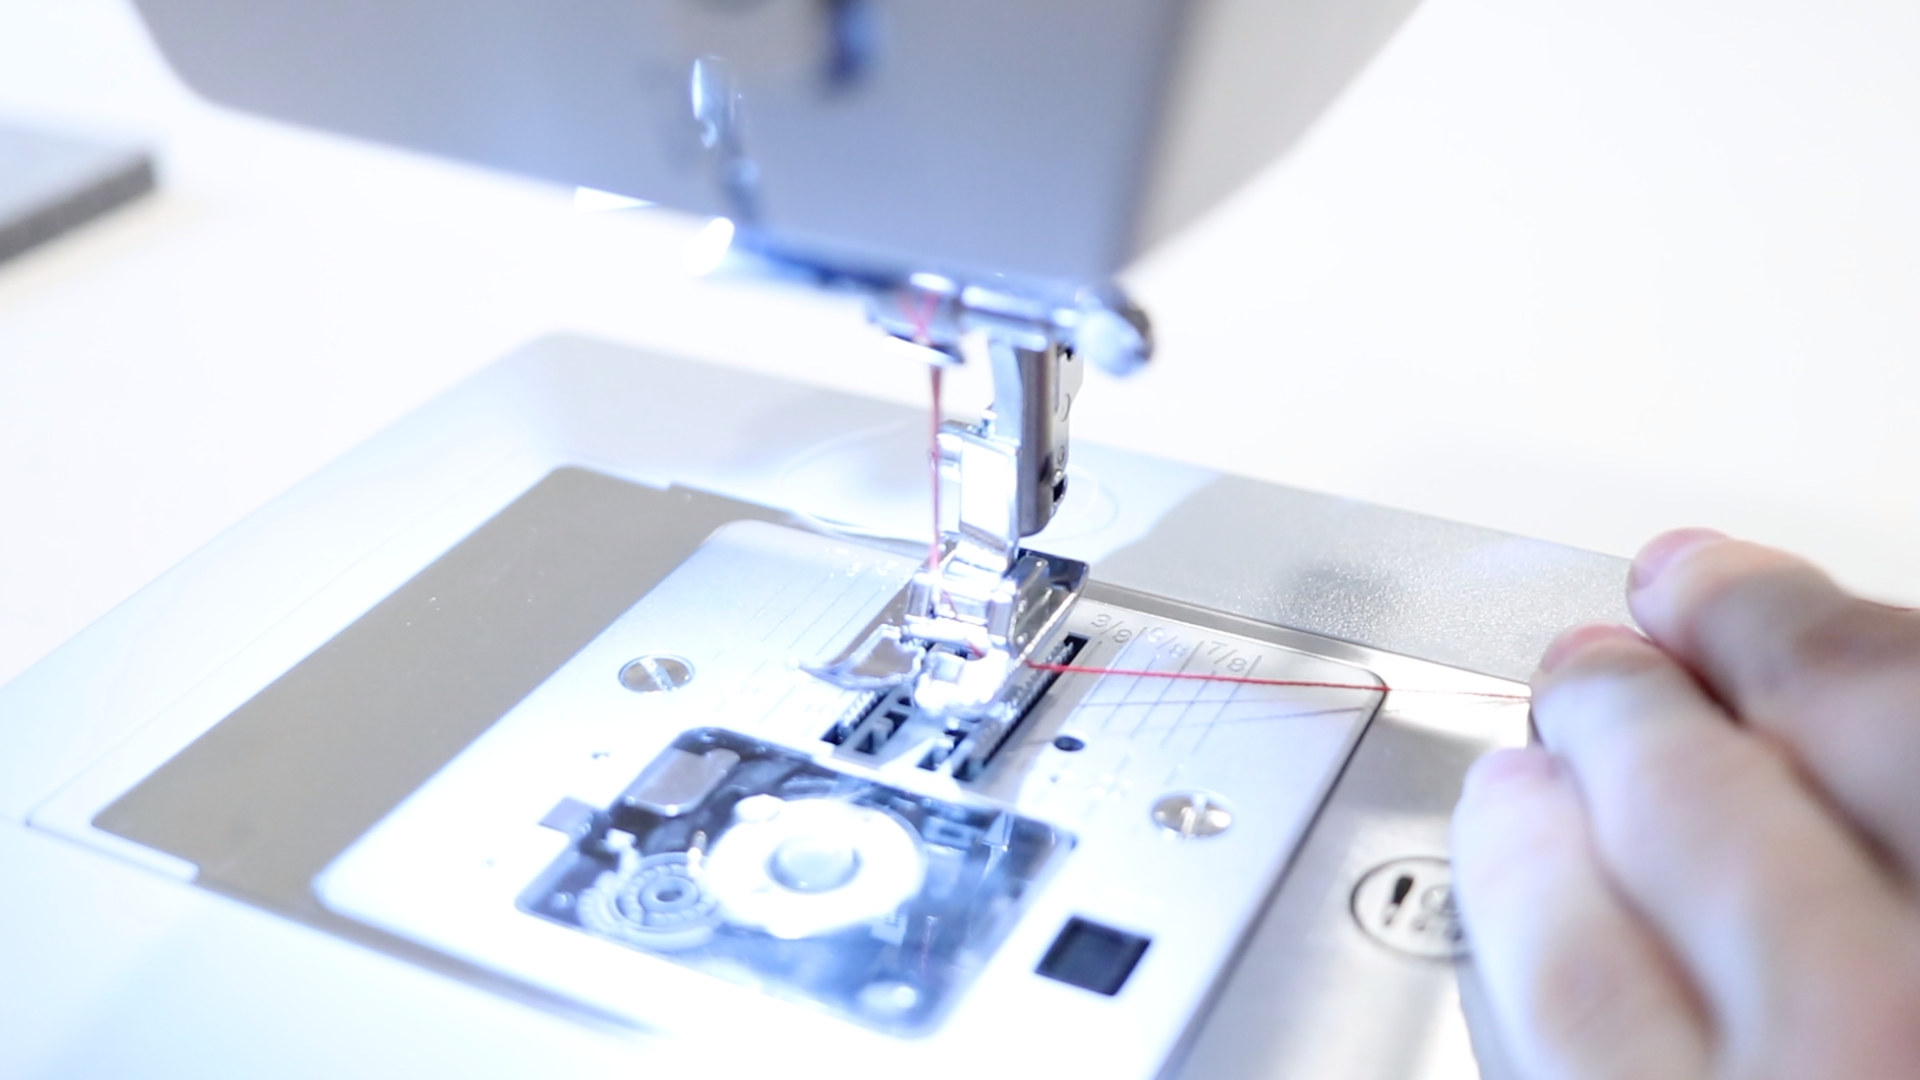
Step 10- Insert (load) a bobbin
This is the last step in learning how to thread your sewing machine from start to finish.
Depending on your machine, this step may look completely different for you.
Bobbins can load in different ways:
- from the lower FRONT of the machine
- LEFT lower side of the machine
- ON TOP (like the one I’m demonstrating on) for this tutorial
Again, if this is confusing, look in your manual. Hopefully, your sewing machines instruction book will have good pictures to reference.
You can also watch the video to watch that step for a couple of tips when doing this threading step.
(The video contains a timestamp in the description so you can skip right to this step).
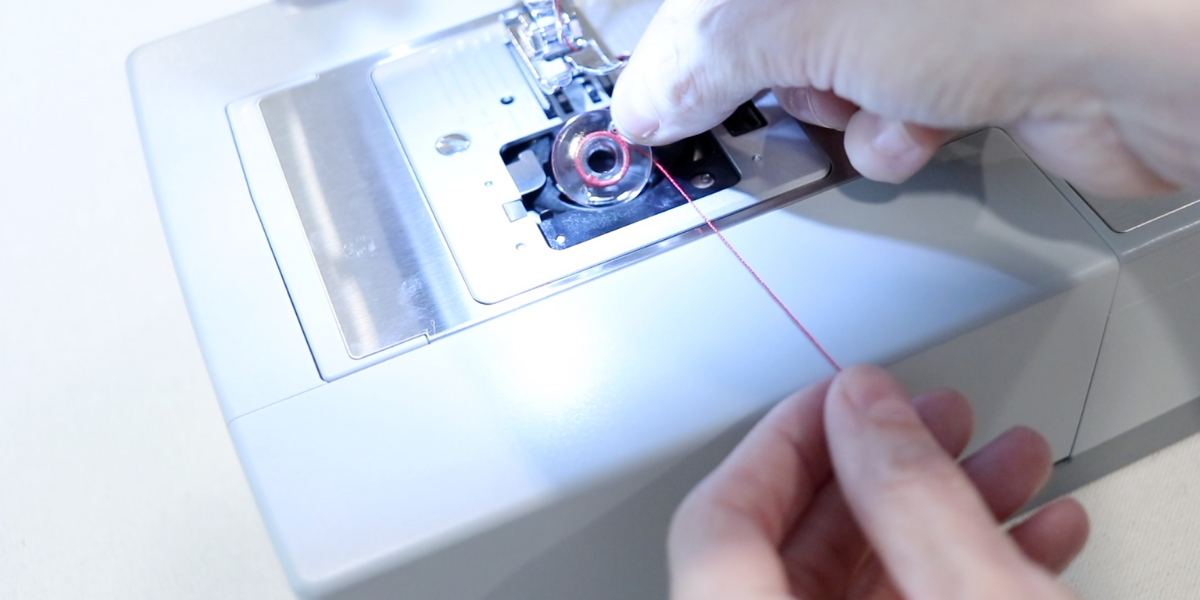
- Remove the bobbin cover.
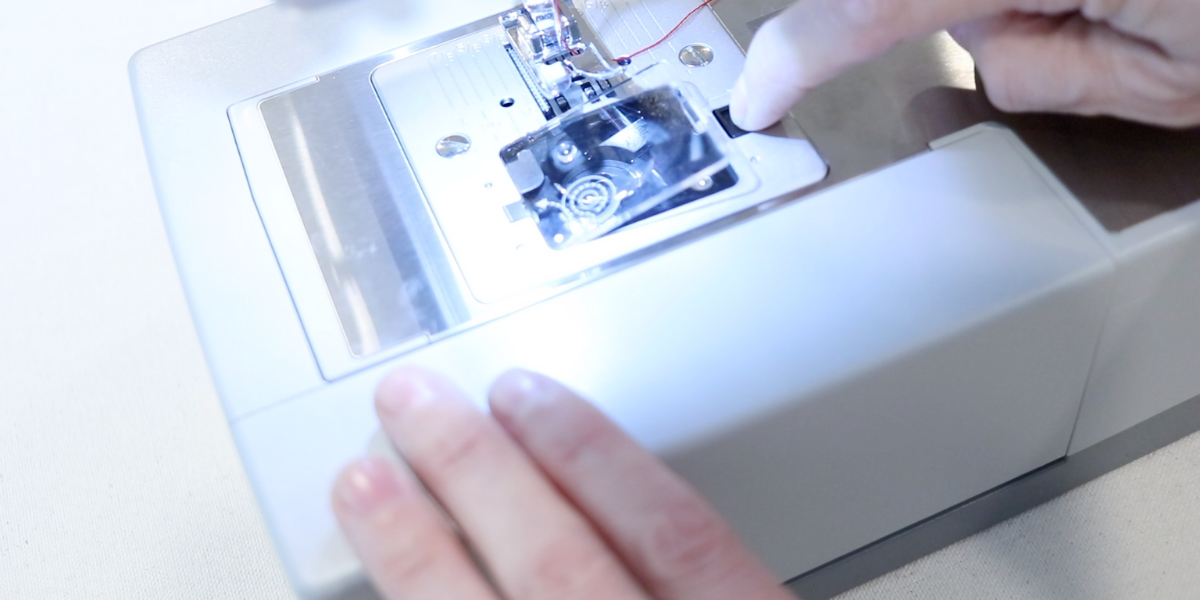
- In order for your bobbin to be loaded into the bobbin cartridge correctly, you first need to determine which way the bobbin needs to spin when unloading the thread (clockwise or counterclockwise).
- Most machines (unless using an older machine), are marked which direction the bobbin spins and how to properly thread the bobbin case.
- Once you have determined how which direction your bobbin needs to spin to sew properly, you can do a quick test. Grab the bobbin in the center with your thumb and index finger.
- Gently pull the bobbin thread to see which way the bobbin is spinning (clockwise or counterclockwise).
- Once you have your bobbin spinning in the correct direction (as required by your machine make and model number), drop the bobbin gently into the bobbin case.
- Now it’s time to follow the guide on your machine and thread the bobbin case.
Again, this will vary from machine to machine.
TIP: to make threading the bobbin case easier, apply slight pressure to the top of the bobbin to keep it from spinning while threading.
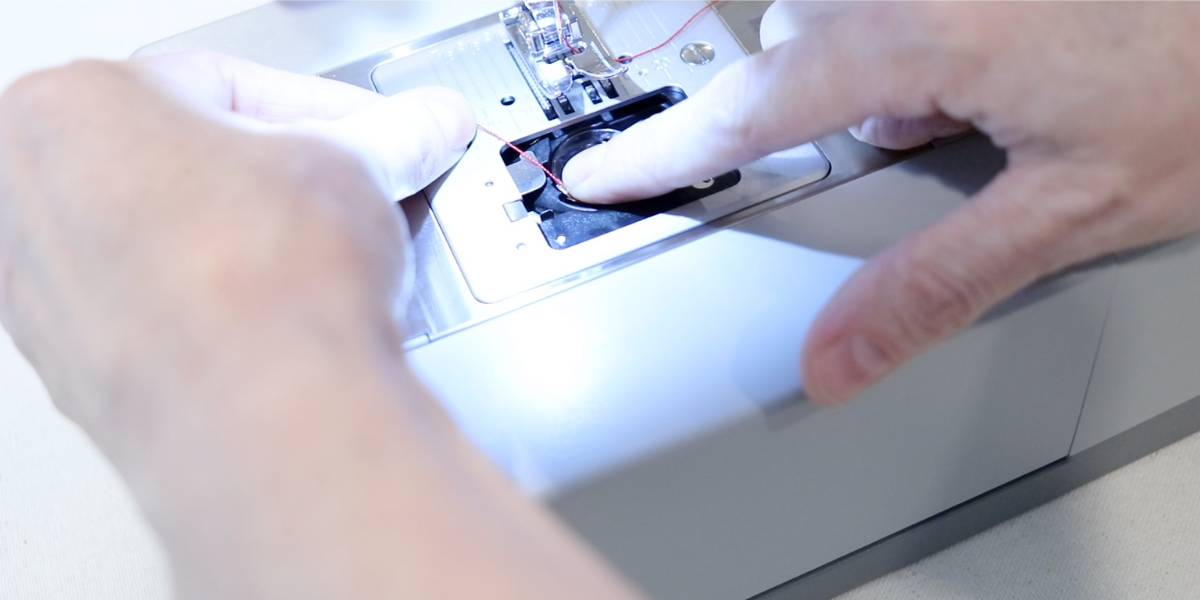
- Replace the door to the bobbin case.
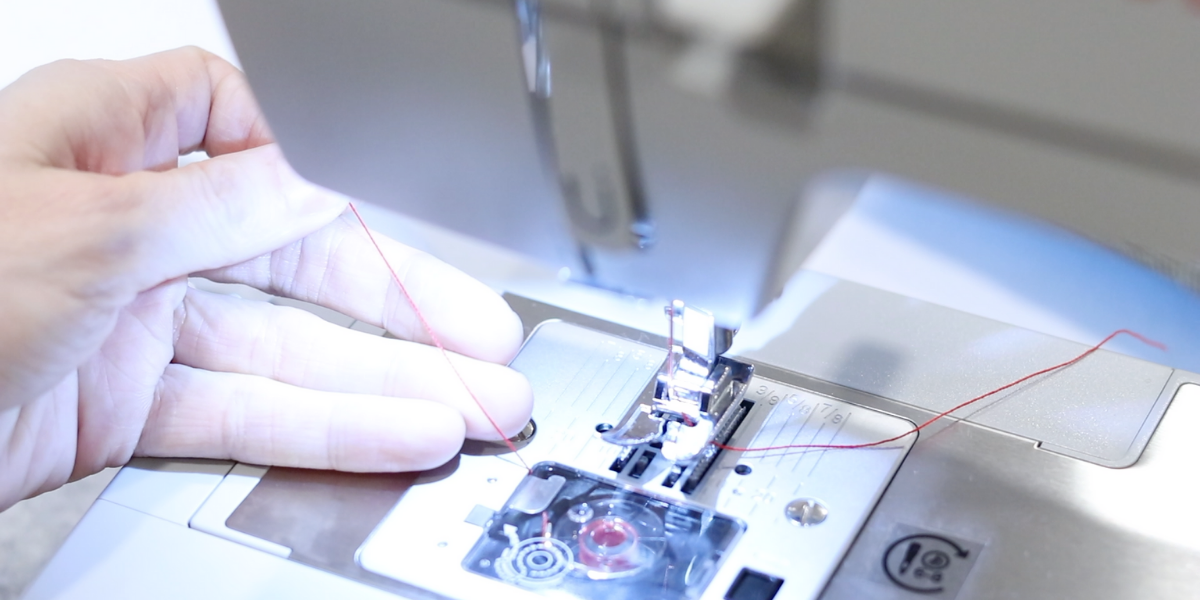
- With the door replaced to cover the bobbin, its time to pull-up the bobbin thread.
Step 11- Pulling up the bobbin thread
This is the last step to having your sewing machine fully threaded and being ready to sew.
- Hold some tension on the thread coming through the presser foot (upper thread).
- While holding that thread with your left hand, slowly begin to turn the hand wheel on the right side of your sewing machine to lower the needle.
- When the needle lowers into the bobbin case, it should hook the thread and draw it back up.
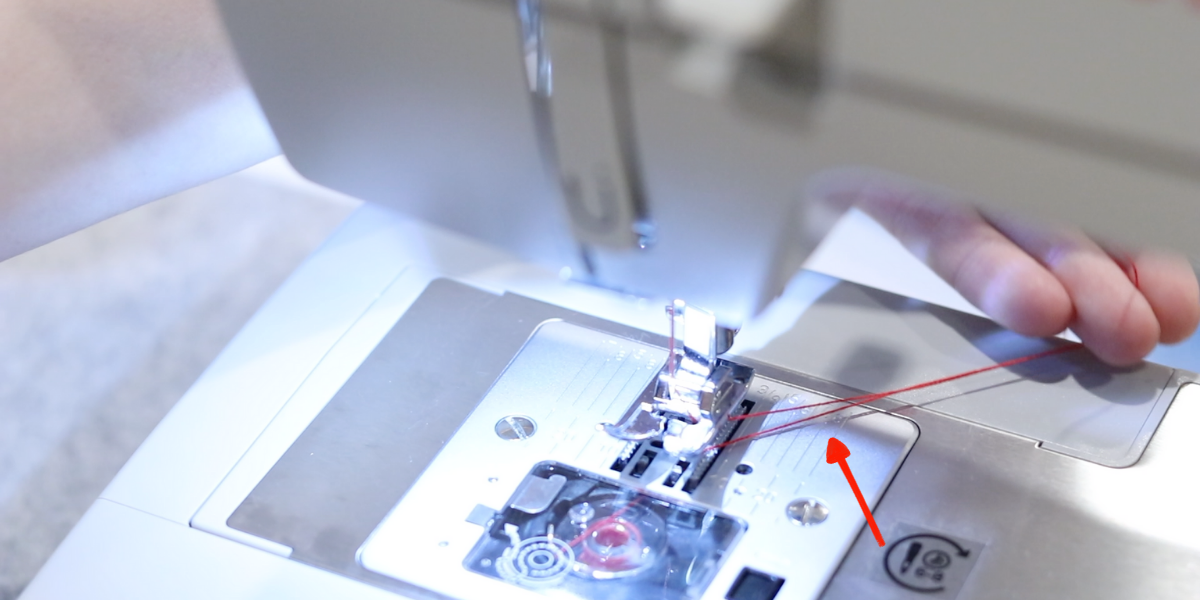
- Gently pull the two threads out to meet and place them behind the presser foot.
You have now successfully fully threaded your sewing machine.
How To Thread A Sewing Machine Tips
- Always keep your sewing machine manual close by. Most sewing machines thread very similarly. However, there can be slight differences (such as how the bobbins load) that make them useful to have around.
- Once you have your sewing machine threaded, be sure and test the stitching first on a scrap of fabric. It’s such a shame to start sewing your project and realize it isn’t sewing correctly because you threaded it wrong. Practice first! If all looks good, sew away!
- Buy a sewing machine that suites your skill level and that you are going to be comfortable using. The machine I am using is a very good beginner sewing machine that is very easy to use.
I personally used this machine for years before I felt like I needed to upgrade to something else. My daughter now uses this machine (she’s 7) and she loves it as well.
Thankfully the basics are very similar on most home sewing machines. Once you’ve threaded one machine, you’ve threaded them all. It gets easier each time you do it.
If you are still have questions, feel free to ask in the comments section below or try these other suggestions:
- Refer to the users manual that came with your sewing machine (can’t stress this enough).
- Check YouTube for videos that pertain to your specific make and model of sewing machine. Youtube is such a great resource for more visual learners (like myself).
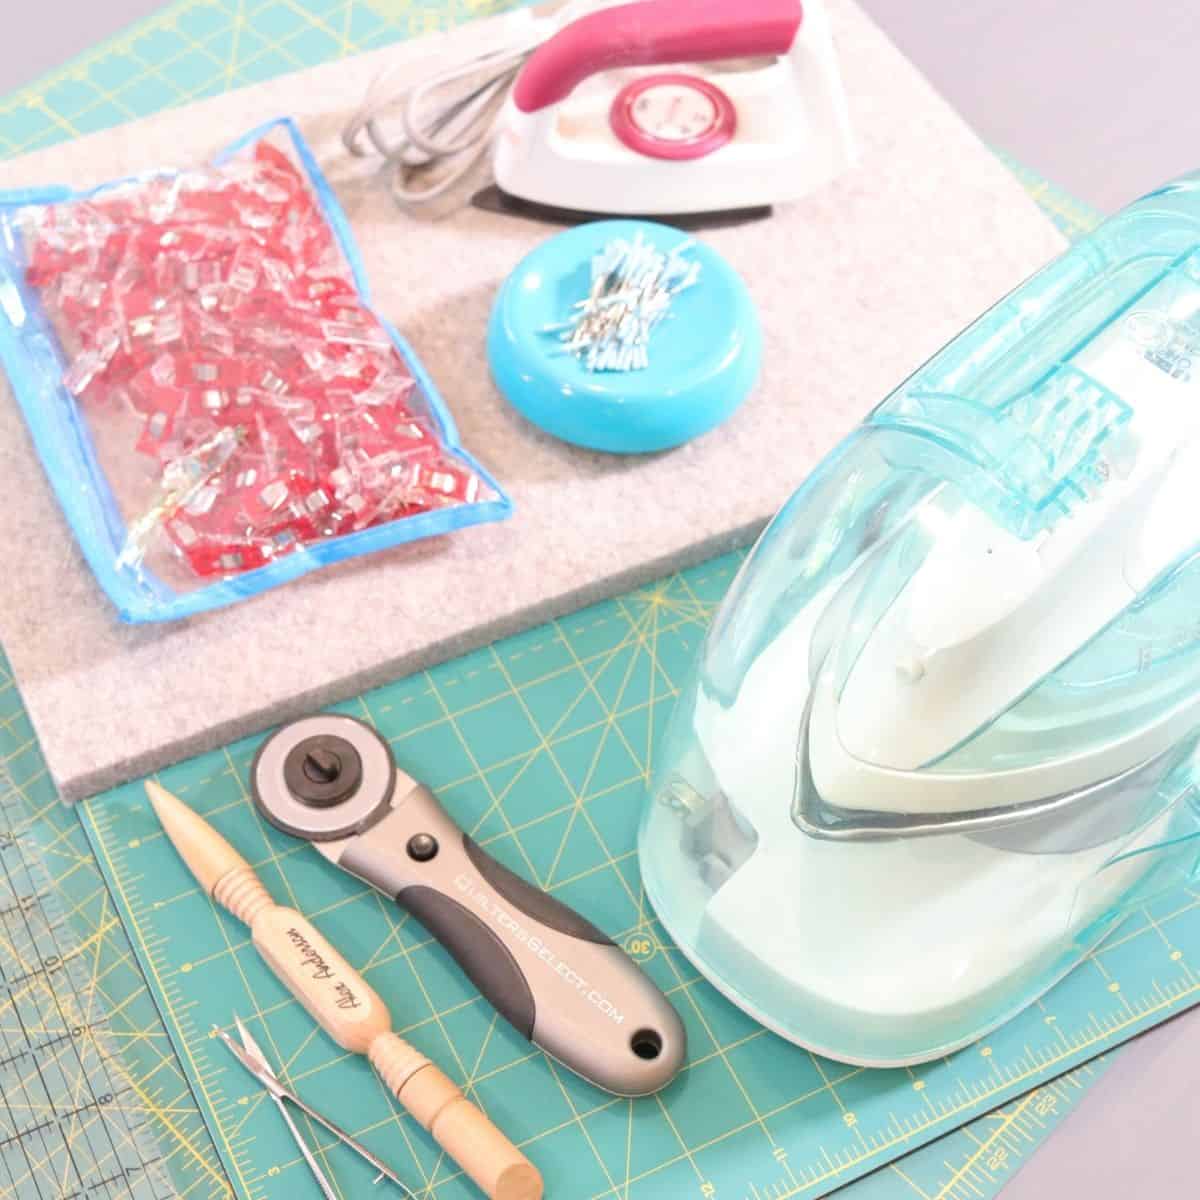
Basic Sewing Tools For Beginners
I did an entire detailed post covering the basic sewing tools every beginner needs.
I cover everything that will make your sewing journey easier and more enjoyable. We discuss tips on where to skimp and where to splurge as well as the best sewing supplies for your buck.
All the things I wished I would have known as a beginner.
I will also have a couple of other simple projects that are still in the works. Stay tuned!
SHOP
Sewing is a love and passion of mine. I adore spending my days and late evenings nestled up in my sewing room buried in piles of beautiful fabric and creating things.
I’ve been on a quilted jacket kick lately. I’m having a lot of fun making them for myself and my kids.
Beginner Friendly Sewing Projects
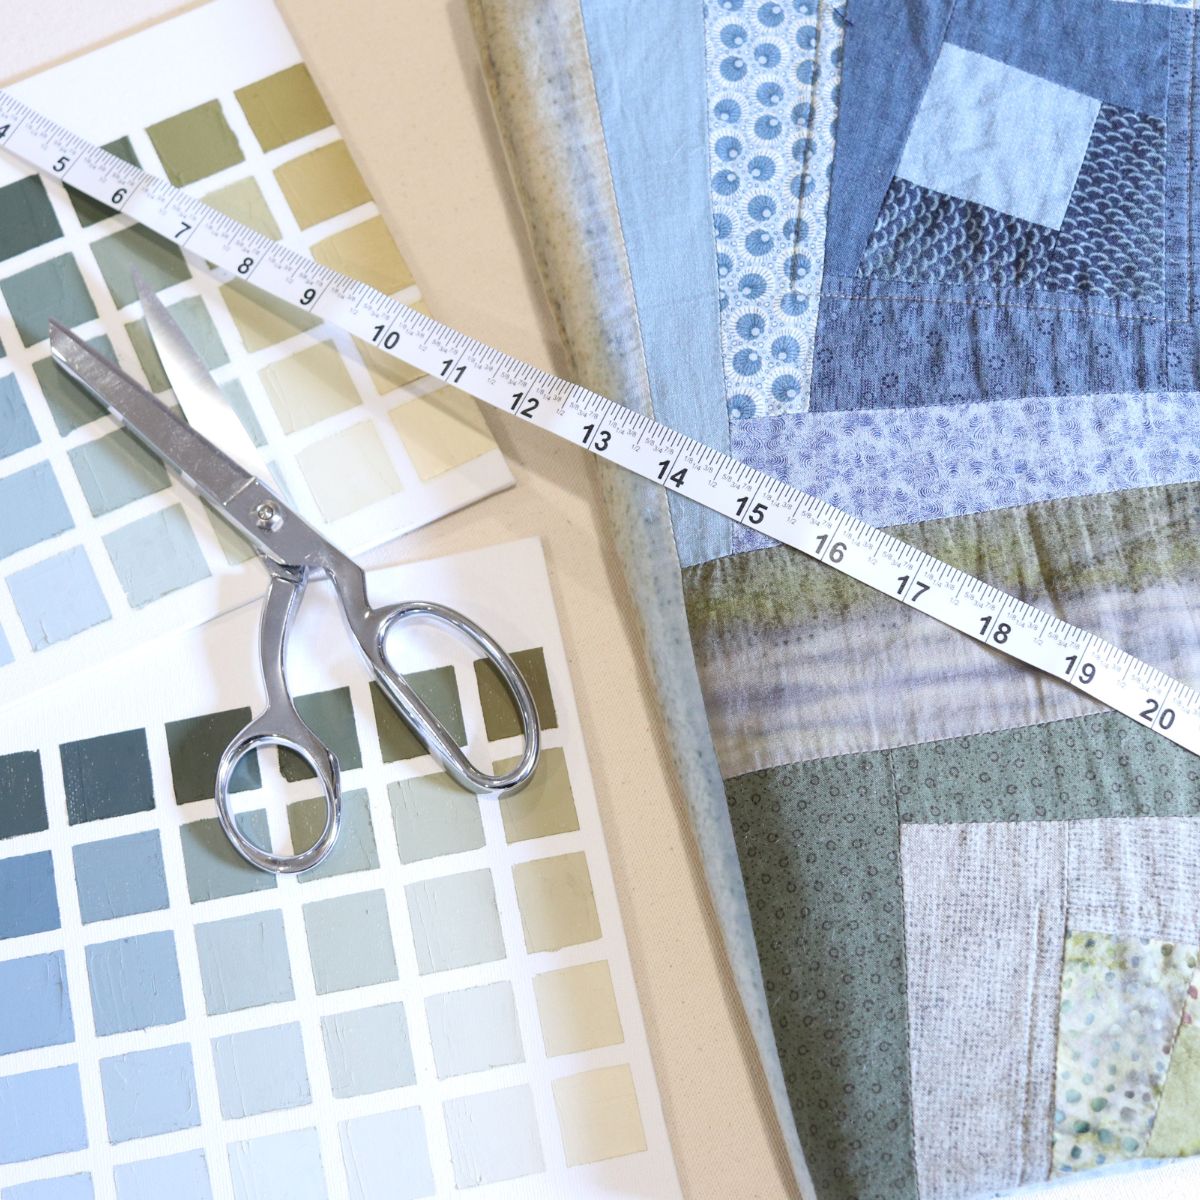
How To Make A Log Cabin Quilt Block

How To Sew Scrunchies
The Best Sewing Supplies For Beginners

Happy Sewing!
– Brie