DIY Fabric Easter Basket-Free Sewing Pattern
Easter is just around the corner, so today I’m sharing how to make this simple DIY fabric Easter basket using this free sewing pattern.
If you are looking for a different style of Easter bag, I have a post for a bucket style as well. This style can be made with a single or double handle.
So grab your sewing supplies and let’s make some easter baskets!

Some of these links are affiliate links, you can read my full disclosure here.
Disclaimer: You are welcome to sell your completed Easter baskets you’ve made using this pattern. The pattern piece however may NOT be sold.
Some of these links are affiliate links. You can read my full disclosure HERE.
How to make a fabric Easter Basket video
If you would like to see a step by step video tutorial for this Easter sewing project, you can find that on my YouTube channel.
Sewing difficulty
This pattern is great for a beginner or more advanced sewer. Some skills you will need to complete this sewing project are:
- cutting and pressing
- making binding and attaching it to the basket edges
- making a boxed corner
- sewing straight lines and some arcs
There are no specialty sewing techniques used to create this pattern.
Sewing project time
It will take around 1.5 to 2 hours to complete this project.
If you plan to fussy cut your fabric or add machine quilting, time to complete will vary.
Finished Easter basket measurements
This fabric basket pattern can be made in two sizes. I have included the dimensions for both below.
Measurements are from top of handle to the bottom, then side seam to side seam.
SMALL TOTE MEASUREMENTS
15 inches tall by 17 inches wide roughly.
LARGE TOTE MEASUREMENTS
15 inches tall by 24 inches wide.
Print your fabric basket sewing pattern
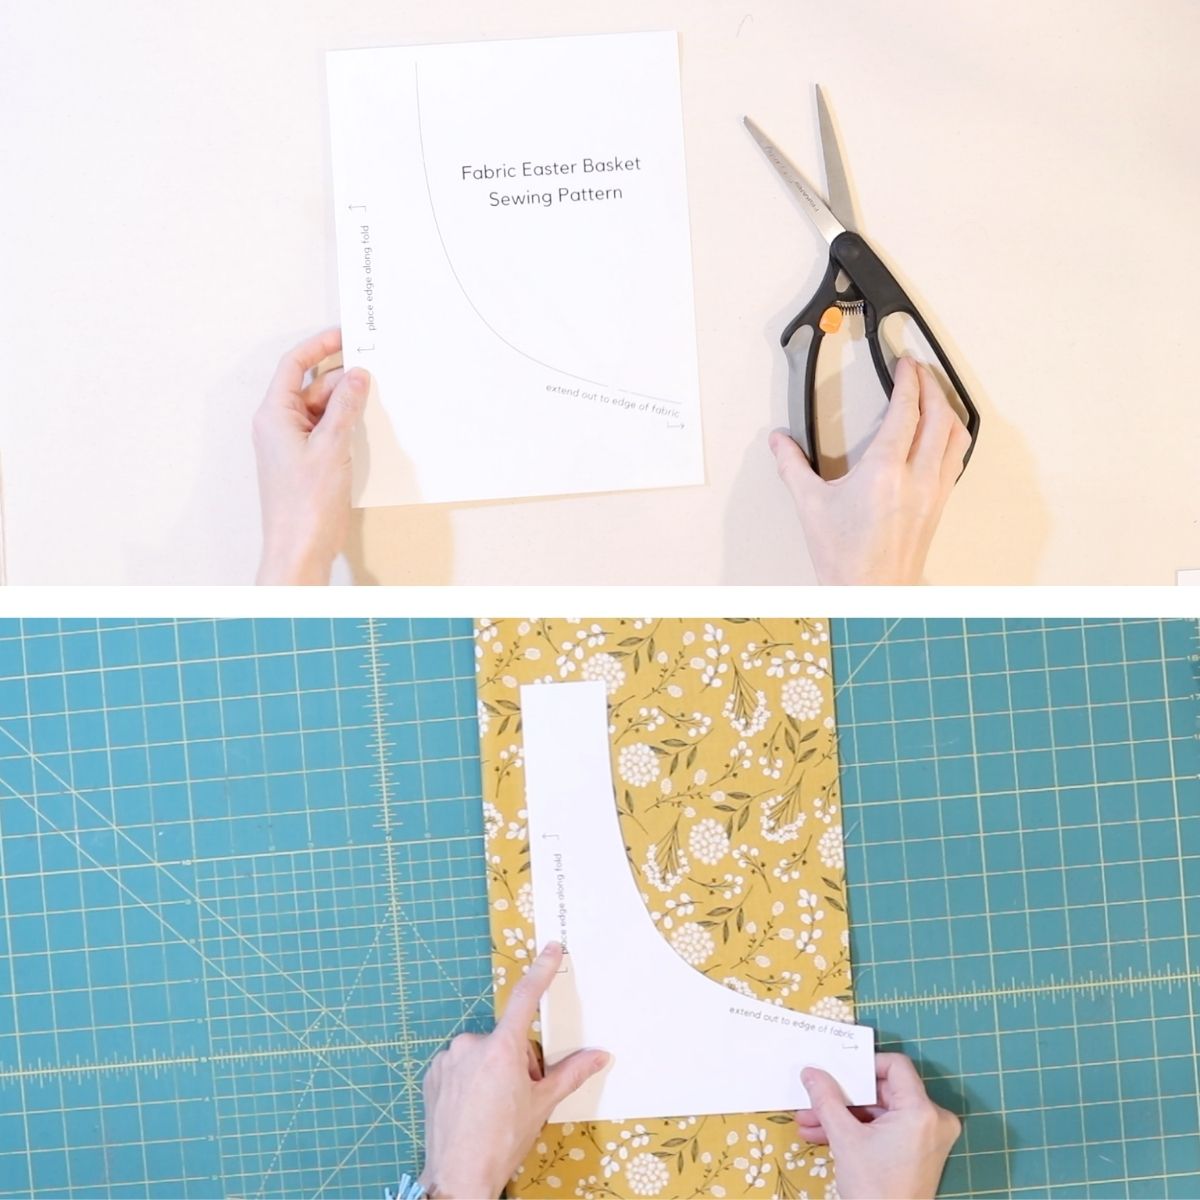
Cut out the sewing pattern
After you have printed out the sewing pattern (link above), it’s time to cut it out.
If you are making the larger fabric basket, proceed on to the next step to enlarge the pattern for cutting.
If you are making the smaller version, skip that step.
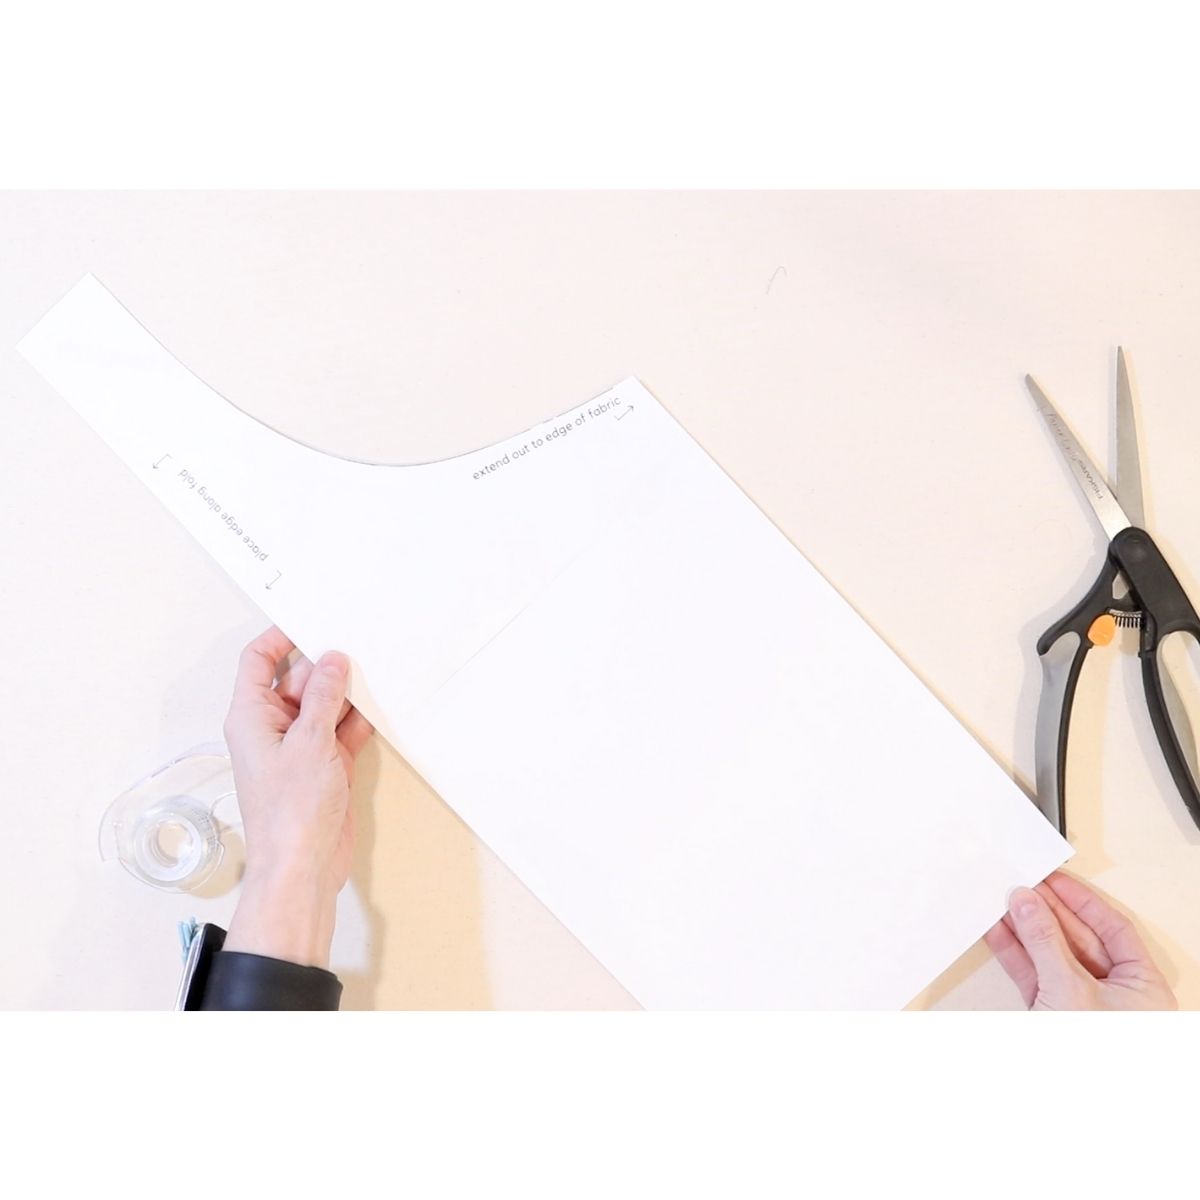
Large Easter basket sewing pattern
If you are planning to make the large version of this fabric Easter basket, you’ll need to add a piece of printer paper to the pattern piece you printed earlier.
Here’s how:
- Tape an 8.5 inches by 11 inch piece of printer paper to the bottom of the pattern piece you just cut out.
When it’s taped together, your new pattern piece should measure 8.5 inches at the widest part by 22 inches long.
Fabric requirements for SMALL Easter basket
- 5/8 yard of exterior fabric
- 5/8 yard of interior fabric
- fusible interfacing
- (2) strips of fabric for binding (3″ wide by 42″ long each)
Fabric requirements for LARGE basket
- 3/4 yard of fabric for the exterior
- 3/4 yard of fabric for the lining
- Binding fabric 3 inches wide by 42 inches long (x2) one for each side of your basket opening.
This is more than you will use. I added a bit extra in case you’d like to add a pocket or two.
Sewing supplies
- sewing machine
- thread
- basting spray
- scissors
- thread snips
- iron and ironing board
- rotary cutter and cutting mat (you can also just use scissors)
- sewing pins or clips
- fusible fleece or cotton batting
- fabric for the interior, exterior and binding
A complete list of where you can buy these supplies is listed at the bottom of this post.
Be sure and check out all my favorite sewing supplies!
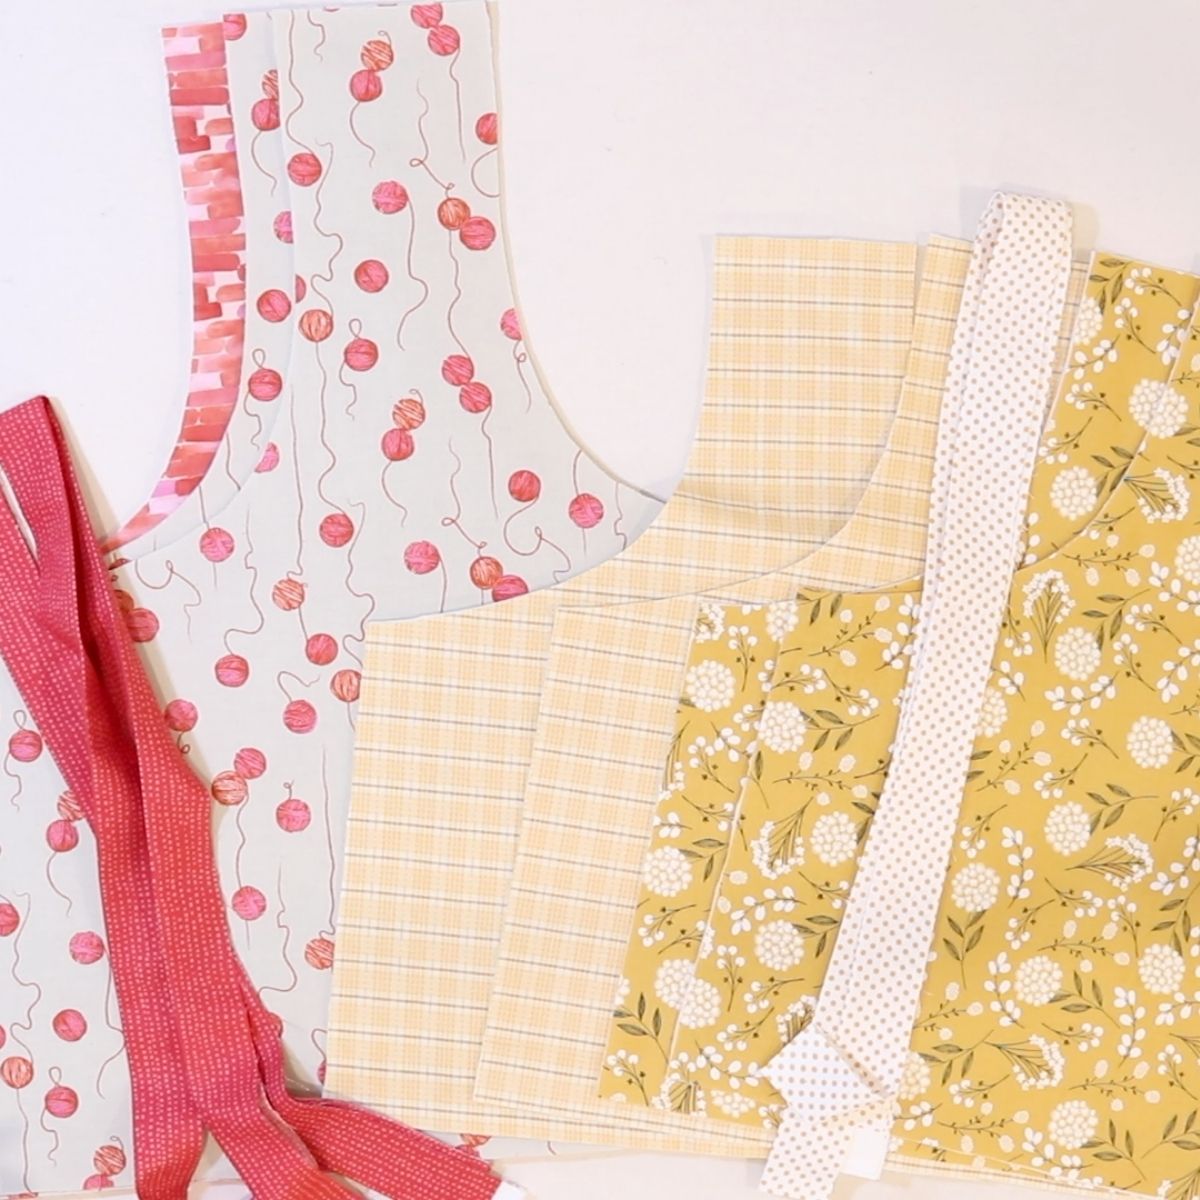
Fabric cutting instructions (small fabric basket)
Cut fabric pieces 18 inches wide by 20 inches long. You’ll cut all four pieces of fabric this size. Two from the exterior fabric and two from the lining fabric.
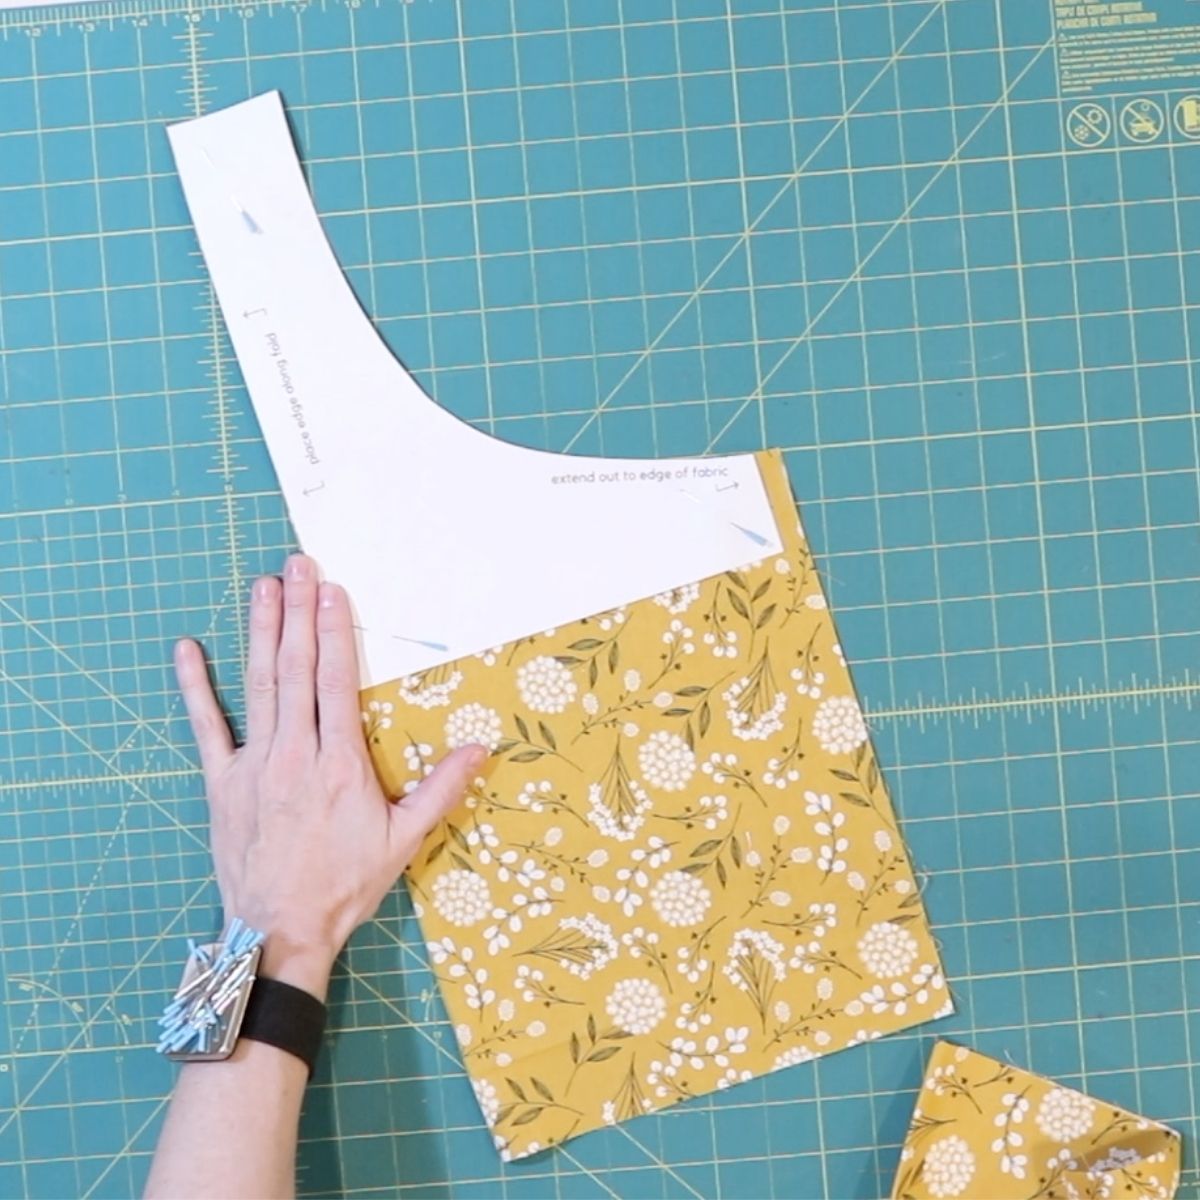
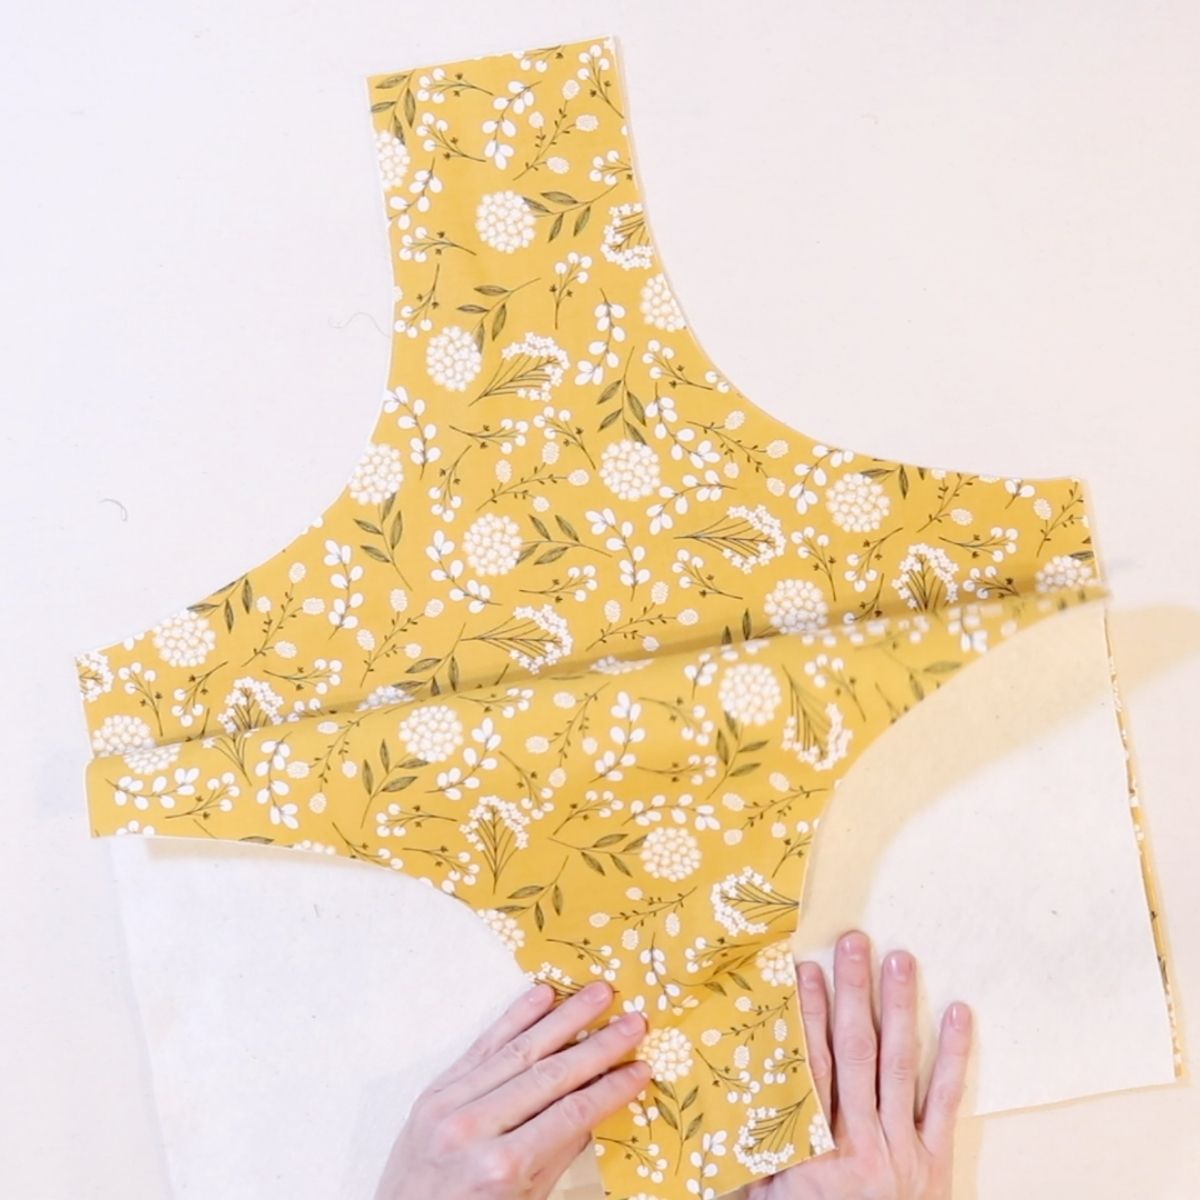
- Fold fabric in half lengthwise and place your pattern piece on as indicated.
- Repeat for the two exterior pieces of fabric as well as both interior pieces of fabric.
Be sure that the longest edge of your pattern is placed along the folded edge of your fabric for cutting.
Fabric cutting Instructions (large basket)
- Begin by cutting (2) 25 inch wide by 26 inch long pieces of exterior fabric.
- Repeat for the two lining pieces.
- Fold fabric in half lengthwise and place pattern with bottom edge of pattern along the bottom edge of your fabric. Be sure that the patterns long edge is placed on the folded side of the fabric (as shown).
You should now have (4) pieces of fabric cut. Two from the exterior fabric and two from the interior fabric.
Main Menu
- Cut (2) 3 inch wide by 42 inches long strips for binding.
You can use a coordinating print or contrasting print fabric.
If you don’t want to make your own binding, you’re welcome to buy pre-made binding at the fabric store.
Interfacing the fabric pieces
You can use a fusible fleece interfacing or baste a cotton batting with a basting spray.
Both methods of interfacing your fabric pieces will produce almost identical results.
- fuse interfacing of your choice to the WRONG side of your fabric. You can do just the two exterior pieces, or all four basket pieces. I chose to do all four pieces for a more heavy duty basket.
- DO NOT fuse the binding.
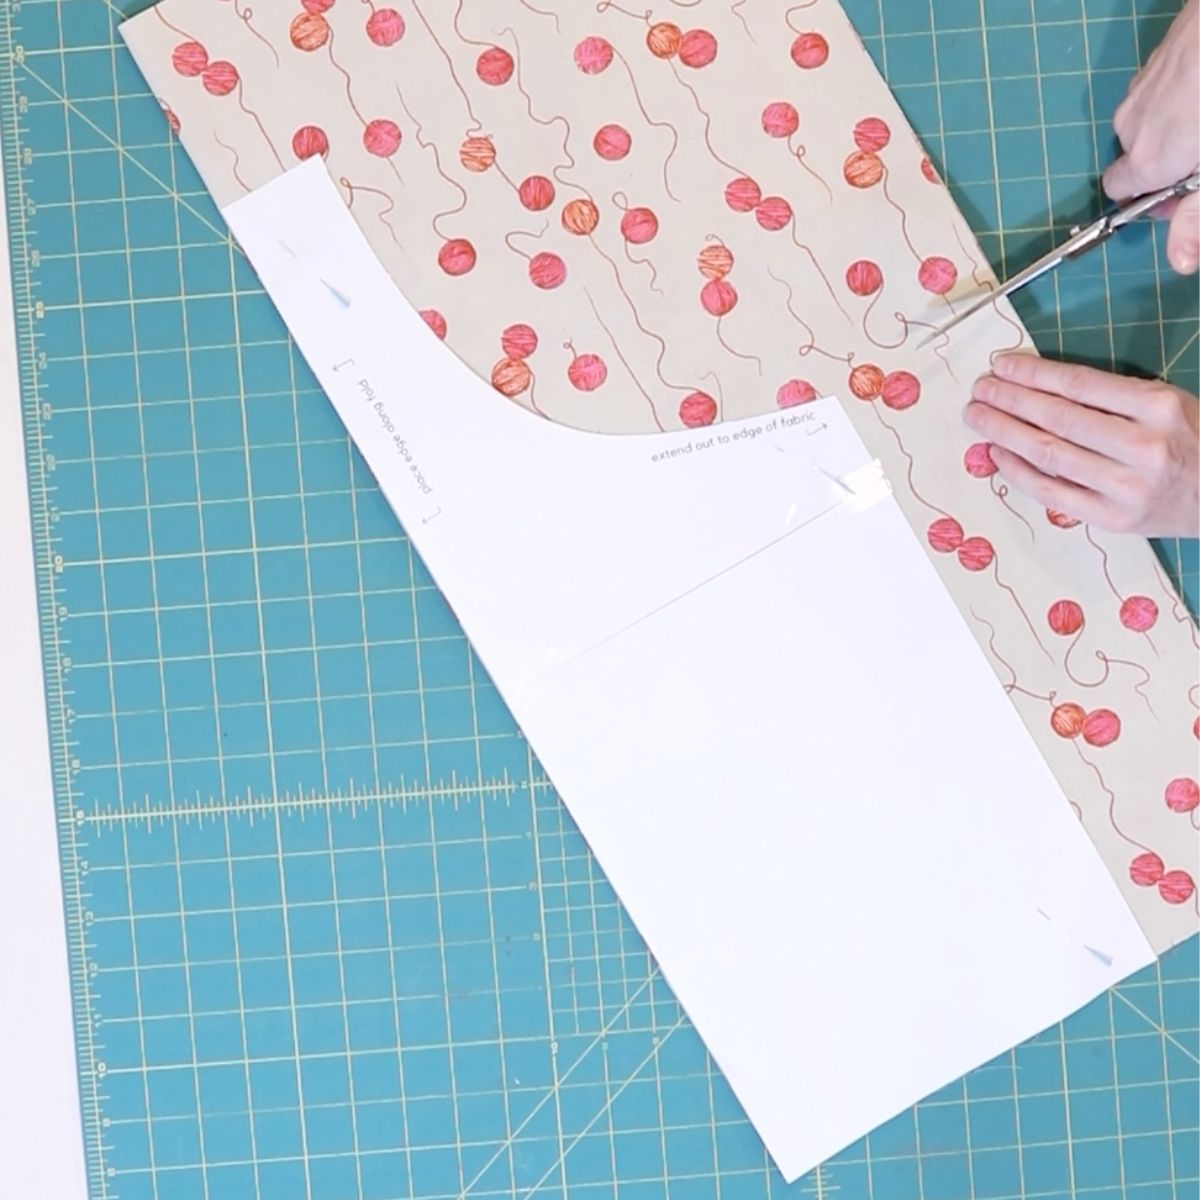
- Once you have fused the two exterior pieces or all four pieces of your basket to interfacing, cut the pieces out.
Seam allowance
Use 3/8 inch seam allowance for all sewing unless otherwise specified.
If you choose to use a different seam allowance for this project, just be sure and use it for all parts of the basket.
TIP: If you are a beginner sewer and prefer some help, try out a magnetic seam guide! The magnet on the guide sticks to the bed of your sewing machine and your fabric runs along the edge to help keep your seam allowance consistent.
Exterior fabric basket assembly
Now it’s time to assemble the outside of our basket.
- Place the two pieces of your (2) EXTERIOR pieces right sides together (RST).
- Using a 3/8 inch seam allowance, sew across the top handle of your basket and down the two sides and the bottom.
Be sure and backstitch at the start and stop.
When you are finished sewing, the only open edges you should have are along the two sides of your handle.
Repeat the previous steps for the lining of your fabric Easter basket too.
When you are finished sewing, you should have the exterior and the interior pieced together.
Boxed corners
Now it’s time to make the boxed corners of our fabric Easter baskets.
Boxed corners make your baskets sit up nice and flat. It keeps them from falling over when being used. It only takes a few minutes to make them, and they really do make a difference-let me show you how.
Let’s begin with the fabric basket exterior. You’ll repeat this step with the lining of your basket as well.
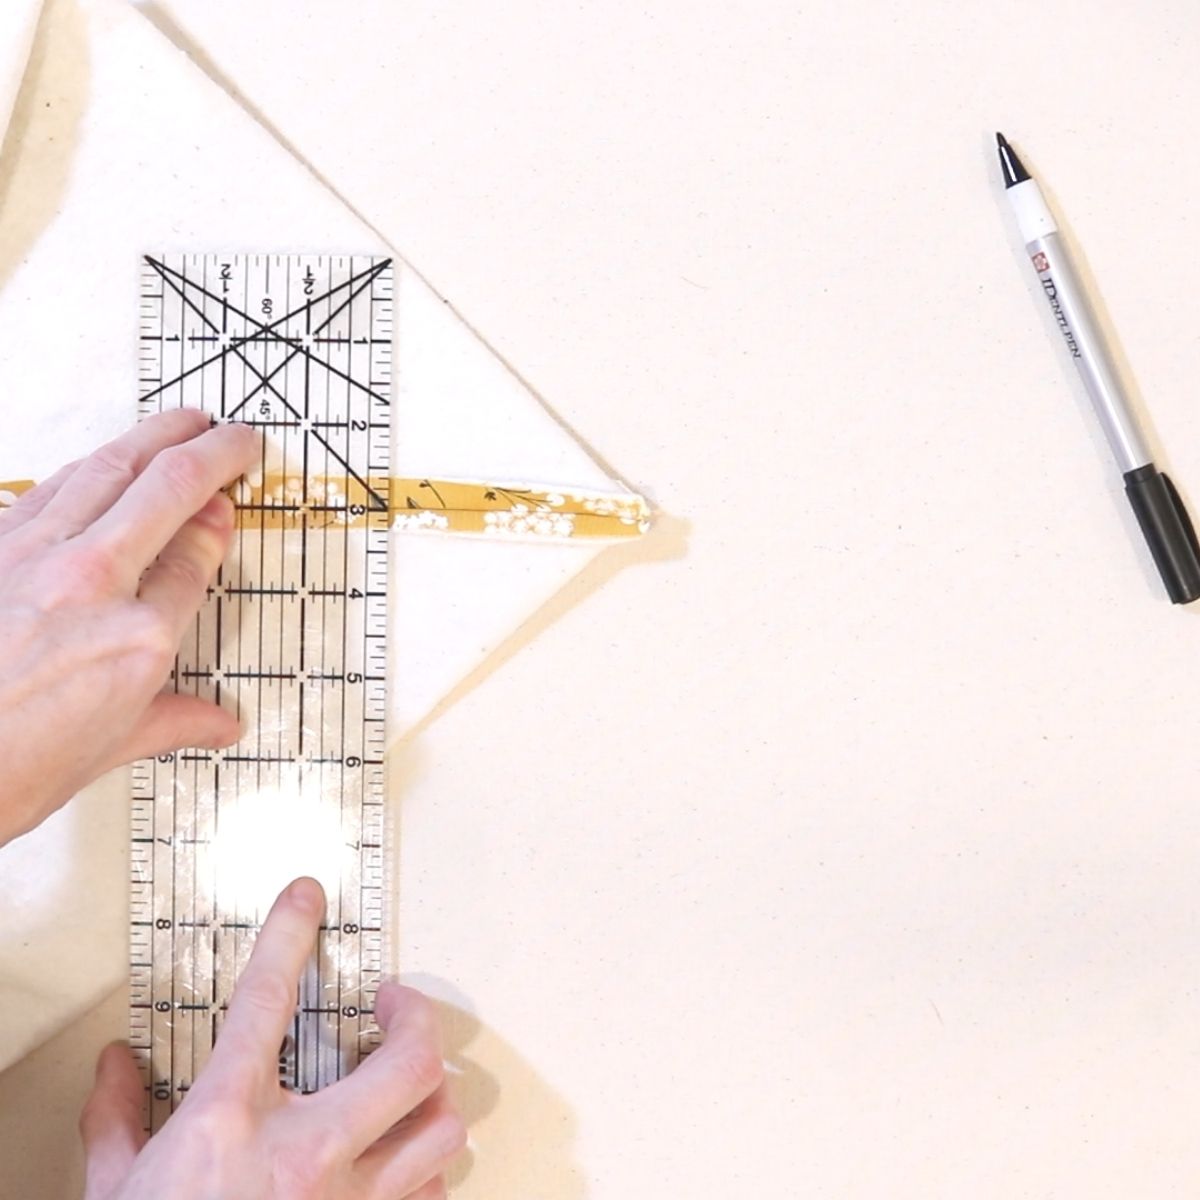
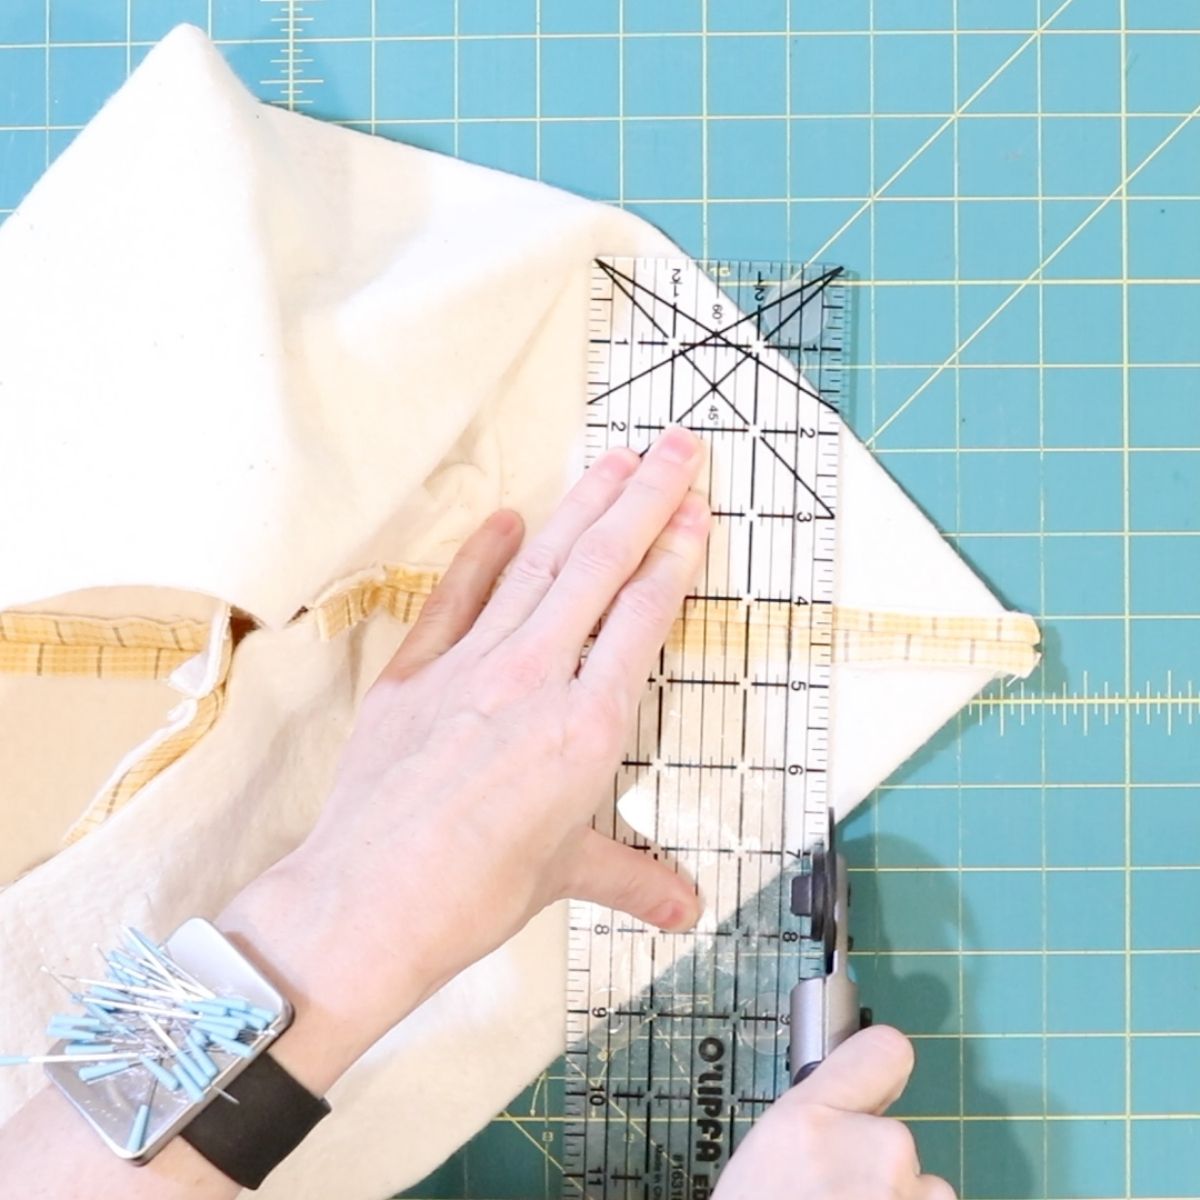
- Beginning with the exterior of your basket wrong sides out, press the side seam and bottom seam together. The seams should be onto of each other. Be sure there is no wrinkles in your basket.
- Lay a ruler or a tape measure on the corner with the 3 inch marking on your center seam. This will make a 6 inch boxed corner once completed.
- Once your ruler is in place, use a fabric marking pen and draw your line.
- Using sewing pins, pin in place to keep it from shifting while you mark your other corners.
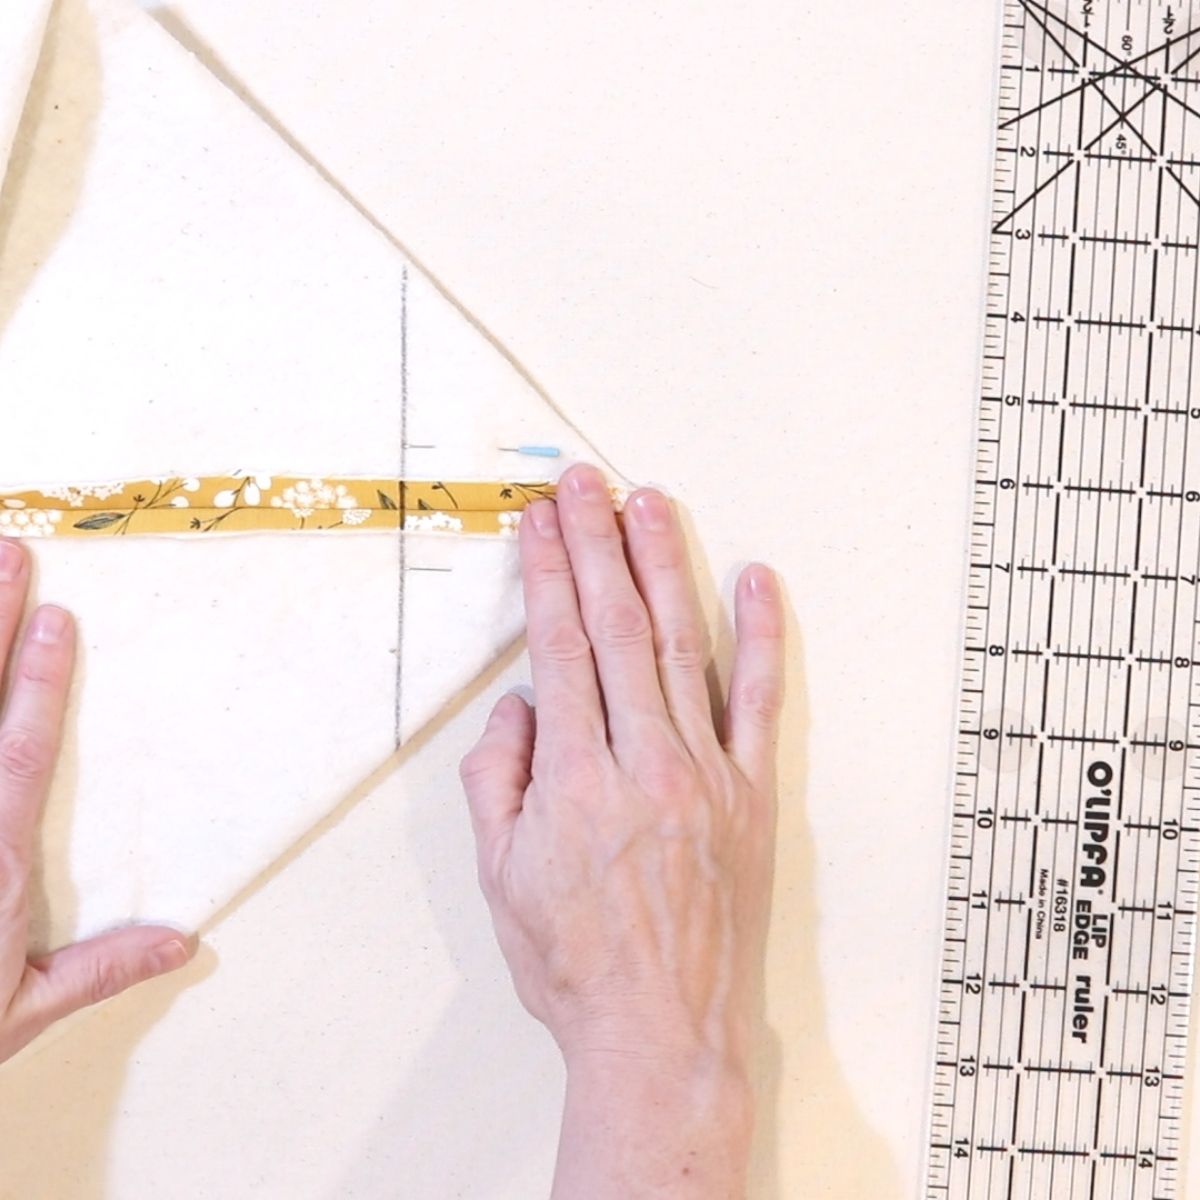
Trimming the corners
Carefully trim 1/2 inch from your seam on each corner.
Be careful not to trim through the line of stitching.
When you’re done sewing, you should have four completed boxed corners-two on the exterior fabric basket and two on the interior basket lining.
Assembling the fabric basket
Now it’s time to put our fabric basket together.
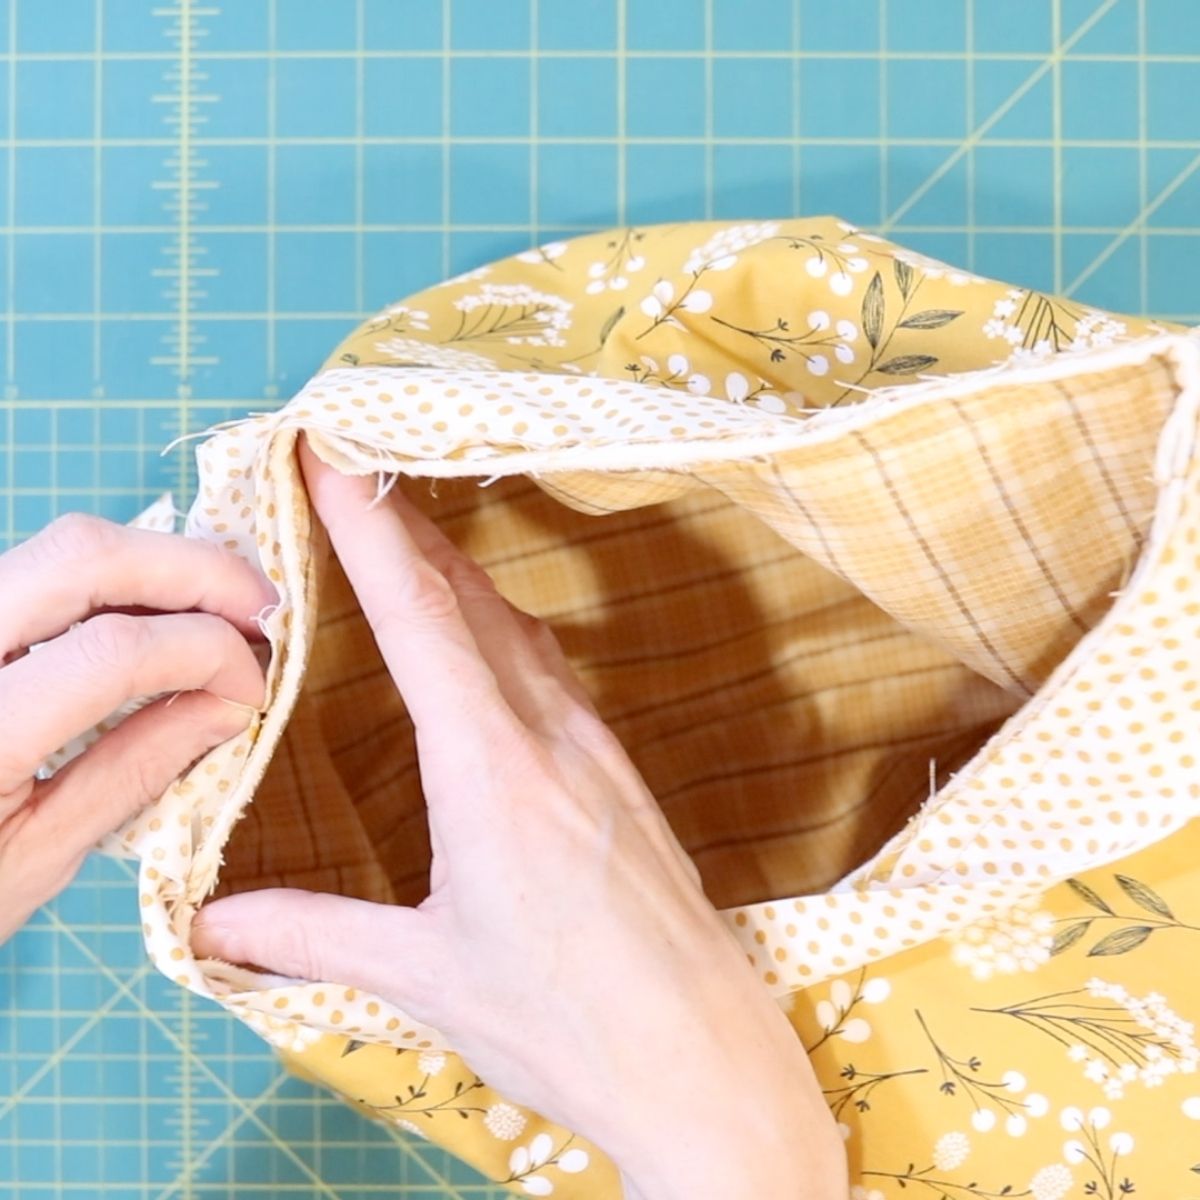
- Starting with the exterior of the basket, turn it RSO (right sides out). This simply means the pretty side of your basket fabric will be visible on the outside.
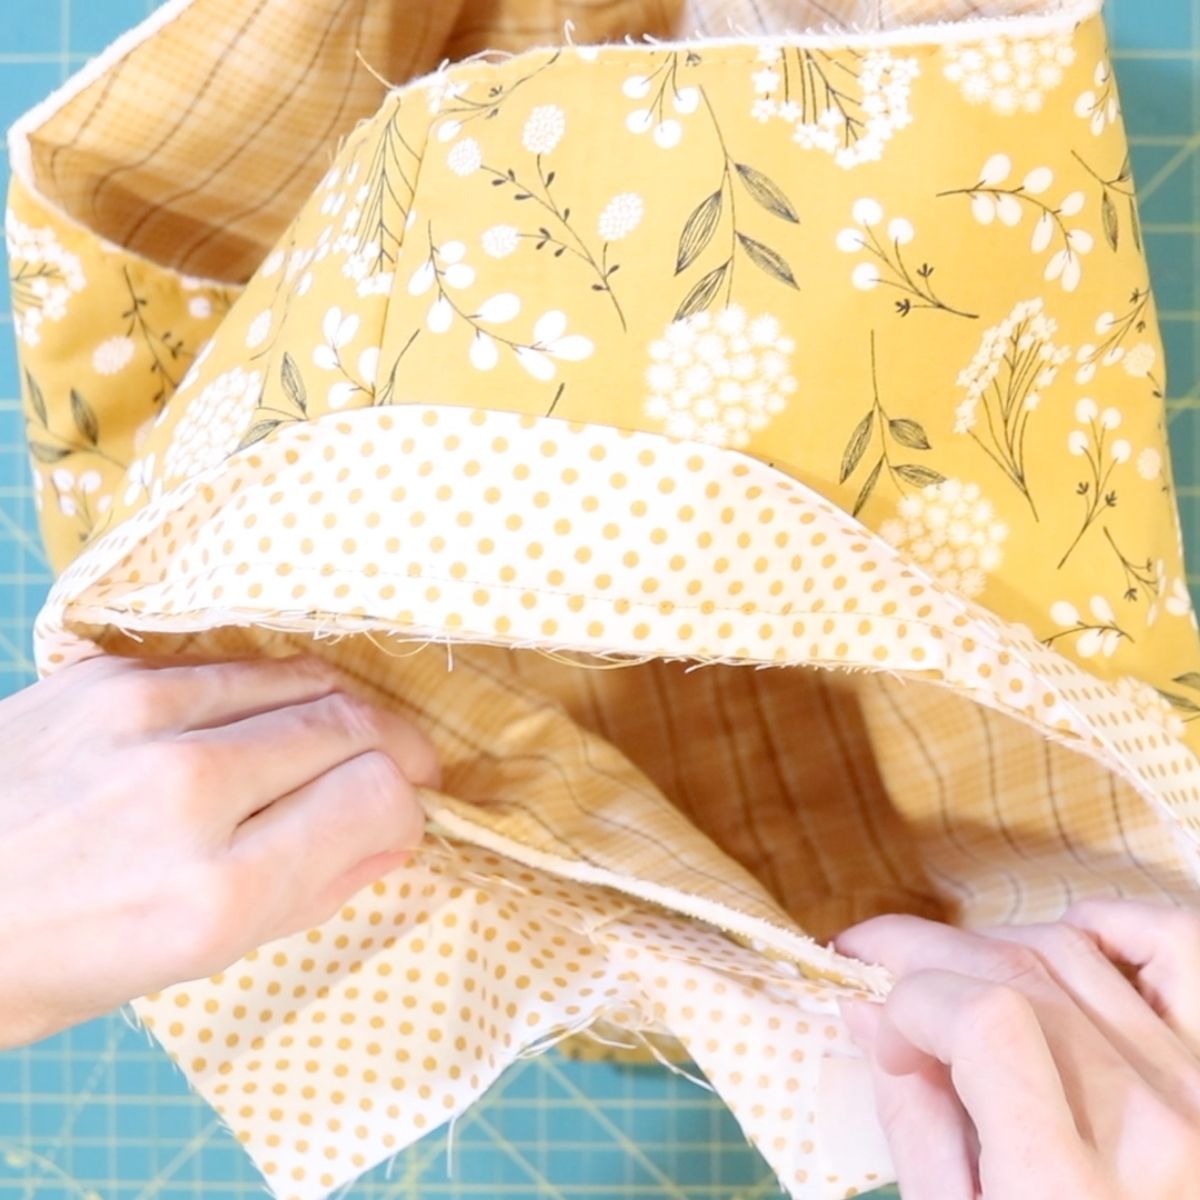
- Leave the lining of your Easter Basket turned inside out and carefully nest the lining into the fabric basket exterior.
- Be sure and match up all the seams (top of the handle and side seams. make sure the basket isn’t twisted at all when doing this.
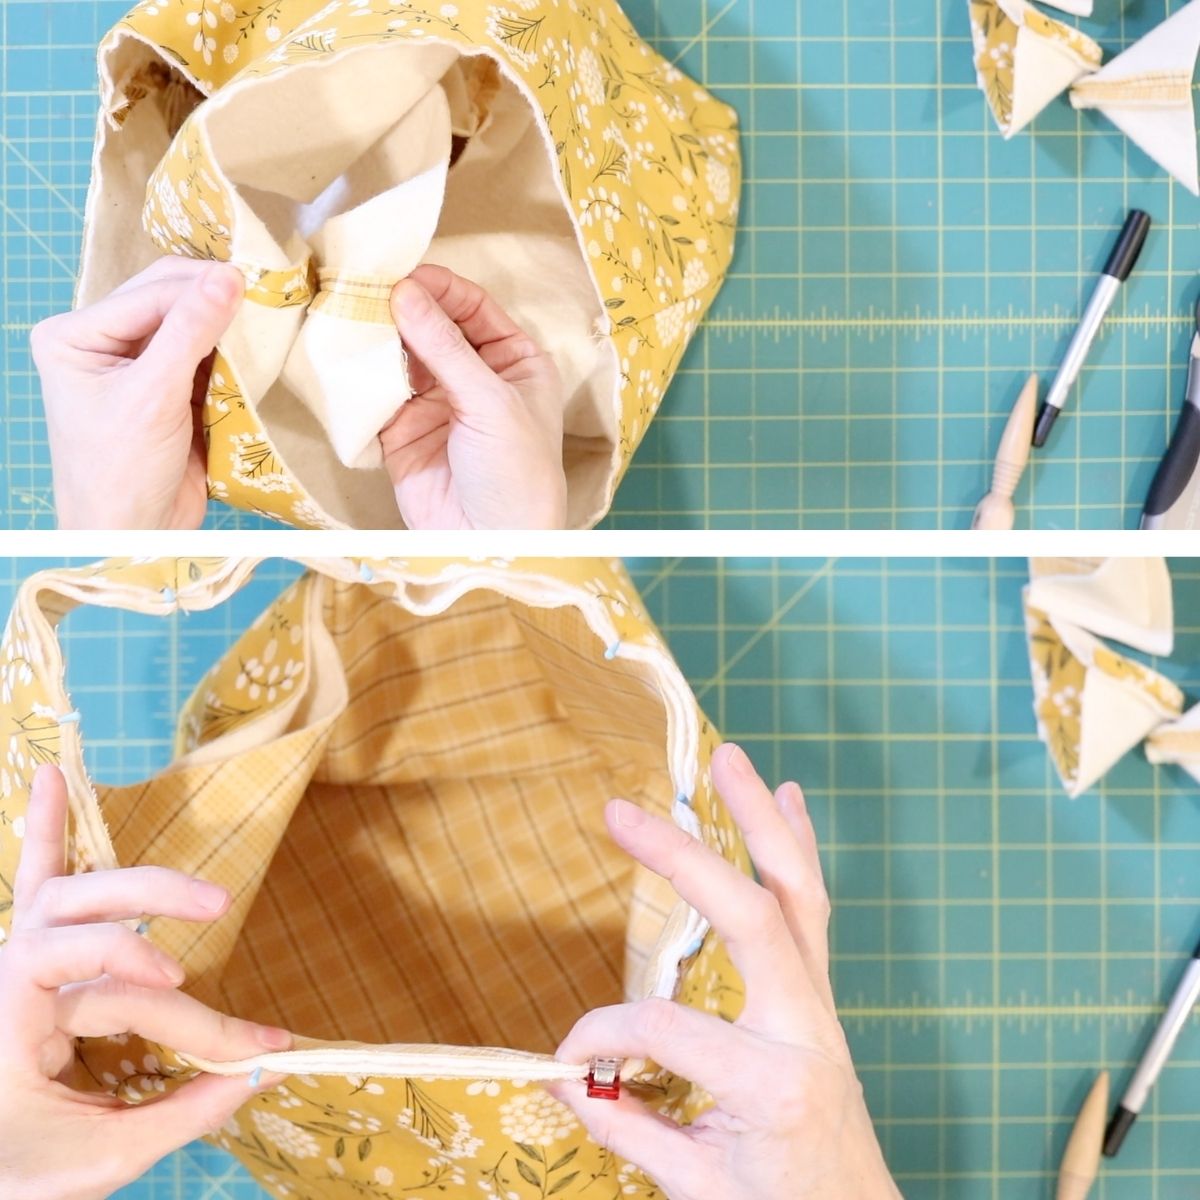
The fabric basket sides should rest nicely together.
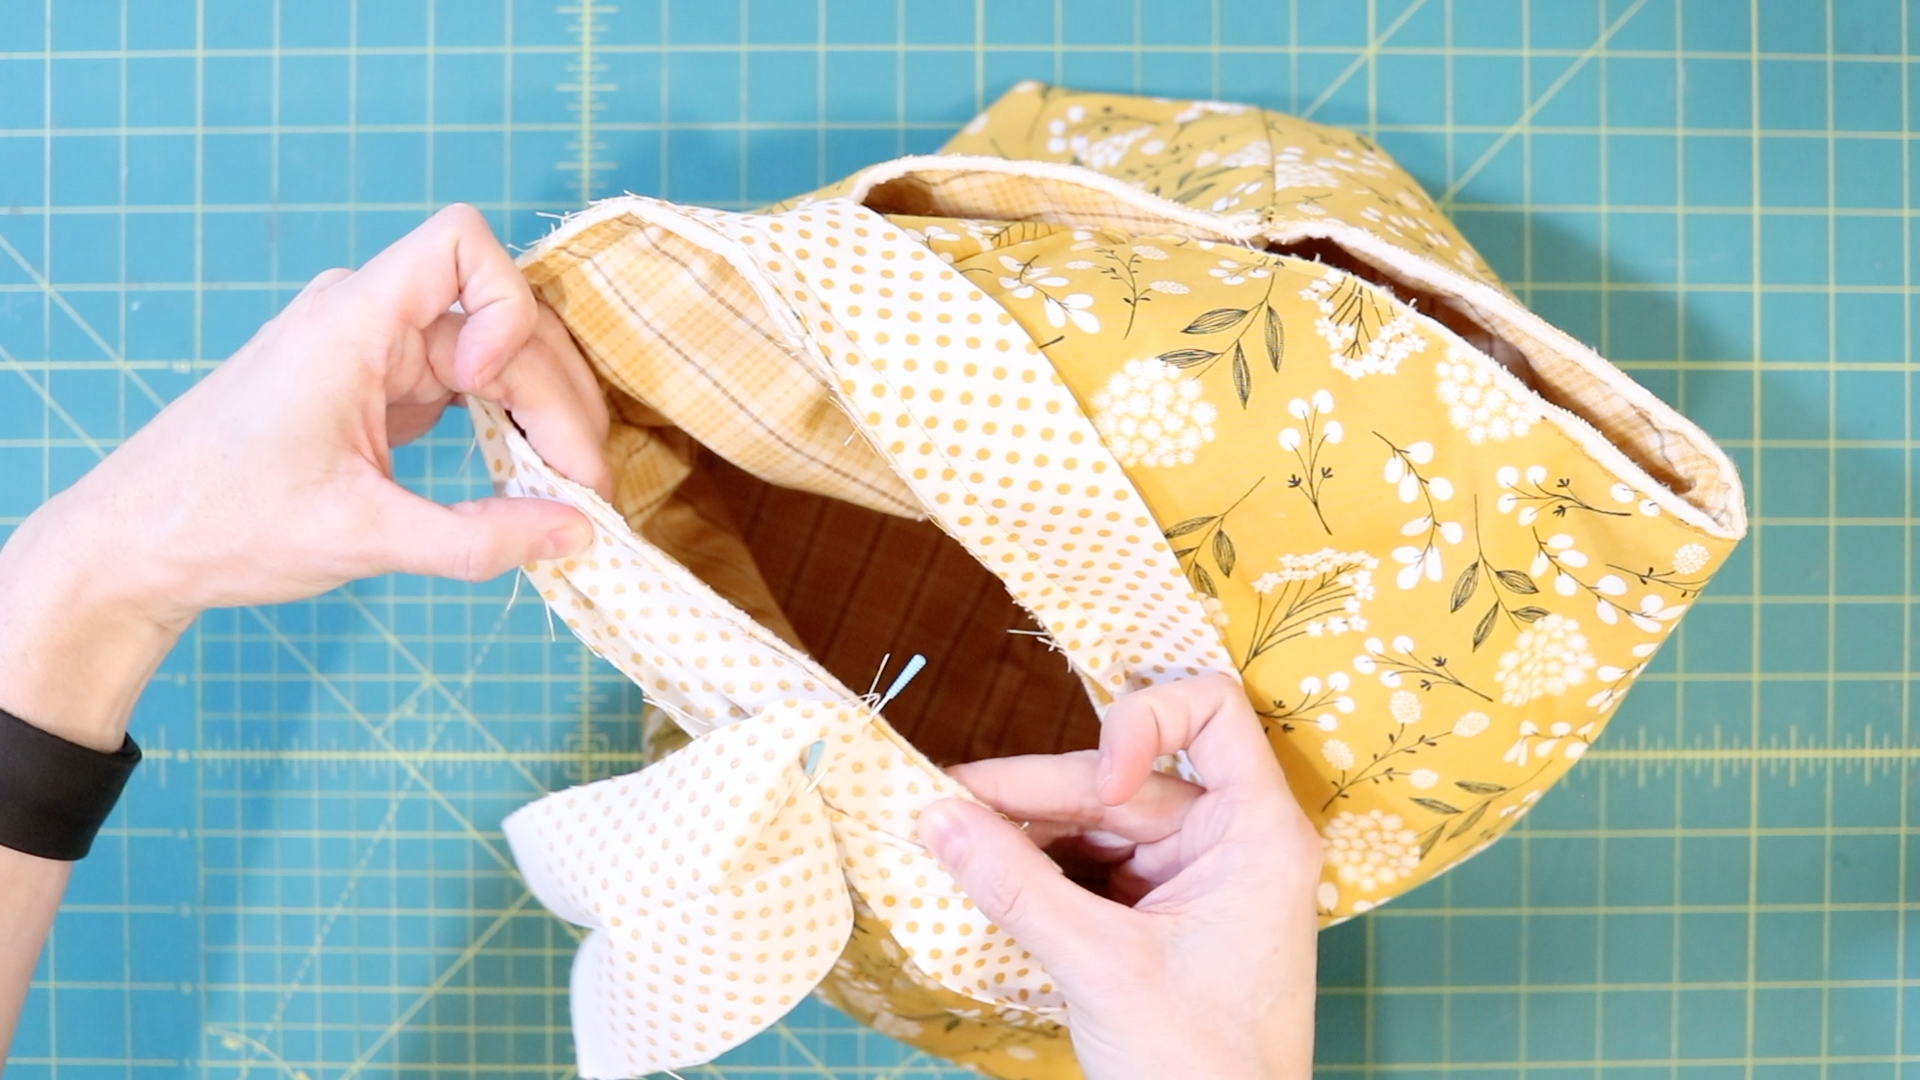
Once everything is in place, pin or clip the basket pieces together to keep them from shifting when basting.
Pin or clip around both sides of the basket handle.
If you are comfortable basting without pinning or clipping, that’s fine too.
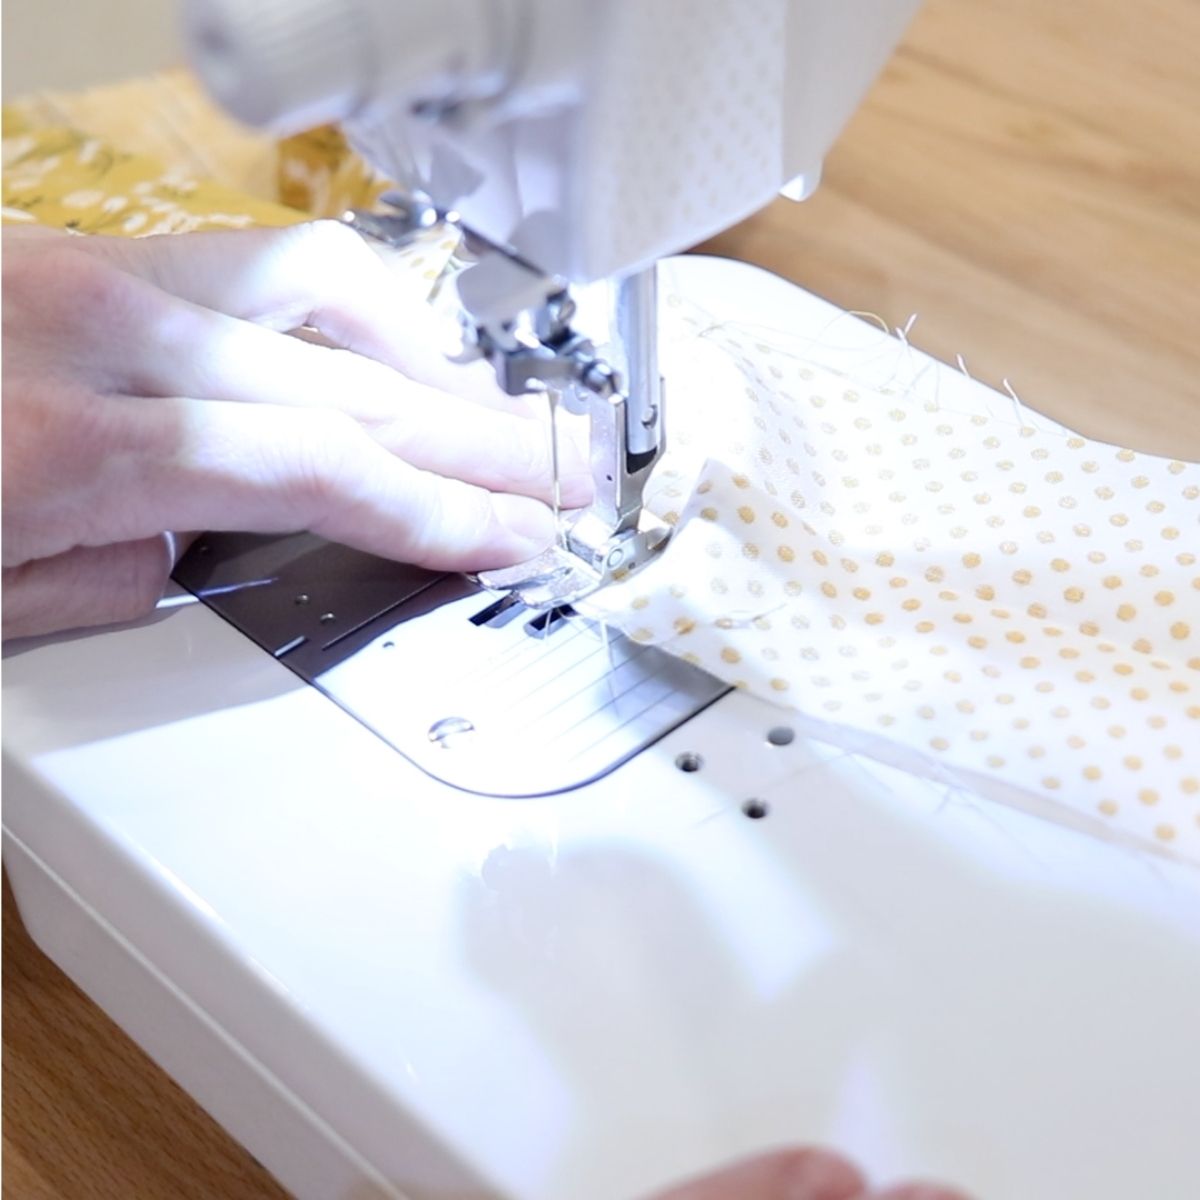
Basting the basket together
Now we’re going to baste around the openings you just pinned. This will keep our pieces together while we attach our binding.
- To baste, begin by lengthening your stitch to a 5.5 or 6. Sew as close as you can to the edges around the openings on both sides.
- Repeat this step for both of the openings.
Return stitch length back to normal stitch setting
Turn your stitch length back down!
Don’t forget to return the stitch length on your machine back to normal stitch setting.
Attaching the binding to the DIY Easter basket
Seam allowance for attaching the binding is also 3/8 inch.
If this part seems confusing, watch the video. I’m going to include a timestamp so you can skip to this part if you need to.
If you are familiar with attaching quilt binding to a quilt, use that method.
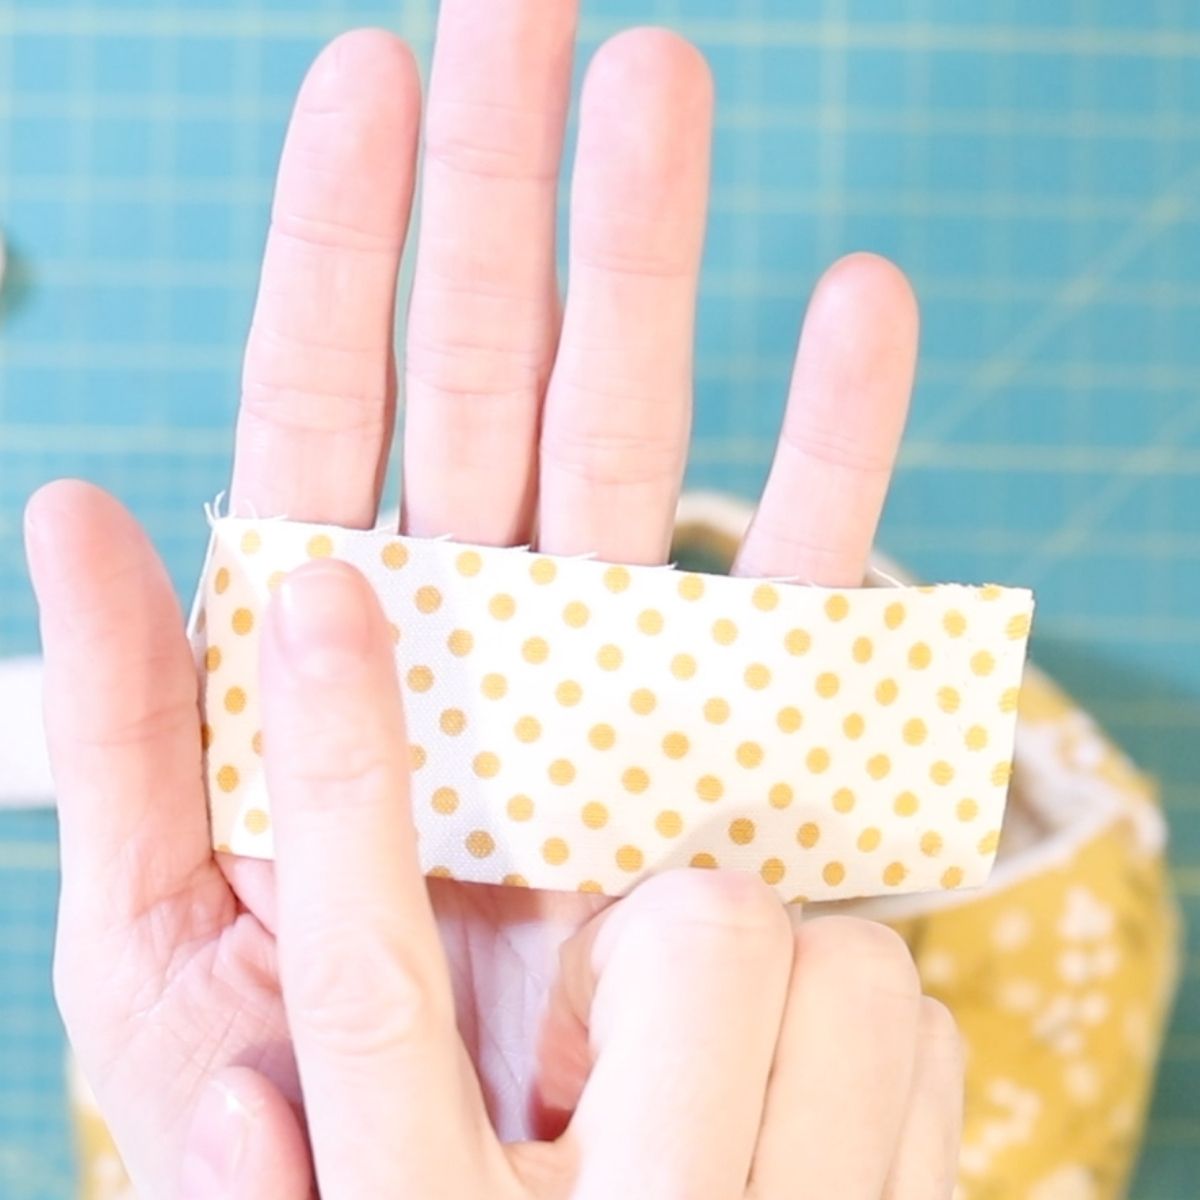
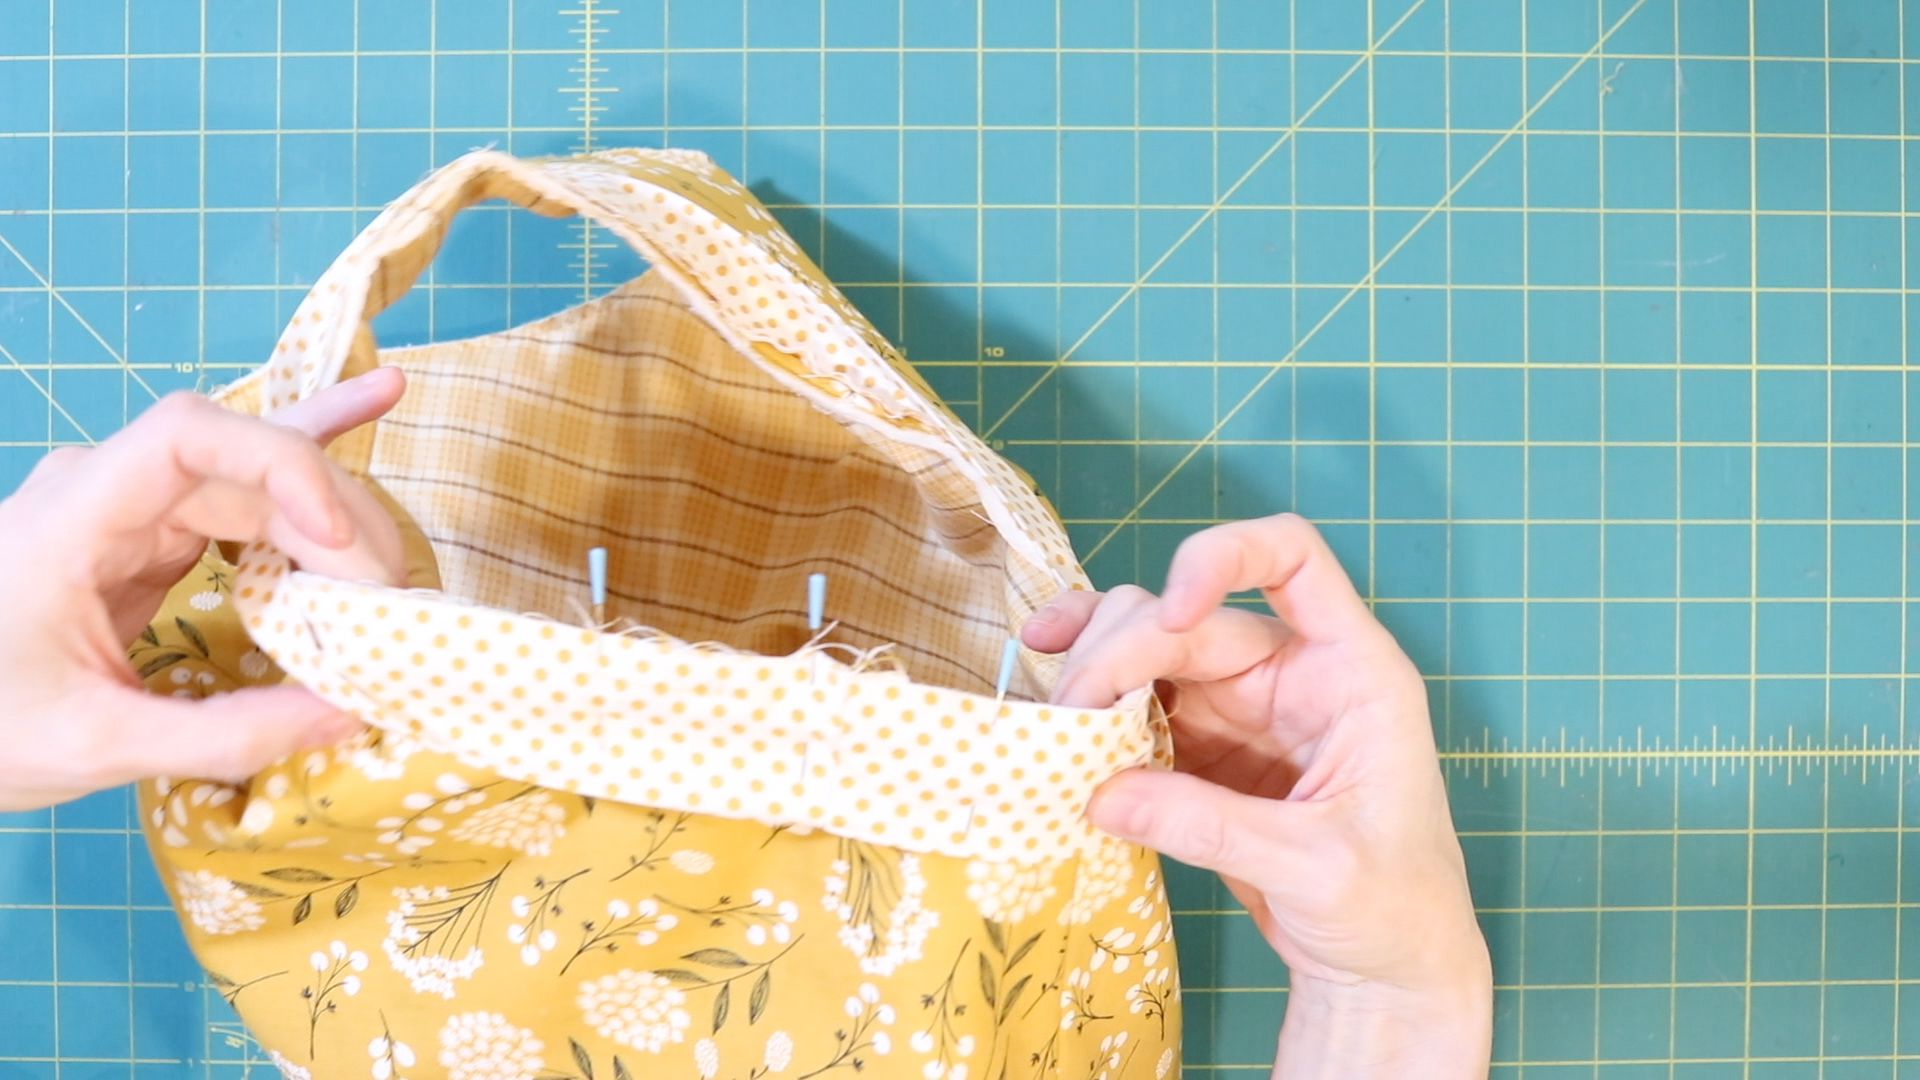
- Take one strip of the binding you made and press it wrong sides together. When pressed it should measure 1.5 inches wide by 42 inches long.
- With the raw edge laying on your basket to match the raw edge around your basket opening, pin in place. Be sure and leave a 4-5 inch tail when pinning. You’ll see why in a minute.
- Be sure your fabric binding isn’t twisted when pinning or clipping it on.
- Using the 3/8 inch seam allowance, sew around the one side of your basket handle. Carefully stitching the binding to your basket. STOP sewing 5 to 6 inches from where you began sewing. This will make the binding easier to turn and stitch.
- Open the binding strip to face RST (right sides together). Again, be sure there is no twisting in the binding strips.
- Slowly snug the binding up to your basket until it is taught. It shouldn’t be so snug that the basket is going to ripple when it is stitched down completely.
- Pin the binding pieces right sides together to get a good fit.
- Sew a straight seam on the wrong sides of the binding strips.
- Carefully turn the strip with WST (wrong sides together) and see how the binding lays against the basket.
- Trim excess binding strip away and sew down.
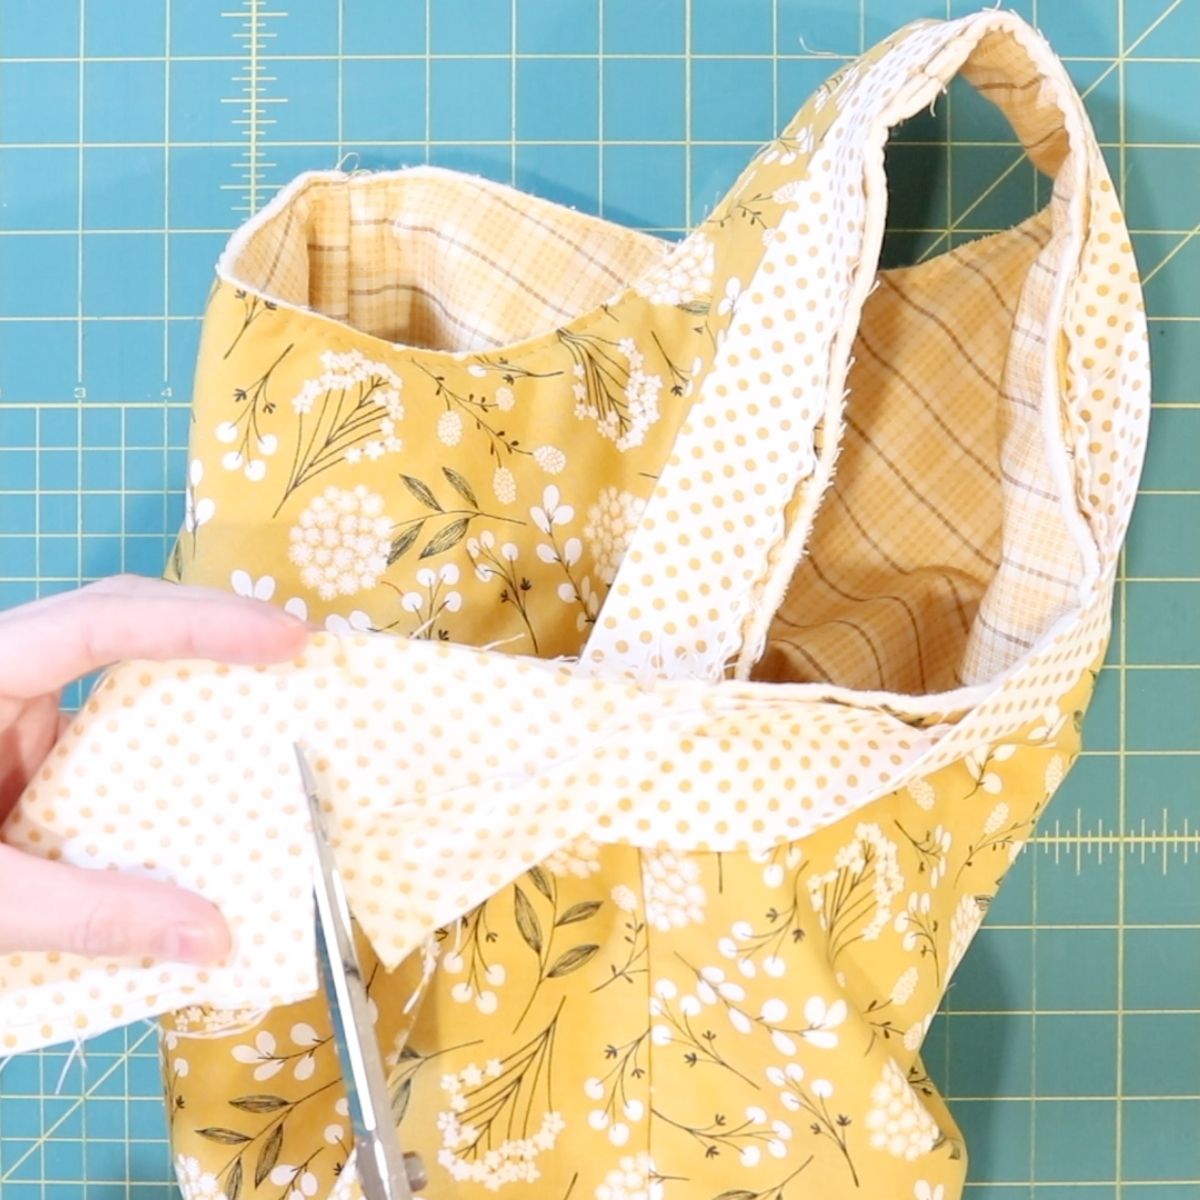
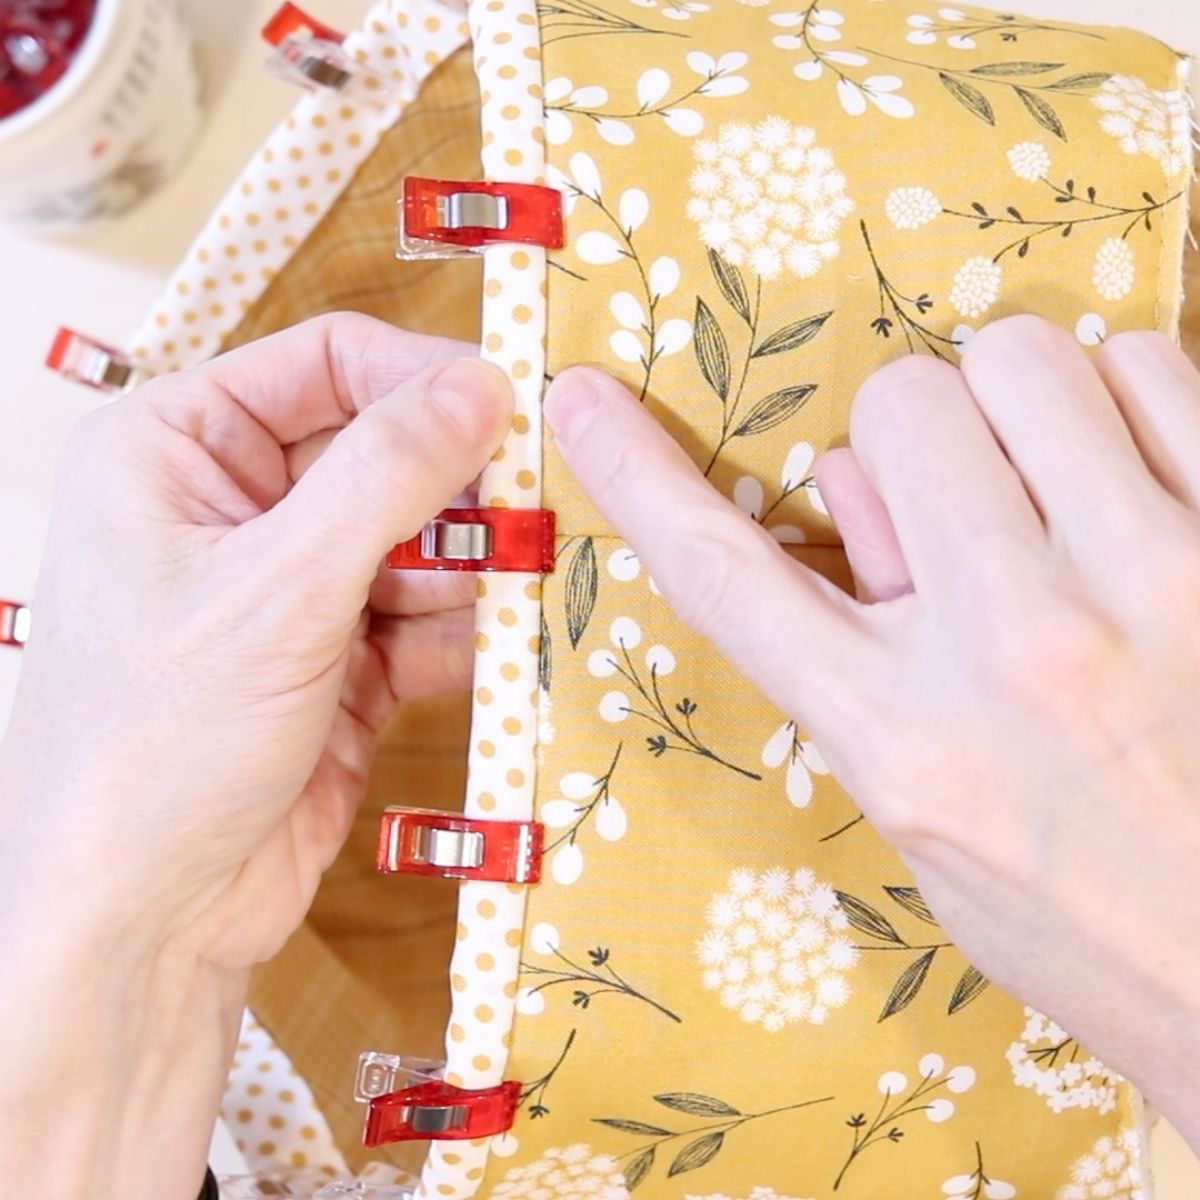
Fold the binding over the raw edges
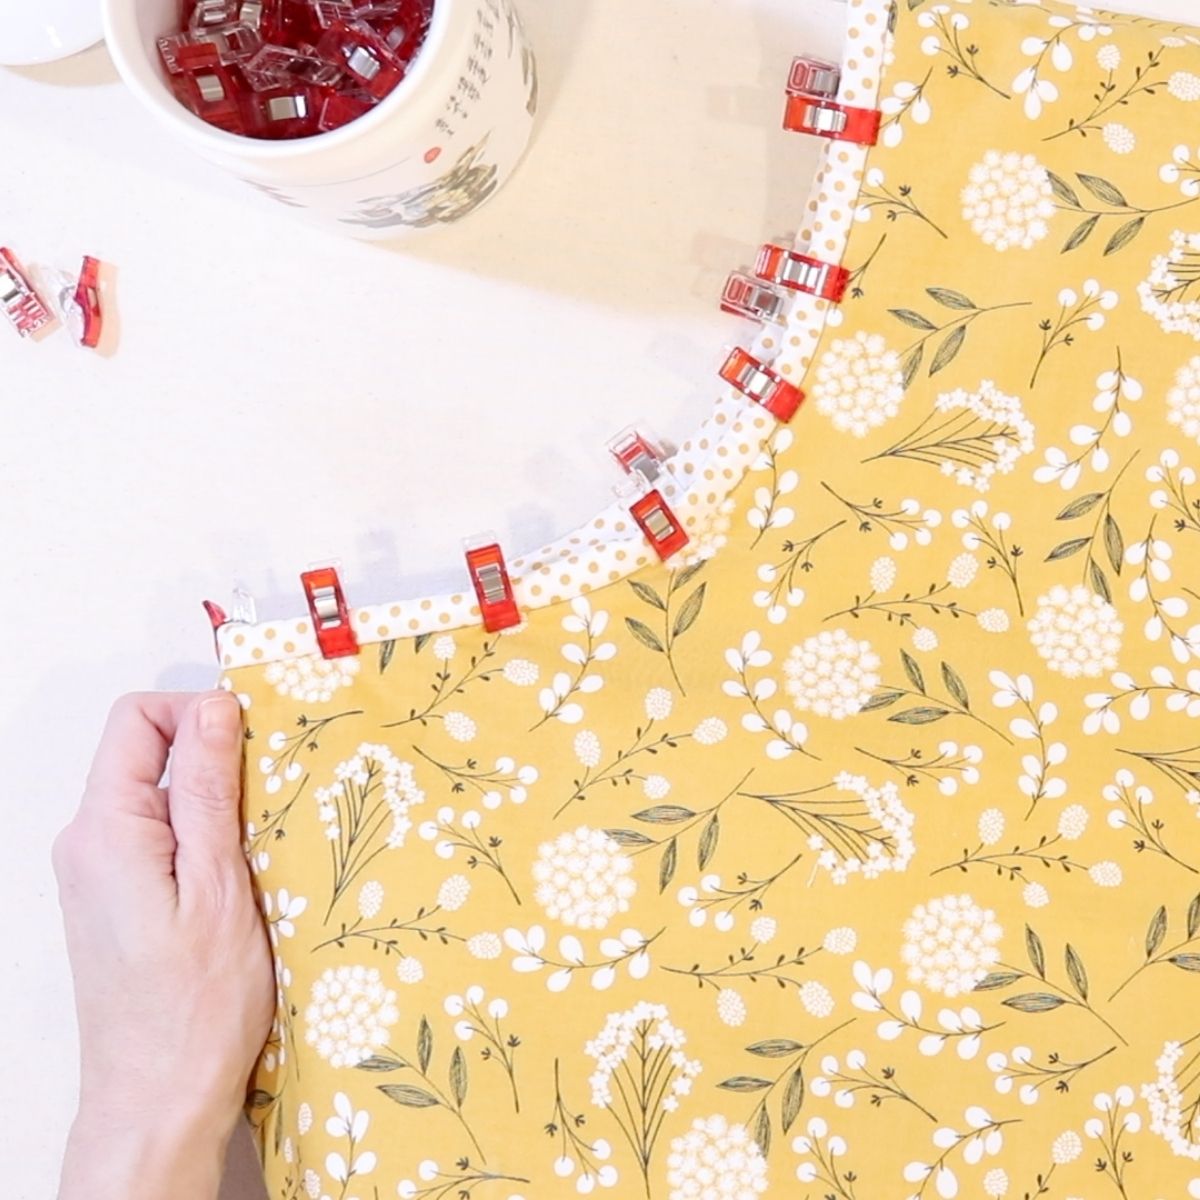
Gently fold the binding towards the inside of the basket. Clip or pin in place.
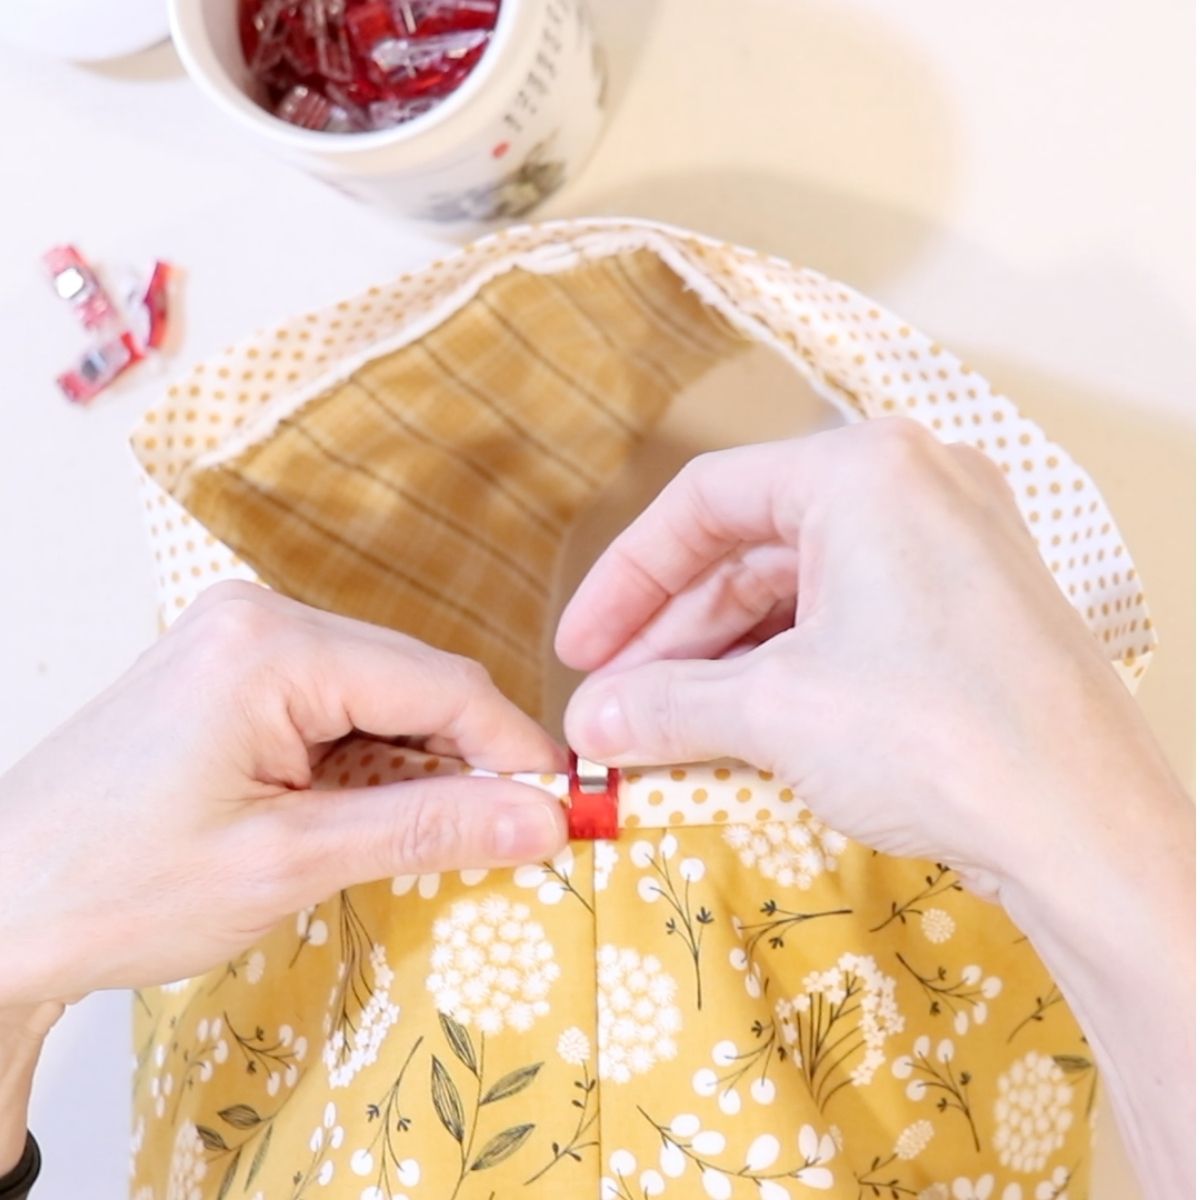
If you don’t want to invest in clips, give these a try. Just as effective and a lot less expensive.
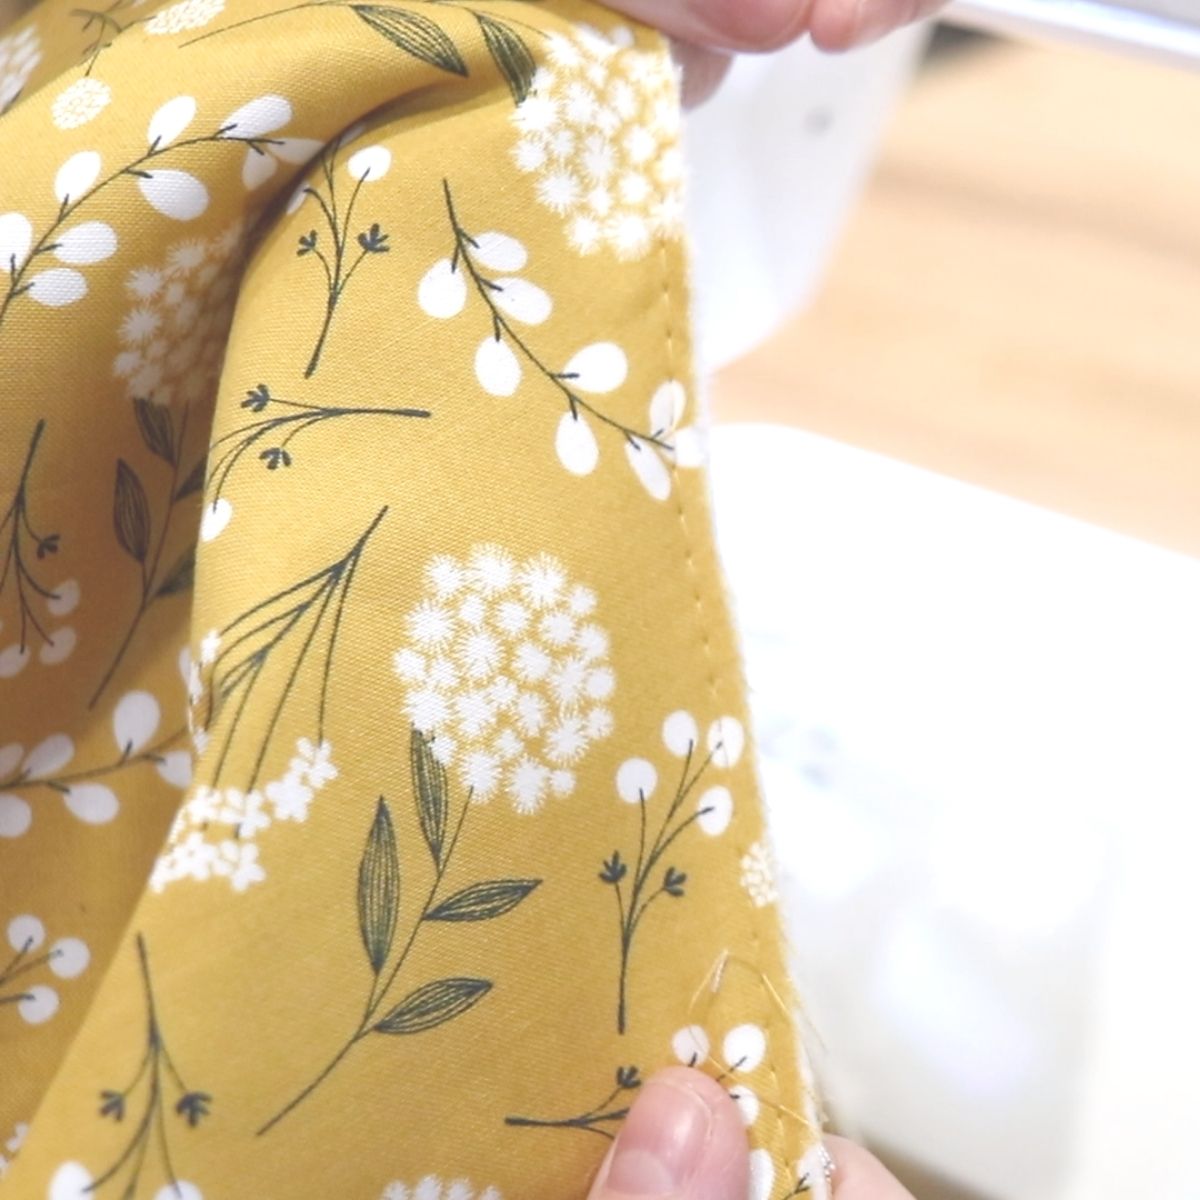
Stitch in the ditch
Take your clipped basket over to your sewing machine and carefully *stitch in the ditch all the way around the basket and handle.
*Stitch in the ditch means to carefully sew in the seam line between the exterior print of your fabric and the binding.
This will catch the binding on the INTERIOR of the tote and keep it down. Repeat with the other side of your basket tote.
Completed fabric basket tote
I hope you enjoyed making these adorable fabric easter baskets. Be sure and share over on Instagram so I can see all of your lovely baskets.
#homadeonourhomessteadmakes
Washing your DIY fabric Easter basket
I wash my fabric baskets using a DIY laundry soap, on a gentle cycle and dry on medium heat.
If you are making your fabric baskets out of material other than linen or cotton fabric, you’ll need to check the care instructions for the material you are using.
Fabric basket variations
There are so many options when sewing a fabric basket like this. Consider making these reusable fabric bags for:
- A makeup bag
- Add pockets to the interior or exterior and use as a knitting or crochet project bag
- Scrap storage
- Use a Halloween themed fabric and use it as trick-or-treat bag
- Fabric bread basket
- Picnic lunch
- Gift basket
- Egg Basket
You could also use the sewing pattern and cut out pieces of your interfacing first as a template and piece the basket together using a quilt as you go method.
Quilting your DIY fabric Easter basket
If you’d like to quilt your fabric Easter Basket, be sure and do this before you assemble the pieces together.
You could free-motion quilt a design on the exterior bag or take a ruler and a chalk pencil and mark the lines you’d like to quilt.
Quilting your fabric baskets can add nice dimensions to them.
Just note that it will add sewing time to the project.
SHOP THIS POST
FUSIBLE and NON-FUSIBLE INTERFACING:
Cotton batting and basting spray
Both of these interfacings will work great for this project but you do not need both. The fleece is fusible so you just iron it on to your fabric pieces.
The cotton batting you can baste stitch on or use a basting spray.
Either method will give you the same result.
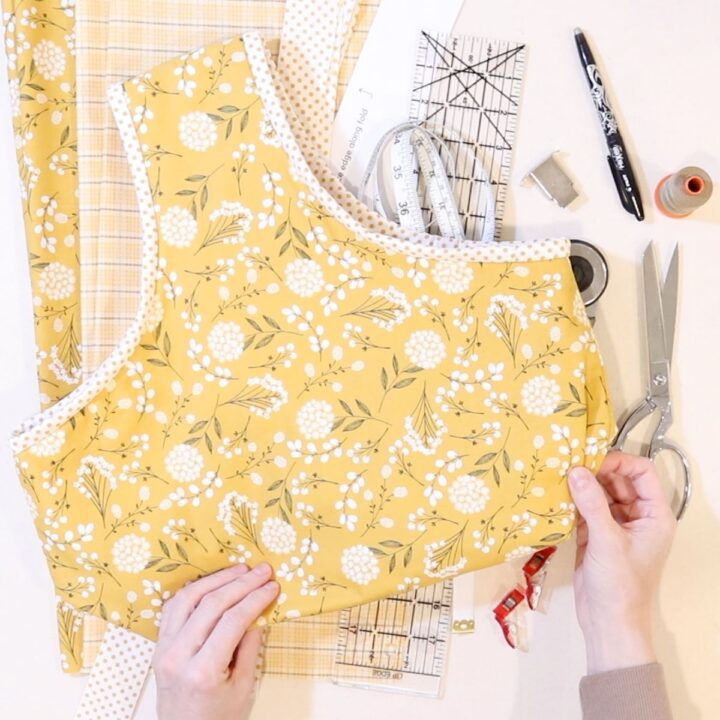
DIY Fabric Easter Basket
Learn how to make these adorable DIY fabric Easter Baskets in 2 sizes with this FREE sewing pattern and step-by-step tutorial.
Materials
- SMALL FABRIC EASTER BASKET:
- 5/8 yard exterior fabric
- 5/8 yard for basket lining
- (2) strips of fabric cut 3 inches wide by 42 inches long for binding
- fusible interfacing
- LARGE FABRIC EASTER BASKET:
- 3/4 yard exterior fabric
- 3/4 yard basket lining
- (2) strips of binding fabric 3 inches wide by 42 inches long
- fusible interfacing
Tools
- Sewing machine
- Thread
- Iron
- Scissors or rotary cutter and cutting mat
- Ruler or tape measure
- Sewing Pins or clips
- Point turner
- fabric marking pen or chalk
Instructions
- Select the three fabrics you want to use for your basket.
- Print your FREE sewing pattern.
- Prepare all your fabrics (wash, dry and iron).
- Cut the fabrics you are going to be using based on the size basket you want to make.
- Place your pattern on the fabric and cut out each piece. When you are finished cutting your pieces, you should have 2 pieces from the exterior fabric and 2 pieces from the lining fabric.
- Using whichever method you prefer to baste with (fusible or spray), baste your fabric basket pieces. You can do both the exterior pieces and the lining or just the 2 exterior fabric basket pieces (to save time and money). Do NOT fuse the binding strips.
- After the pieces are basted, cut them out.
- Begin with the two bag exterior pieces and lay them RST (right sides together). Pin or clip into place.
- Sew using a 3/8" seam allowance along the top handle and three sides of the fabric basket. Do not sew the handle openeings.
- Repeat step 9 for the lining of your fabric basket.
- Box the corners of your fabric easter baskets (exterior and lining). You'll make a 6" boxed bottom for the small fabric easter basket or an 8" boxed bottom for the larger fabric basket.
- Trim the boxed corner to 1/2" from the seam. Do this for each boxed corner you created (2 on the lining and 2 on the outside basket).
- Turn the exterior basket RSO (right sides out) and use a tool to push the corners out.
- Carefully place the basket lining into the exterior fabric basket. Be sure and line up the side seams and the seam across the top of the handle. Pin to hold in place.
- Lengthen your stitch on your sewing machine to baste stitch. Carefully sew the lining to the exterior of the basket using a basting stitch and sewing as close to the edge as possible. No seam allowance for this step. Be sure NOT to backstitch at the start and stop.
- Matching up the raw edge of your binding strip and the raw edge of your fabric Easter basket, carefully attach the binding strip like you would bind a quilt.
- Repeat the binding step for the other side of your basket.
- Once your binding is sewn down, roll the binding over the top raw edge of the basket to hide it. Clip into place.
- Stitch in the ditch along the handle openeings on both sides. This will keep the stitching from being visible on the exterior of your basket.
- Your DIY fabric Easter basket is now complete!
Notes
Time to make these fabric baskets will vary based on sewing skill level as well as additional steps added to the project (quilting, embroidery). But of these are optional and not needed to complete the Easter basket sewing project.
I hope you enjoyed this sewing pattern for these fabric easter baskets.
Happy Easter!