How to sew a face mask- FREE mask pattern
Learn how to sew a face mask with this free mask pattern and video tutorial.
We are currently facing a situation in which we have never experienced before.
Times are challenging and hospitals are experiencing severe shortages in equipment. There simply isn’t enough PPE (personal protective equipment) to go around. Medical staff are being asked to reuse things like gowns and masks they need to safely care for patients.
Most of these items are intended for single use. However, due to the national shortage of the n95 masks, gloves and gowns, doctors, nurses and other hospital staff are being asked to re-use these items. Reusing these items is putting healthcare worker at risk. Because of this severe shortage, hospitals have turned to those of us who sew and asked for help. Here is a quick and simple sewing tutorial to make a face mask. If you have time and resources, please consider making a few and donating to a local hospital or assisted living facility.
If you have the time to sew some masks but don’t have the resources, contact your local hospital. Because of this COVID-19 pandemic some hospitals are giving out supply kits to those wanting to help. Any donation, great or small is deeply appreciated from those on the front lines of healthcare. This is how I’m able to contribute and do my part right now.
*disclaimer: some of the links in this post are affiliate links. You can read my full disclosure here.
[yotuwp type=”videos” id=”3ZMC3Yr_zOY” ]
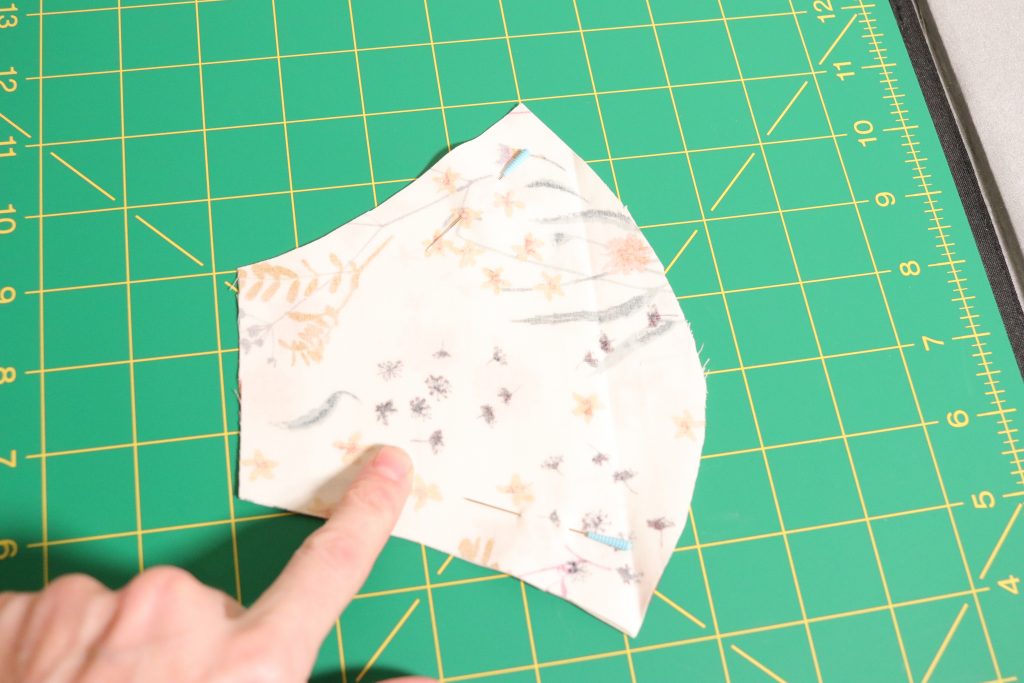
Before you get started, make sure you print off a copy of your mask pattern. Link below.
How to sew a face mask | DIY reusable face mask sewing pattern –(LINK)
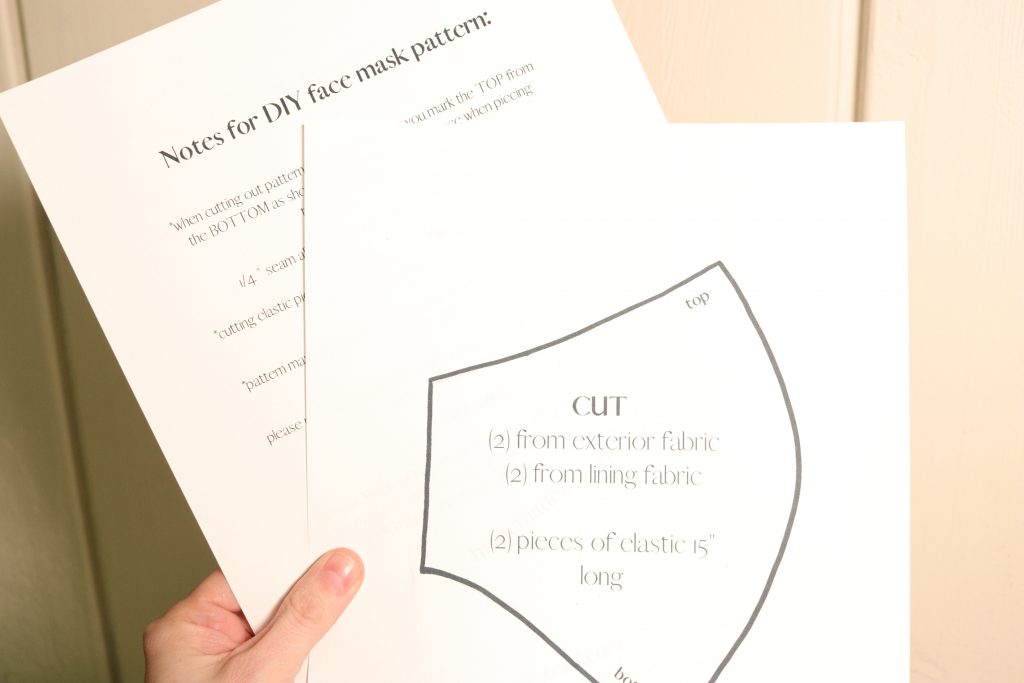
After you have printed off your pattern, read through the pattern notes that are attached, then cut out your mask pattern piece. No need to leave a seam allowance around the outside of the mask-it’s been added in-so just cut along the lines of the pattern.

After you’ve cut out your pattern piece, it’s time to get your fabric ready.
It’s important to wash, dry and iron the fabric you’re going to be using before you cut out your pieces. This will be ensure that your mask doesn’t shrink after it’s been worn and then washed.
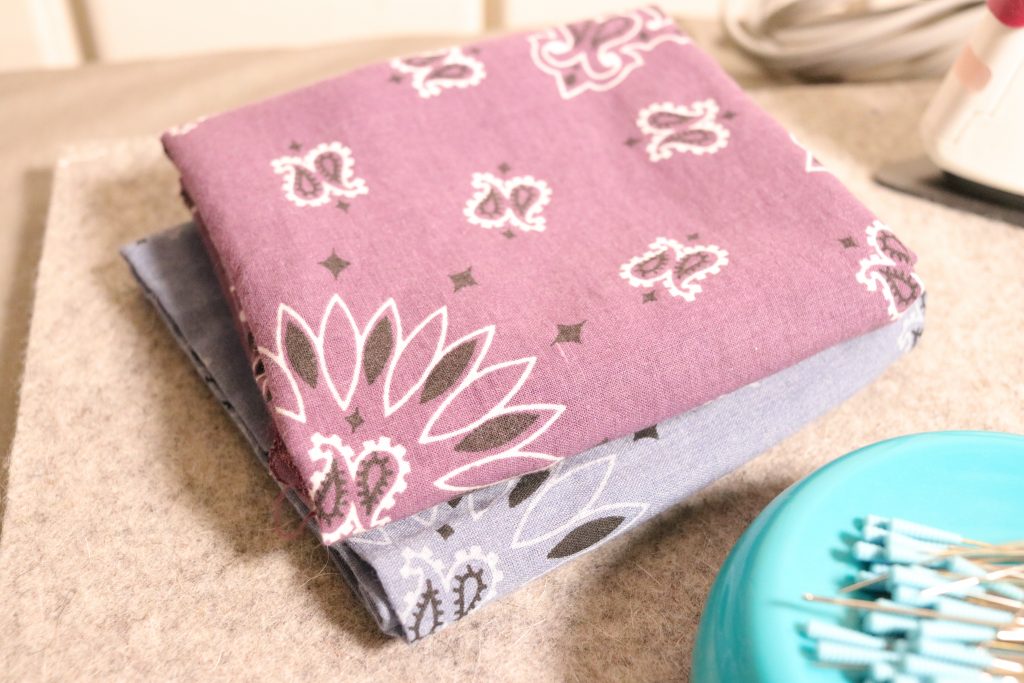
For this pattern you can use a variety of fabrics.
- Quilting cotton works great. This is a great project to use up scraps too.
- Bandanas
- 100% cotton drop cloth. It will need to be washed at least twice first and you can also bleach it if you want a more white fabric. This will give you a lot of fabric for around $12.00. The one I like for all my projects is this one.
- This is a great project to repurpose old scrubs if you’re a healthcare professional.
- If your don’t have old scrubs laying around, you can also repurpose old tee shirts too.
Whatever fabric you decide to use, you just want to make sure it’s a breathable material since you’ll have this covering your mouth and nose.
It’s time to cut your fabric. But first, let’s make sure you have everything you’re going to need to complete your project.
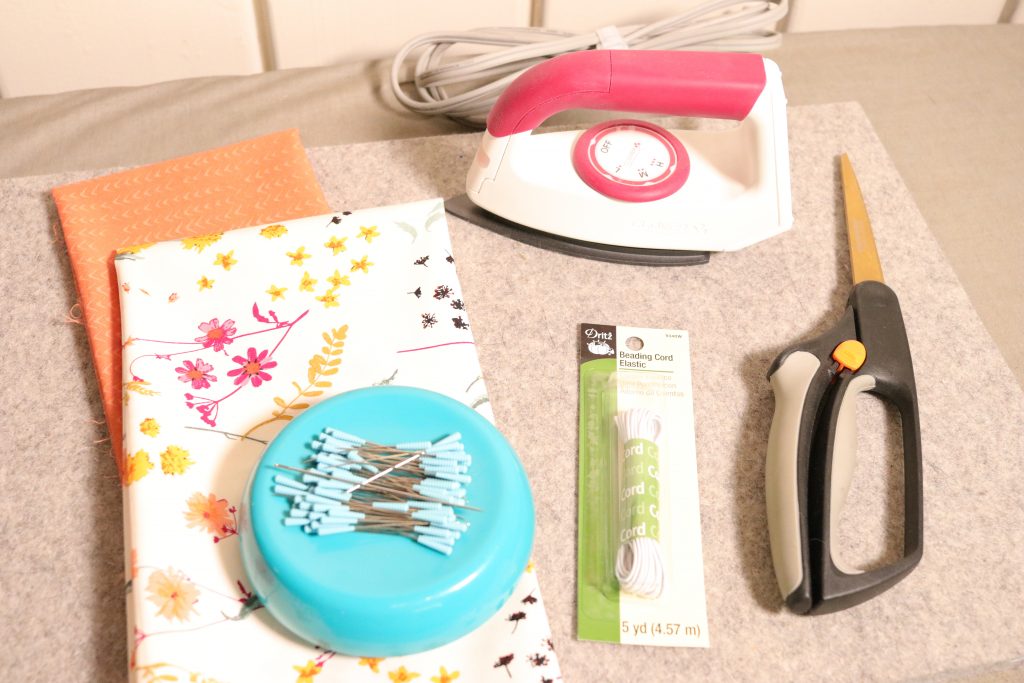
- Sewing machine
- An iron to press your seams open
- Scissors
- Pins and pin cushion. I adore this magnetic one I have.
- Fabric (see suggestions above)
- Elastic cording.
- 1/4″ elastic also works well if cording isn’t available.
Because of the short supply of masks available in hospitals, many people have taken to making them and donating them, leaving a short supply of things like the elastic cording. If you aren’t able to find elastic beading cord on amazon, check your local craft store. You can usually find this in the beading section and or sewing section.
If you still aren’t having any luck, you can also use hair ties like these ones. You may need to extend out the end of the pattern a bit to be able to use these, but its a great alternative if nothing else is available.
You can also use drawstring cording that you can tie, larger diameter shoes laces work well too. Bias tape is easy to come by and comes in a variety of colors. This will allow you to make the ties in any size and color you like to coordinate with your masks. So there is other options if you can’t find elastic.
It’s cutting time!
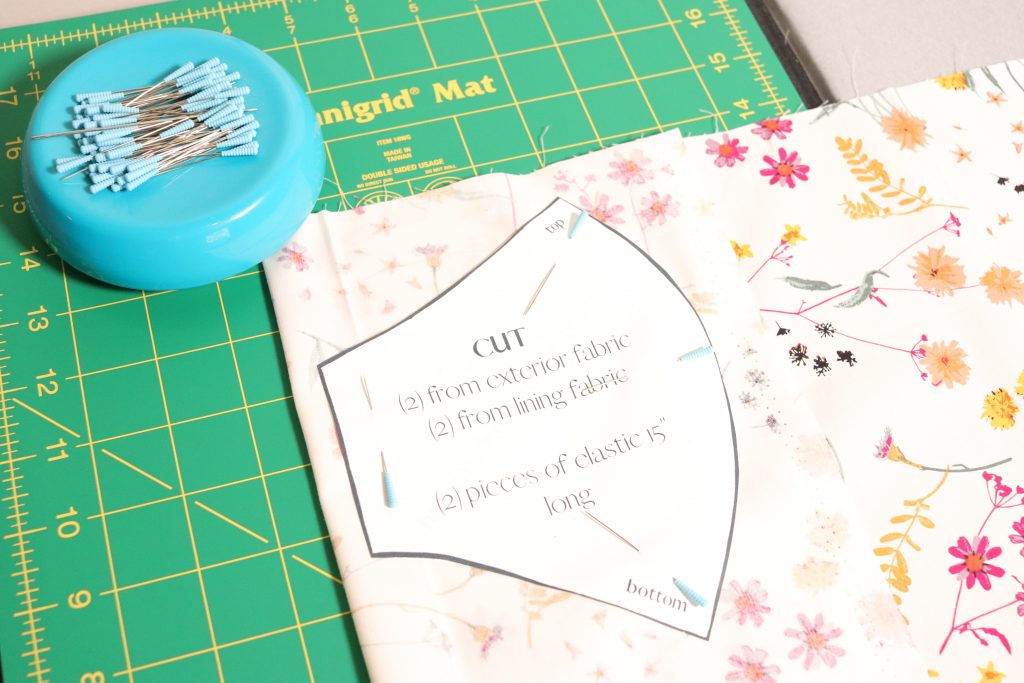
- Fold your fabrics so they are double thickness. This will make it so you can cut once and then sew, instead of having to cut the pattern out four separate times. Fold the exterior fabric in half and do the same for the lining fabric. After you have done this, lay the fabrics onto of one another and pin your pattern piece on. Then cut out your pieces.
- Remove your pattern from your fabric, and make the TOP of your pattern pieces. This will make a difference when it comes to piecing them together. You can do this with a fabric pen, a chalk pencil, or simply place a sewing pin along the top of each piece. After these have been stitched together, you can get rid of the pins or markings. These pens are my favorite to use and the best part? They iron off!
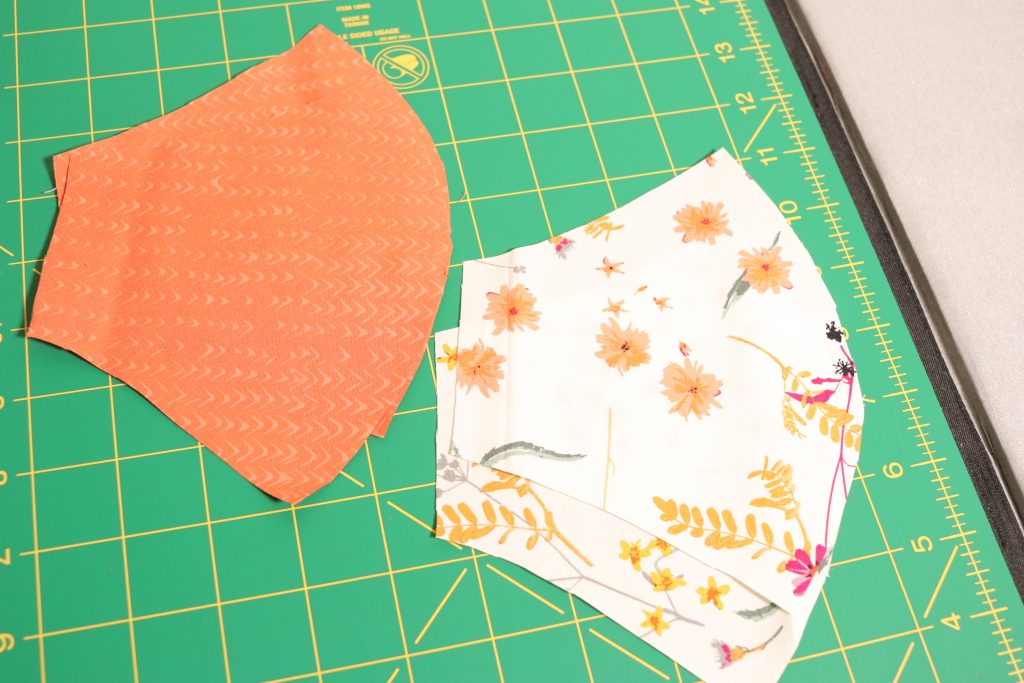
3. So you should have 4 pieces (total) cut from your exterior (outer fabric that you’ll see) and the interior fabric (lining). Two pieces of each-as indicated on the directions.
4. Place your (2) matching exterior pieces RST (right sides together). This just means that you want the pretty side of the fabric you’ll see when you’re wearing your mask, facing each other when you sew them together. In sewing terms, RST may be what you see on a pattern in the future.
5. Do the same thing for the (2) lining pieces as well.
Turn on your iron. After you sew the first seams, you’re going to press. So it’s a good time to get your iron ready to use.
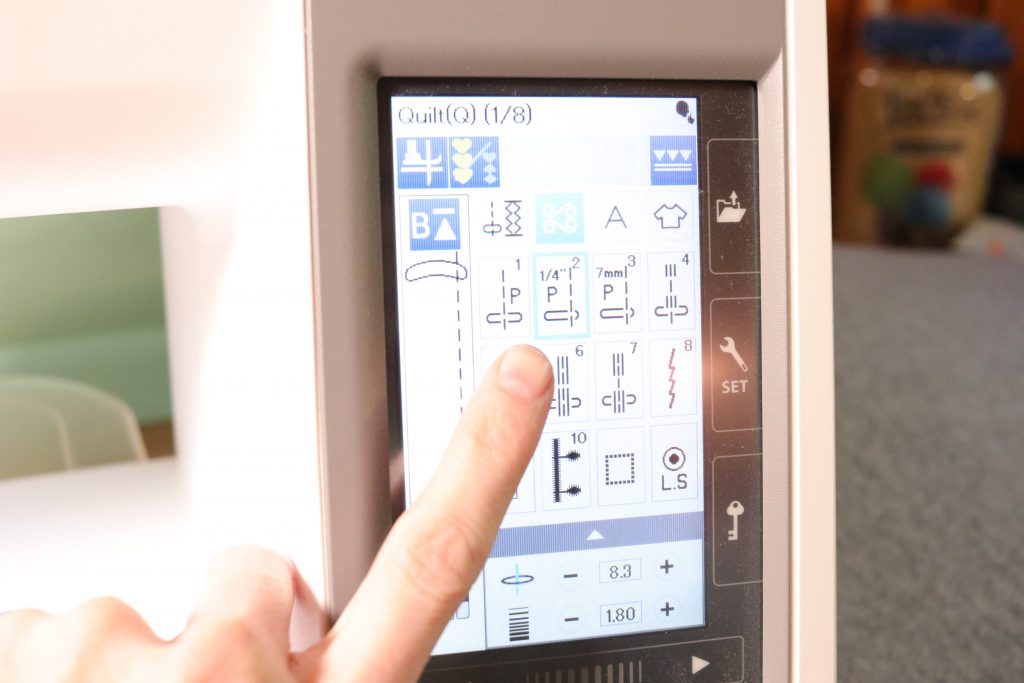
6. For this project you’re going to be using a 1/4″ seam allowance. If you have a machine that came with specialty feet, put your 1/4″ on your machine. Consult your manual that came with your machine if you are unsure. If you are using a machine that has that option digitally, change it now.
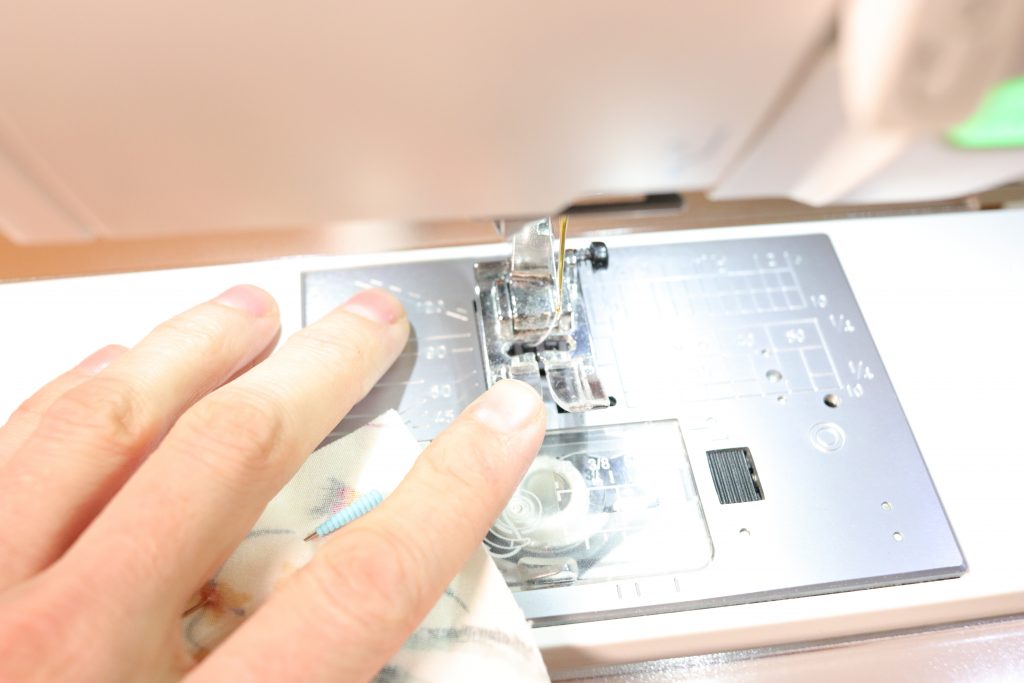
7. Place the (2) exterior pieces of your mask that are RST under your machine presser foot and put the foot down into sewing position.
8. Backstitch at the beginning and end of each line of stitching. This reinforces the line of stitching and it will hold up better long term.
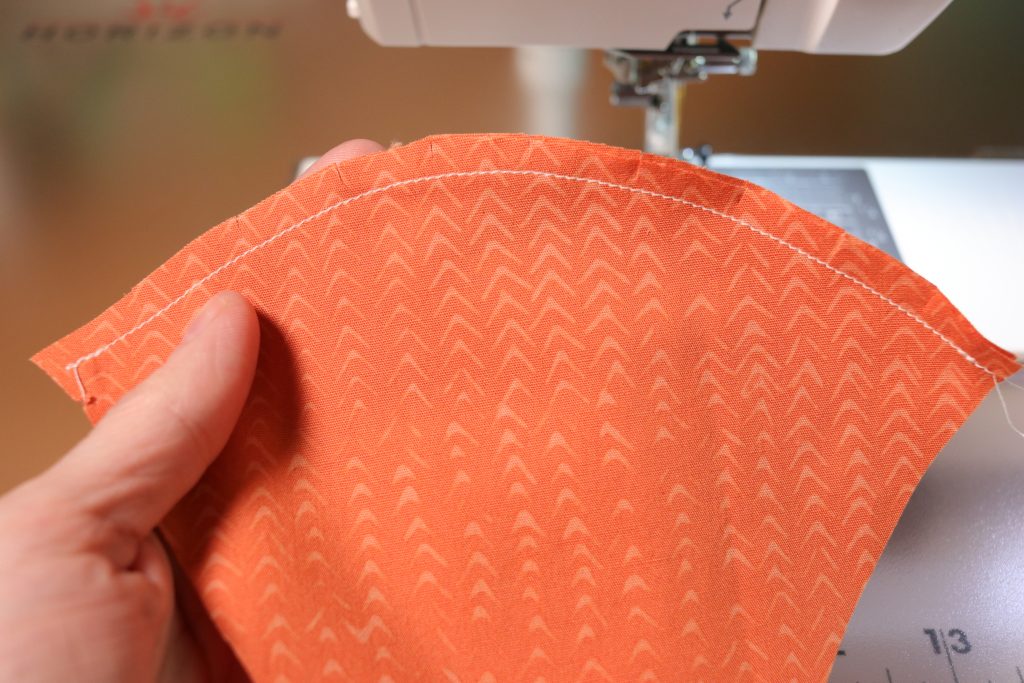
9. Sew from the top to the bottom along the curved edge.
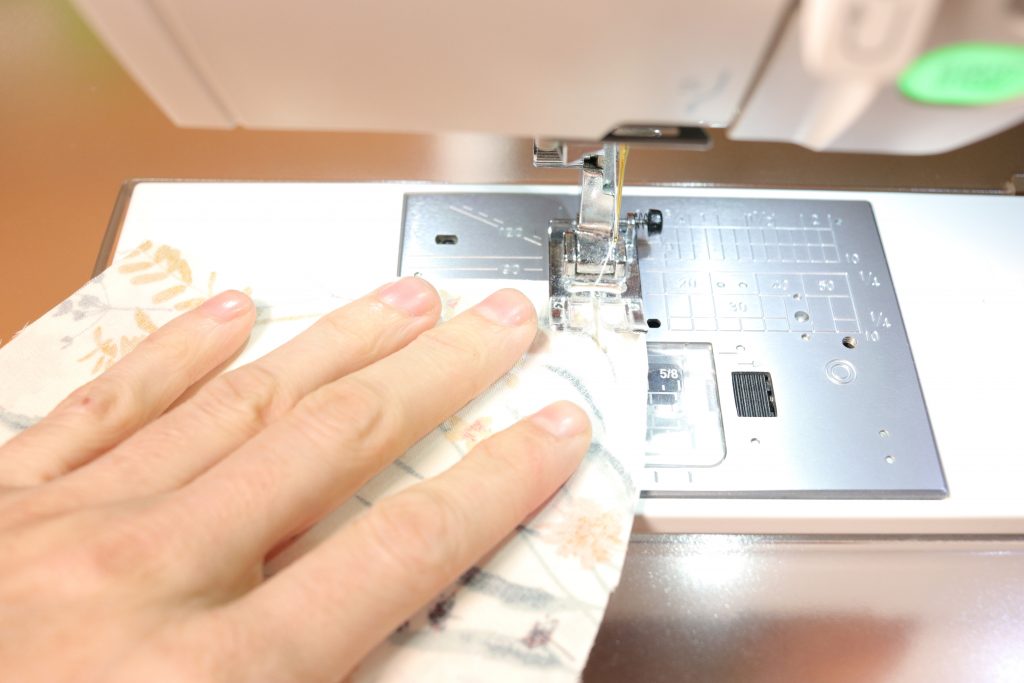
10. Repeat step 9 for the (2) interior pieces of your mask as well.
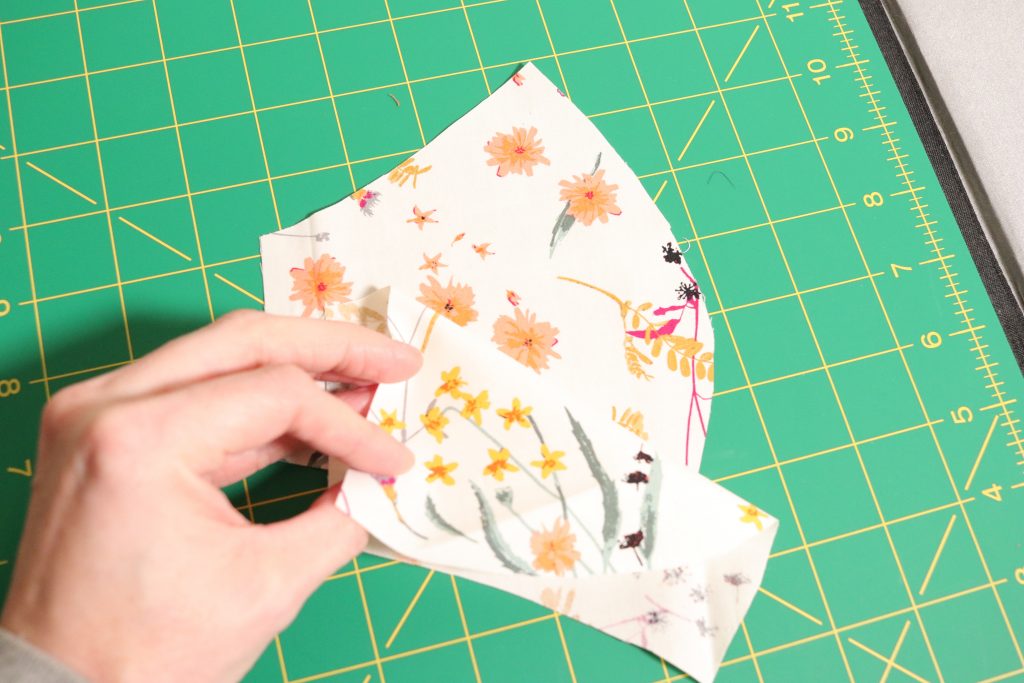
11. After you have sewn the exterior pieces and interior pieces together (you should now have 2 pieces of material instead of 4), you need to ease the seam. This just means that you make tiny “snips” or cuts into the fabric along the curved edge. This helps the seam to lay nice and flat when you press it open. You don’t have to do this step if you are afraid you may accidentally cut through the stitching. It’s just something I always do.

12. Next you’re going to press these (2) seams down the center of each of your pieces open. This will help your masks to lay nice and flat. If you don’t have an iron, you can finger press them open. This just means using the heat from your fingers to press them open instead of using an iron.
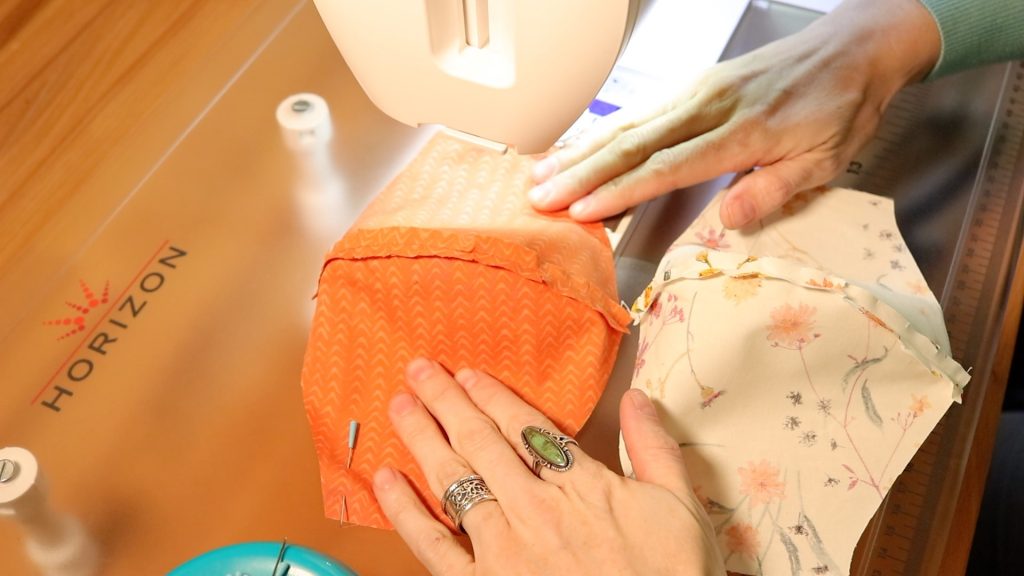
13. After you have pressed your seams open, You’re going to place your two pieces RST (right sides together) to sew them together.
NOTES:
- Make sure that you place the “tops” of each piece together. It makes sewing them together so much easier.
- You also want to make sure that the center seams are lined up on the top.
Sewing your mask together.
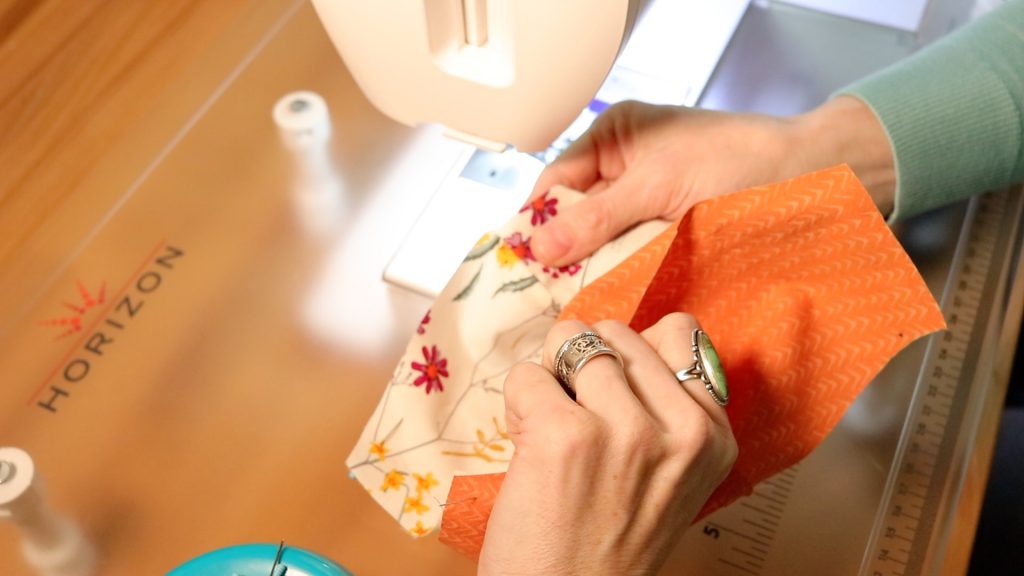
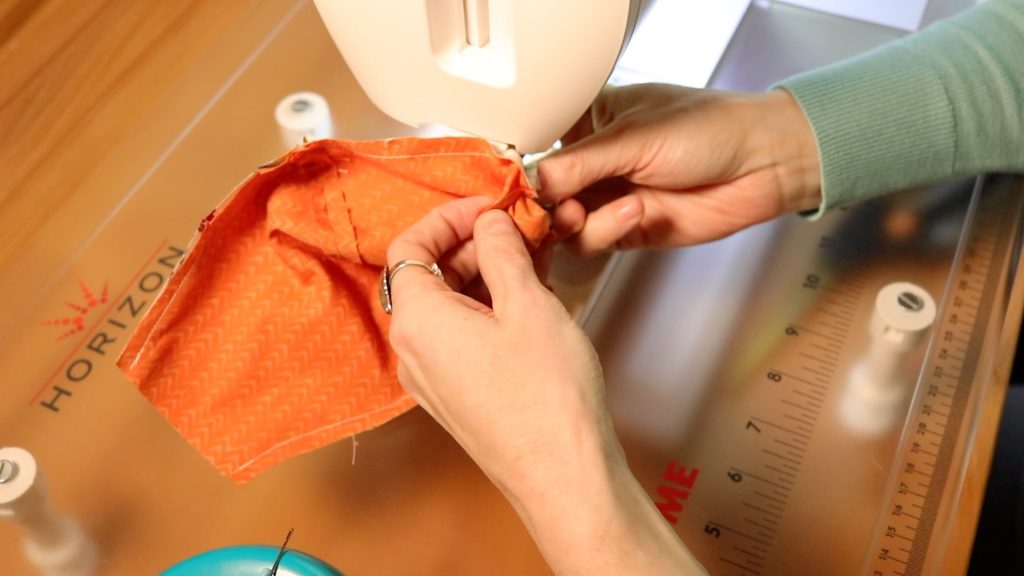
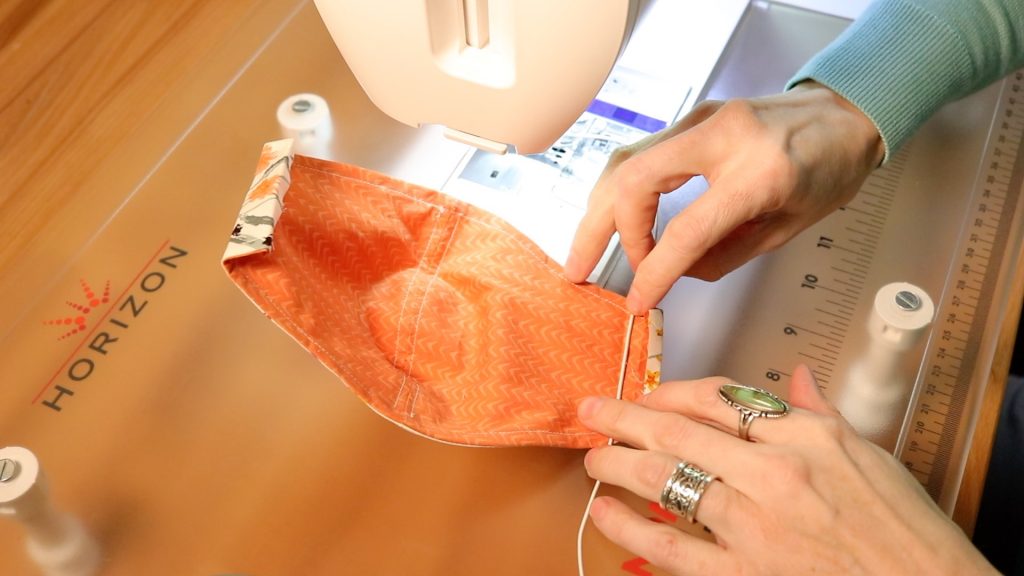
14. Pin along the top and bottom edge of the mask. You’re going to sew a 1/4″ seam along each side. DO NOT SEW THE SIDES CLOSED-you need these open to turn your mask when you are done.

15. After you have sewn both sides, ease the seam around the curved areas to allow your mask to lay flat the we turn it.
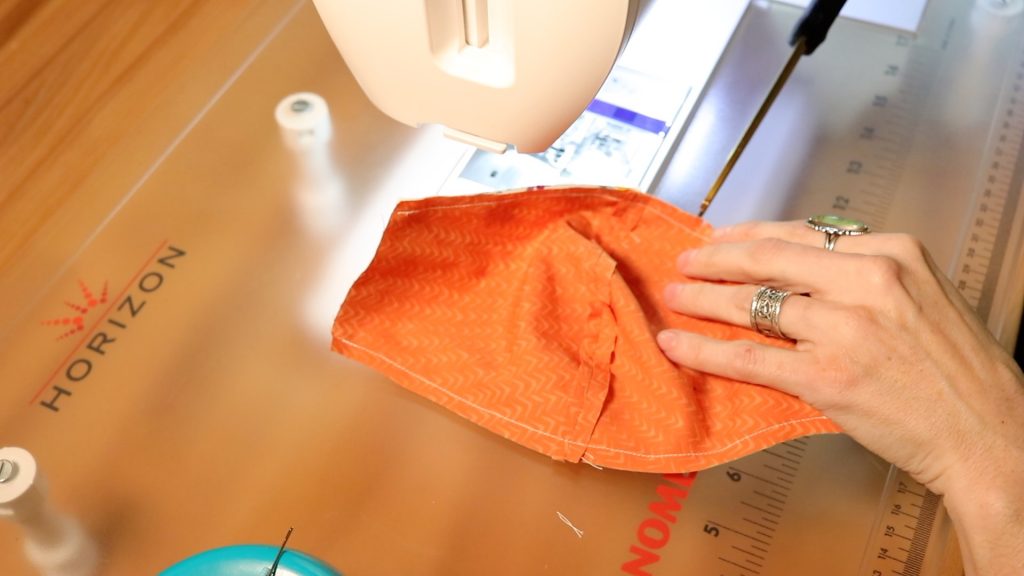
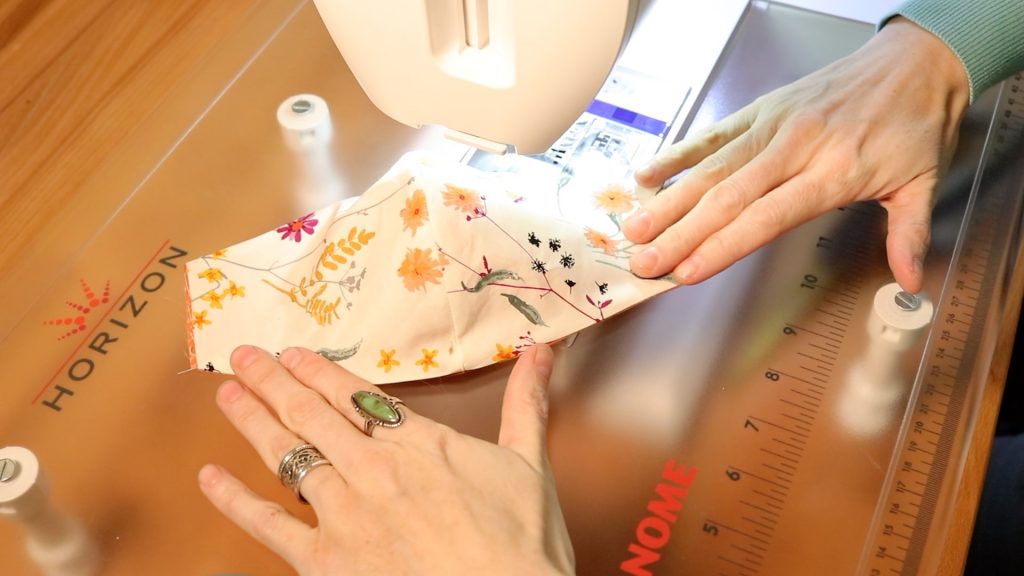
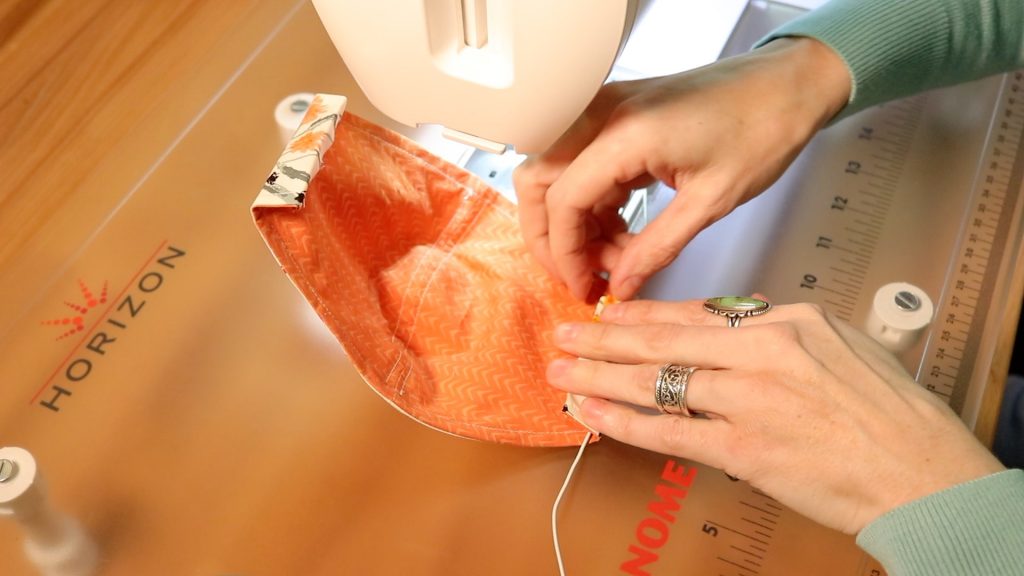
Now it’s time to turn your mask RSO (right side out).
16. This part looks a bit messy, but it goes quick and you’ll iron it nicely when you are finished. Using one of the ends you left open, slowly begin to push your mask inside out.
17. Now you should have the pretty side facing out and all the seams on the inside where you can’t see them.
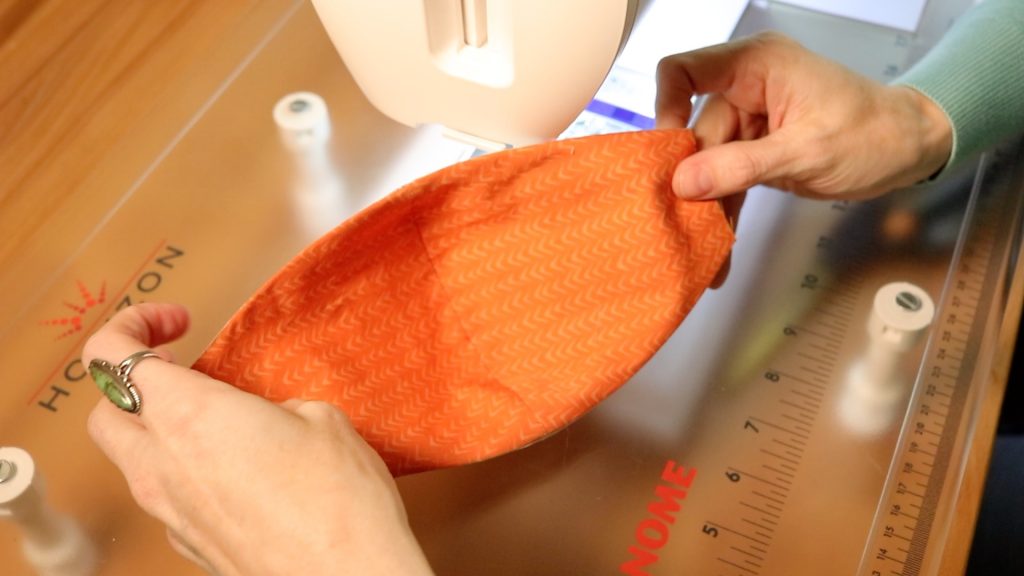
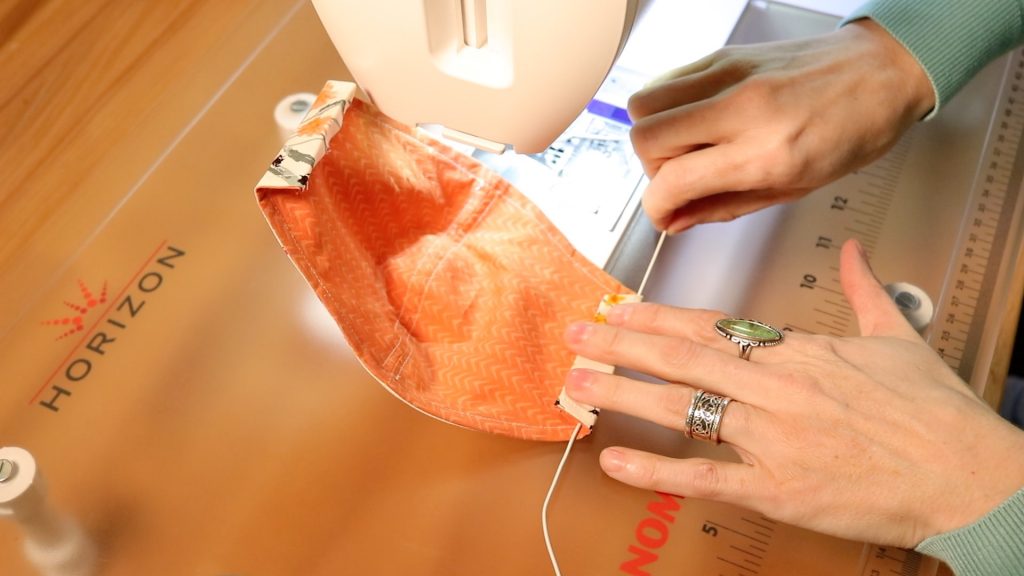
Press along the top and bottom edge of your mask once you have turned it inside out. This will make sure you’re seams are nice and flat before topstitching.
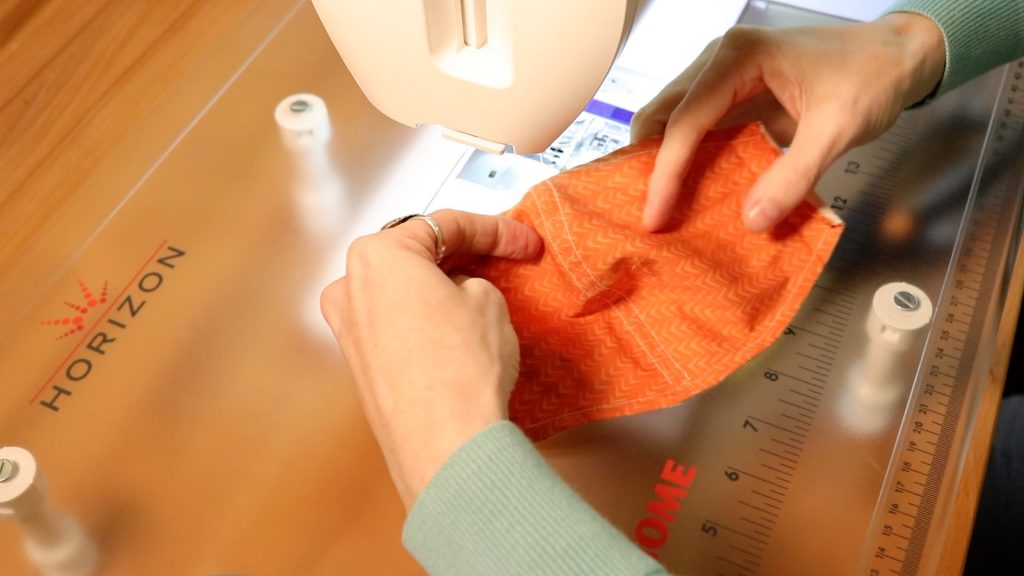
18. Again using a 1/4″ seam, topstitch the top of the mask and along the bottom of the mask. I also prefer to top stitch down the center seam of the mask too. This just keeps everything together and flat when you wash them. You don’t have to do this step, but it looks more polished when it’s done.
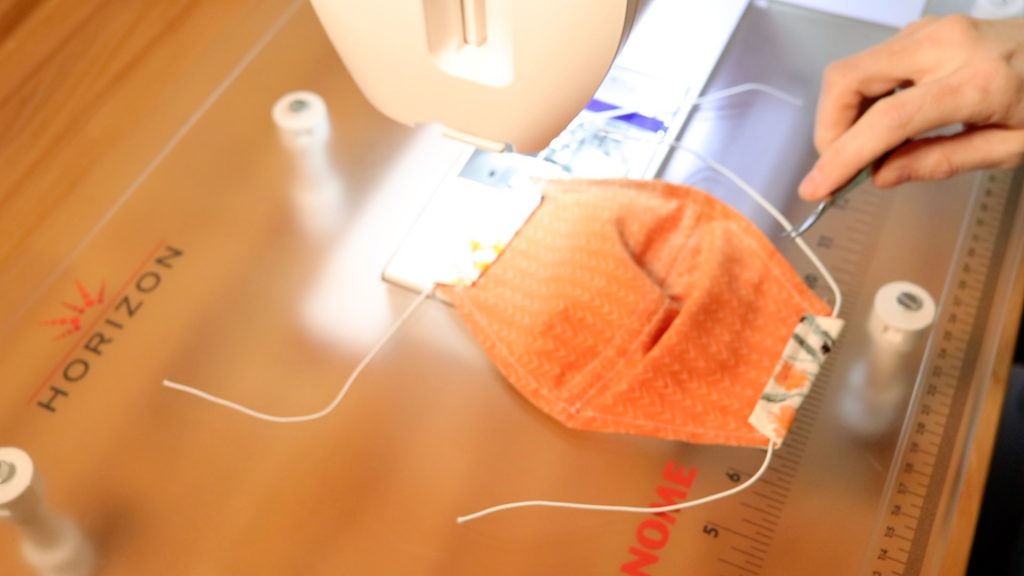
19. Cut (2) elastic pieces 15″ long.
Last steps, you’re almost done!
20. Starting on one side of your mask. Fold in and press 1/4″ or so.
21. Then fold again 1/2″ and press. This will encase the elastic and hide the raw edge of the fabric.
22. Lay your elastic piece into the ironed seam, and topstitch along the edge. The elastic piece should be able to slide freely through this hole. If the elastic over time becomes weak or breaks, it’s easily replaceable. Again, if you can’t get elastic cording, you can use bias tape to make ties, 1/4″ elastic also works, or hair ties.
23.
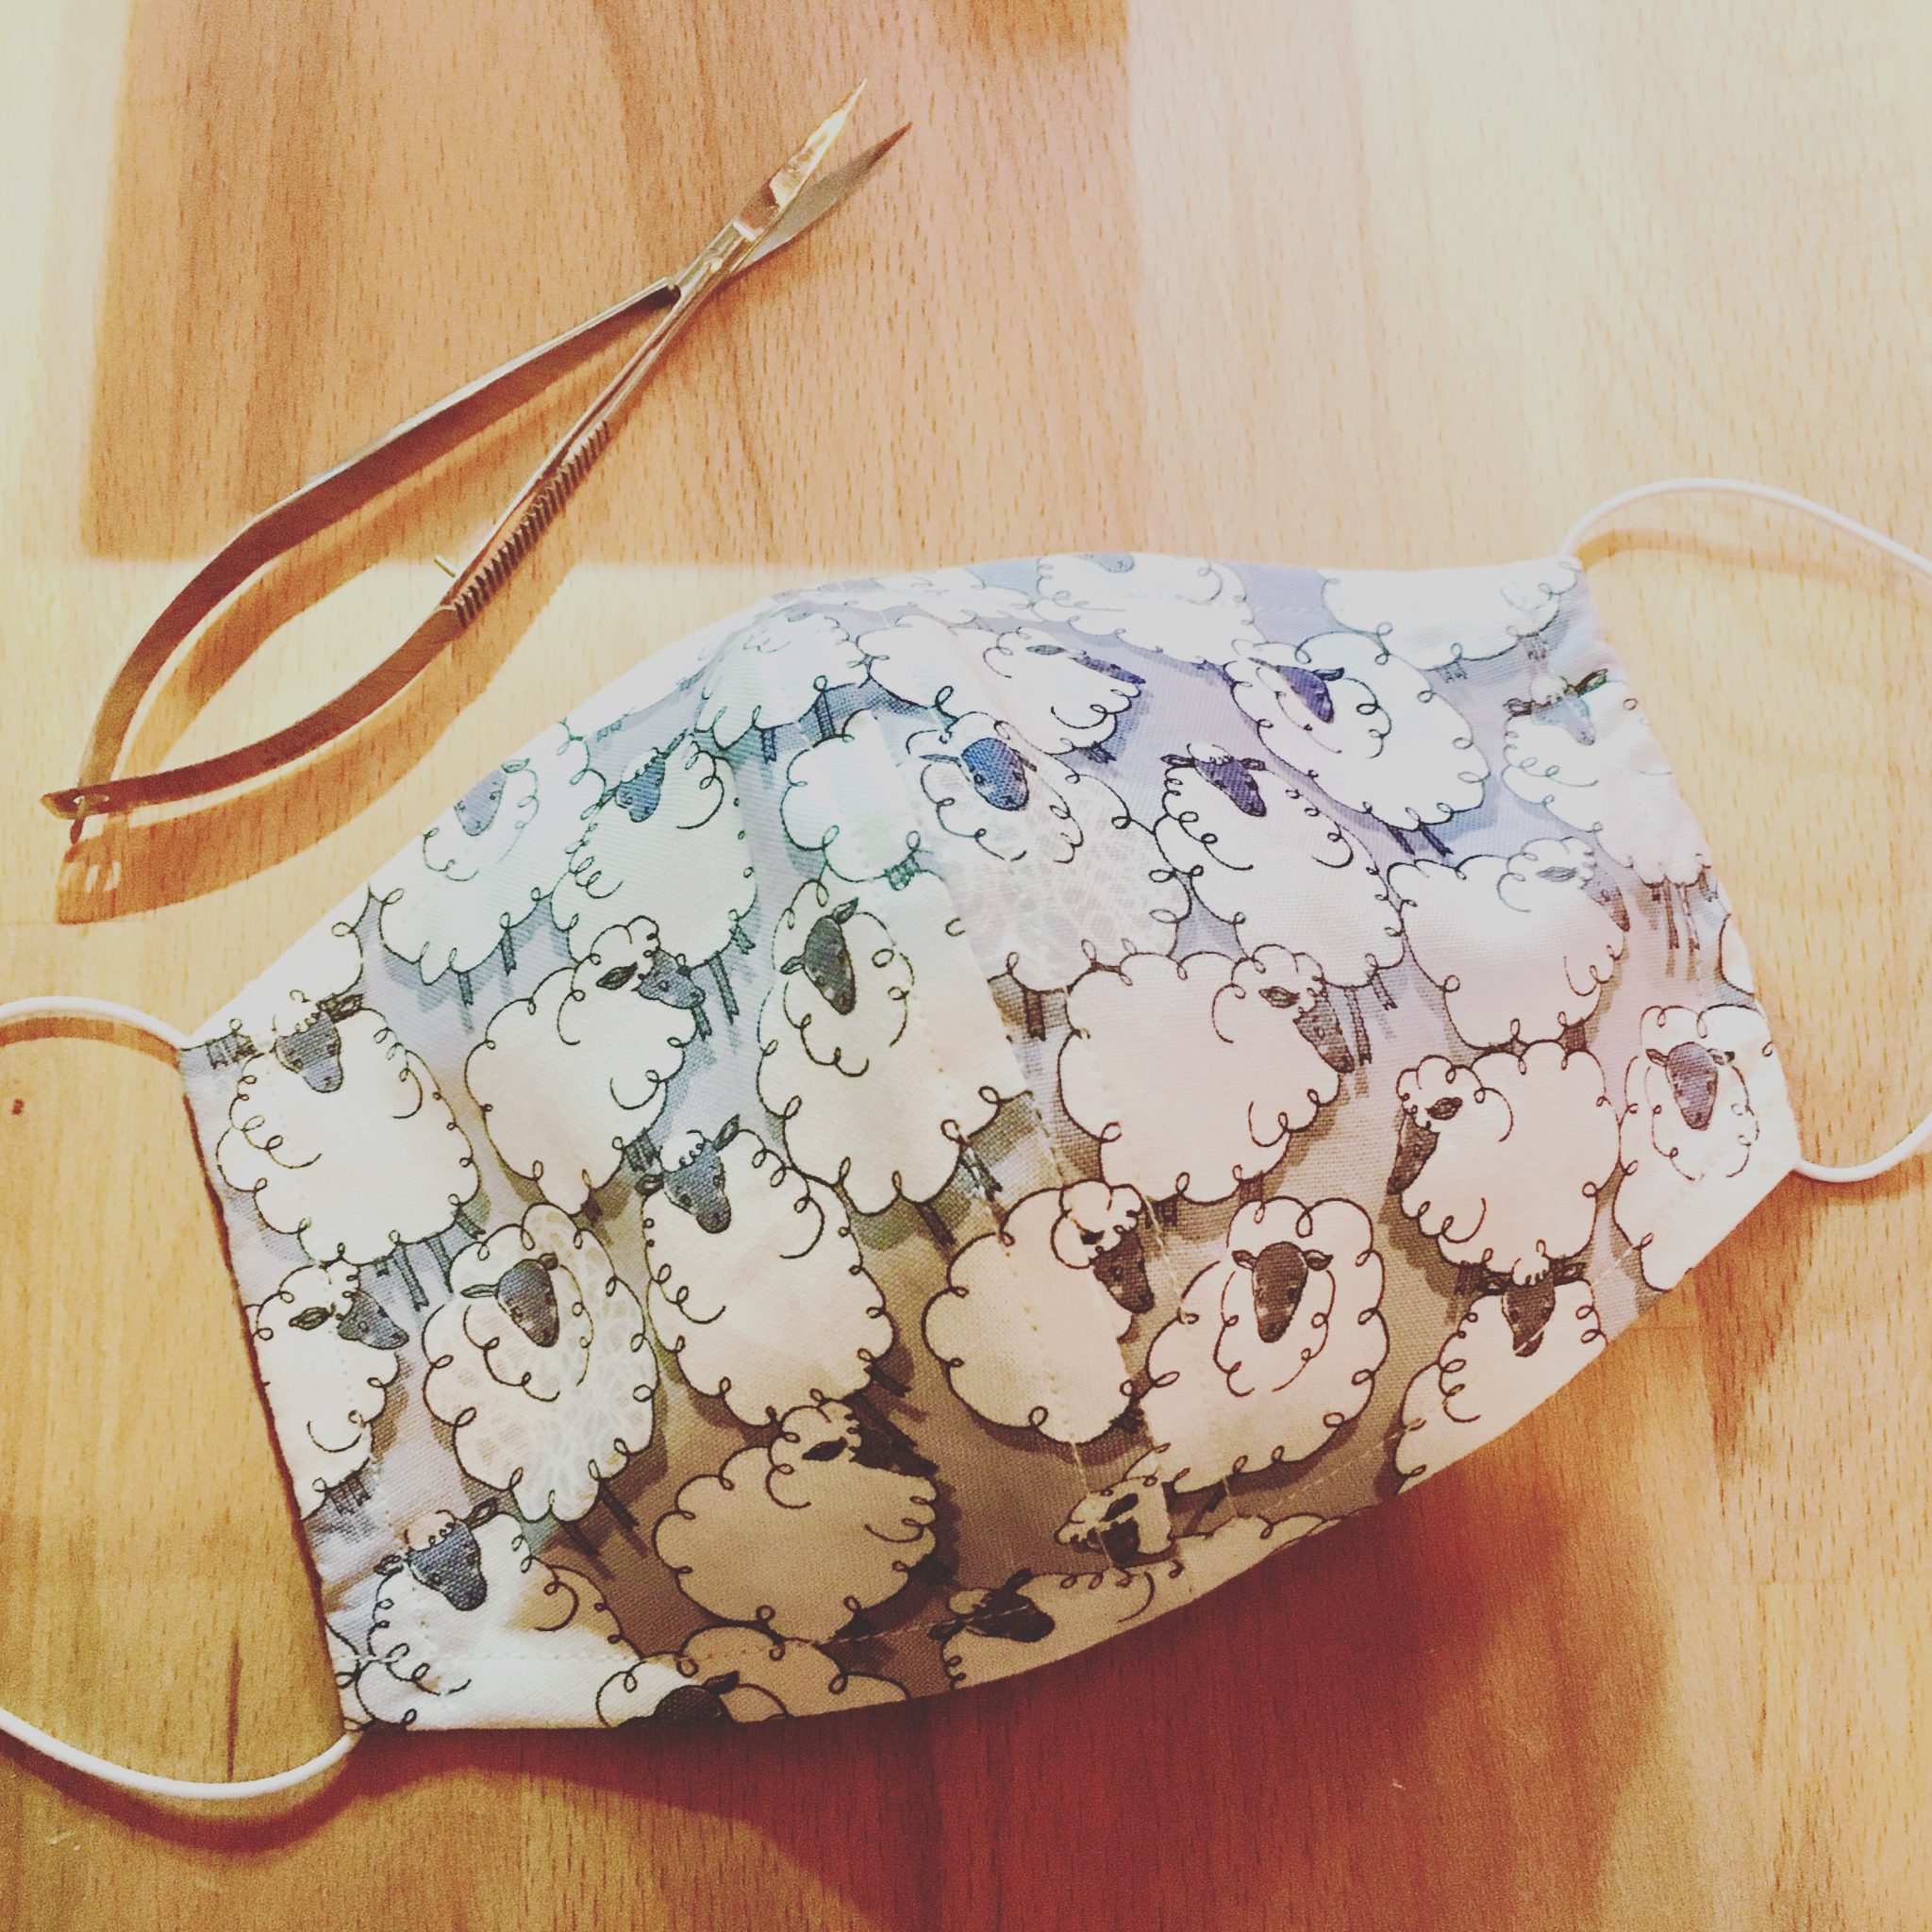
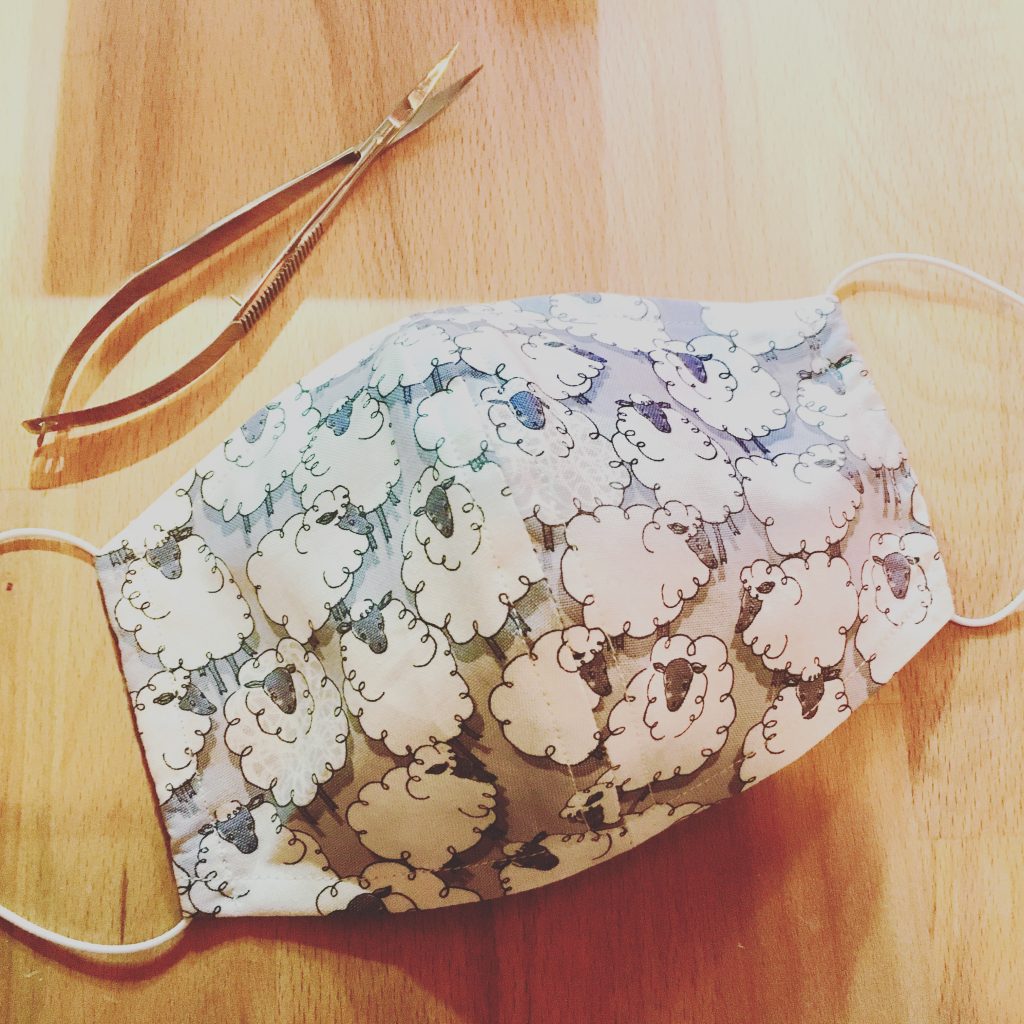
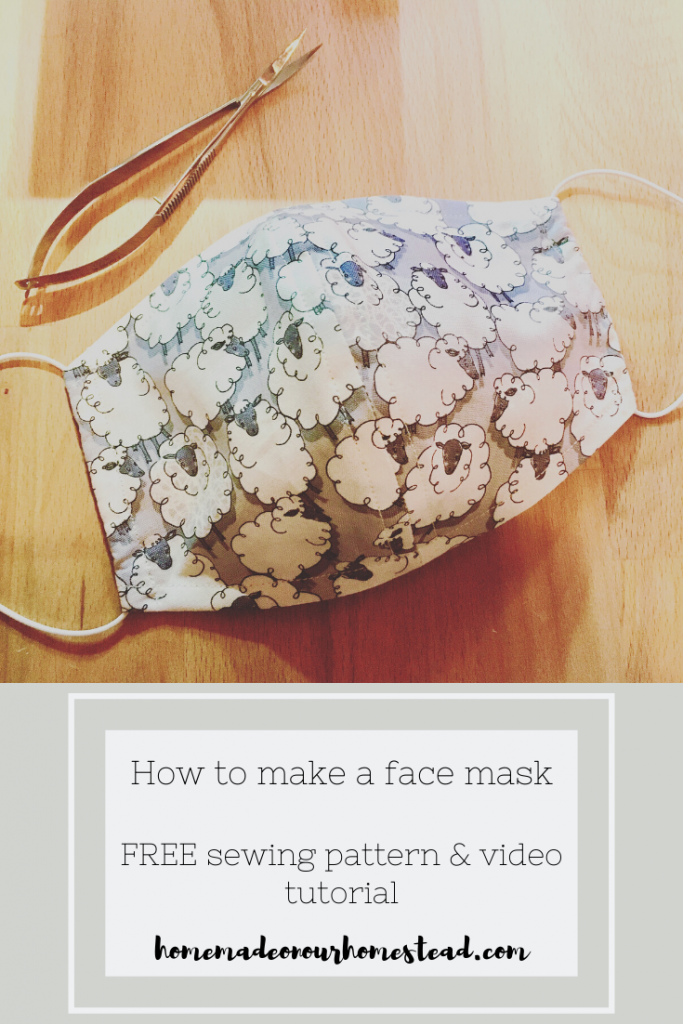
You’ve now finished sewing a face mask. Make sure to leave the elastic pieces long so they can be adjusted when being fitted. once the correct size has been achieved, tie a really tight double knot. Cut the excess elastic, and pull the knot so its incased in the side seam.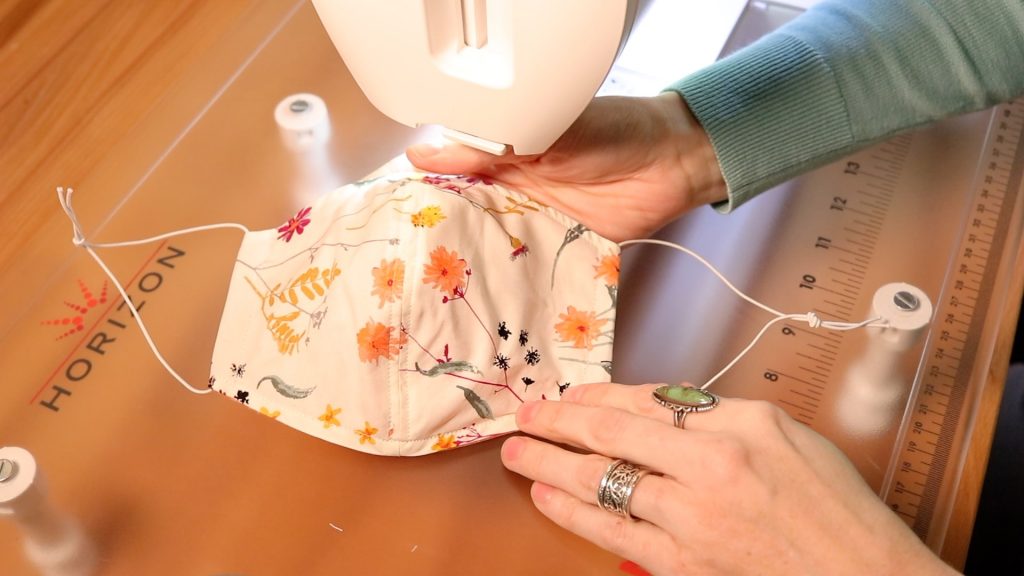
To those of you who are sewing these for healthcare workers during the COVID-19 crisis, thank you so much. Your work and dedication to helping us out during this difficult time is really appreciated.
-Brie RN
How to make a face mask | DIY reusable mask sewing tutorial is also available HERE if you prefer video format. Enjoy!
Pin for later:
Thank you for this pattern and instructions. I have been looking for a pattern that was worth using. I shall be making these soon.
Thank you so much, I’m in Healthcare Im going to be making me some masks…
Blessings~
Elizabeth
Where is the actual pattern to print
Okay, I’m pissed. This is the second vid I’ve watched where a pattern is offered…and so far its crap. Spent 30 minutes getting my printer to print it out….and it’s nothing like the printed pattern you show in your instructions. I’d like a complete pattern please. I’m a guy with little sewing knowledge but even I can tell this doesn’t match what you show. So now what? Can I have the complete pattern emailed to me? I wish I could post a pic here so you could see what I’m talking about. I’ve hot everything to make the mask except a complete pattern to lay on the material.
HelloI
Thank you for providing this free pattern for a face mask.
I was hoping you could answer a question for me. When cutting out the pattern, should I cut it on the grain or against the grain?
Thank you for your time. 🙂
How do you get the free pattern??
Im working on the post right now 🙂
About 50% smaller. Thats what I did for my daughter. I have a much simpler mask thats really easy to sew that Im working on a post for now. The YouTube video is already done and you can find it under the “video” tab of my website. Its called the “reusable medical mask.” To make a Childs size its 9″ x 7″. Hope this helps.
You’ll want to cut in a manner that provides the least amount of stretch. I’m glad you like the pattern. I also have another video under the “video” tab here on my website titled, “how to sew a reusable medical mask.” This mask is by far the most popular one I have done with almost 2 million views. If you are sewing these for the medical community, these are great for batch sewing 🙂
Yes If you send me your email address I’d be happy to send you the pattern. Make sure when you print the pattern you print at 100% and not “to scale.” It makes a huge difference in the size the pattern prints out. So by complete pattern, what else are you looking for? Is the scale of the pattern not looking correct? How else can I help? 🙂
Oh thank you so much Jo Anne. I’ve uploaded many mask pattern videos. You can find them all under the “video” tab of my website. Its so weird having to wear homemade masks to work isn’t it? 🙁
Under the heading “Before you get started, make sure you print off a copy of your mask pattern. Link below,” theres a hyperlink. Click on it and the pattern directions as well as the pattern will open win pdf format. Make sure you print at 100% and not “to scale.” Otherwise the pattern will not print the correct size. Hope this helps. Its directly above the picture of me holding the mask pattern and instructions.
How wonderful, kind and generous of you Elizabeth. I’ve made over 200 to donate myself 🙂
Click on the hyperlink thats directly above the picture of me holding the pattern. The link is directly above that and below the heading in the post that says, “Before you get started, make sure you print off a copy of your mask pattern. Link below.” Hope this helps. If you still can’t find it, let me know and I’m happy to email you directly.
Click on the “video” tab towards the top of my website. This will take you to the videos I’ve uploaded to YouTube. You’ll see the video there, just click on it to open it up. Hope this helps.
I wasn’t expecting that video to have so many views (over 2 million!), so I’ve been just swamped with comments and questions to answer. Then I filmed a Q&A video to follow up. The post for this particular mask is almost finished. Will have up by the end of the weekend at the latest.
I did mine 50% for my 6 year old and it fit well.
Cathy,
Under the heading in the post that says, “Before you get started, make sure you print off a copy of your mask pattern. Link below” theres a hyperlink to click on that if you click on it will open up the instructions for cutting as well as the actual pattern. Make sure you print at 100% and not to scale to get the correct size. It directly above the picture of me holding the pattern and instructions for cutting. Hope this helps.
If you click on the “video” tab towards the top of my site, it will take you to all my video uploads from YouTube. You should see the video. Click on it and it will start to play. I haven’t deleted it, it’s still there. Hope this helps.
They hang down like a beautiful cascading wall of strawberries 🙂
I haven’t tested it (yet), but that is a great suggestion. I need to try this because elastic around the ears makes for sore ears after 16 hours 🙁
Directly below the heading in the post that says, “Before you get started, make sure you print off a copy of your mask pattern. Link below.” theres a hyperlink thats a dark green color. Click on it and the pattern cutting instructions and pattern will open in pdf format. Print at 100% and not to scale otherwise the pattern won’t print the correct size. The link is directly above the picture of me holding the pattern. Hope this helps.
Oh thank you.
Within the post theres a heading that says, “Before you get started, make sure you print off a copy of your mask pattern. Link below.” Theres a dark green hyperlink. Click on it and the pattern cutting instructions and the pattern itself will open in pdf format. Remember to print at 100% and not to scale so your pattern in the correct size. Hope this helps. The link is directly above the picture of me holding the pattern.
Within the post theres a heading that says, “Before you get started, make sure you print off a copy of your mask pattern. Link below.” Theres a dark green hyperlink. Click on it and the pattern cutting instructions and the pattern itself will open in pdf format. Remember to print at 100% and not to scale so your pattern in the correct size. Hope this helps. The link is directly above the picture of me holding the pattern.
Within the post theres a heading that says, “Before you get started, make sure you print off a copy of your mask pattern. Link below.” Theres a dark green hyperlink. Click on it and the pattern cutting instructions and the pattern itself will open in pdf format. Remember to print at 100% and not to scale so your pattern in the correct size. Hope this helps. The link is directly above the picture of me holding the pattern.
Within the post theres a heading that says, “Before you get started, make sure you print off a copy of your mask pattern. Link below.” Theres a dark green hyperlink. Click on it and the pattern cutting instructions and the pattern itself will open in pdf format. Remember to print at 100% and not to scale so your pattern in the correct size. Hope this helps. The link is directly above the picture of me holding the pattern.
Hello!
So are your face mask video have been the best Ive seen. I like the mask with with drawstring because I don’t like how the ear one pull and irritate my ears. I was wondering if the this mask ( duckbill) style could also have the draw tie cord instead of the elastics. Please lt me know your thoughts. Many thanks for all that you do. Please be safe.
Oh wonderful. So glad to hear. Let me know if you have any questions. I’m here to help 🙂
I don’t currently have a pattern for kids that is this style. You could take the original pattern provided and size it down when printing. Maybe try printing at 75%? Size down according to your Childs specific needs and size.
Oh I would for sure think that the “duckbill” style masks Ive seen could use the same tie concept as to avoid the elastic behind the ears. Let me know if you try it. I’d love to see if it works.
Ive been using shoe laces. They work great and come in all different lengths and can easy be cut to shorten. Good Luck
It worked! I really like the ties and only having to do one is great. Now I would like to put in a wire ( pipe cleaners are all I have for now…). Should I do it the same as with the other mask?
Yup 🙂 You can also check out the Q&A video I did that was an update that gives some tips and tricks for wire placement and how to sew it in etc. Glad it worked. Love hearing this from everyone 🙂
Perfect! And such a great thing to use being that supplies these days are in short supply. Thanks for sharing Brooks.
Thanks Peggy for the reminder here. Ive been working on it for you today. Please send me your email address @ [email protected] so I can send over some revisions for you. Don’t forget to check out the “Reusable medical mask pattern” I posted that already contains a filter pocket. This video has received the best results of all the masks Ive created as well as over 3.5 million views.
Sure. Can you email me @[email protected] and I can send the alteration for the pattern to include a filter pocket your way. Its a really easy rendition.
You know, I haven’t made a duckbill style mask pattern so I’m not sure about the addition of the filter pocket to this style mask. Have you checked on YouTube or google to see is a pattern idea comes up?